If you have ever experienced a 3D print ruined by mysterious rough textures, excessive stringing, or brittle structures that snap under the slightest pressure, you have likely run into the print farm's most silent and common enemy: filament moisture. Many beginner and intermediate makers waste countless hours adjusting mechanical tolerances, changing nozzles, or rebuilding their hotends, completely unaware that the chemical culprit is sitting right on their spool holder. The polymer strands we use in Fused Deposition Modeling (FDM) are naturally thirsty, acting as chemical sponges that absorb water directly from the air. To achieve professional-grade results, understanding the dynamics of filament drying and humidity management is a fundamental skill.
Why Do FDM Filaments Need Drying?
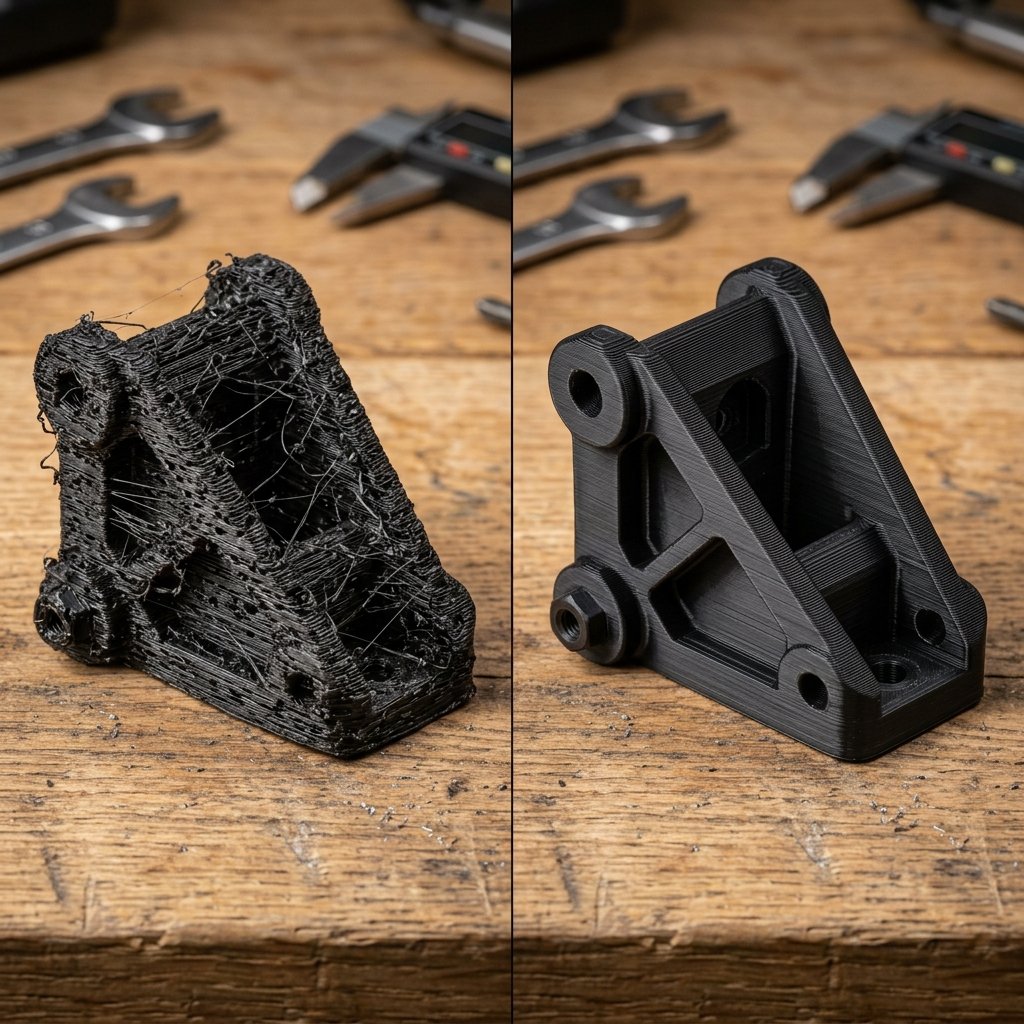
Wet filament absorbs moisture from the air, causing steam bubbles, popping noises, and weak layer adhesion during printing. Drying restores the filament's original polymer properties for smooth, high-strength results. When a wet thermoplastic spool is fed into a hot nozzle, the trapped water molecules instantly vaporize, expanding into micro-pockets of steam that disrupt the uniform flow of molten plastic.
To understand why this happens, we must look at the polymer chemistry. Most 3D printing filaments are hygroscopic, meaning they form hydrogen bonds with atmospheric water molecules. When the filament passes through the extruder and enters the hotend (which operates between 190°C and 260°C depending on the material), the water trapped inside is heated far past its boiling point. This instantaneous phase change from liquid to gas creates steam pockets. As the steam escapes the nozzle, it causes tiny explosions, resulting in audible popping or crackling sounds. These steam voids leave empty pockets inside the extruded line, leading to severe under-extrusion, rough surface textures, and a massive loss of inter-layer bonding strength. If you are noticing prints that easily break along their print lines, you are likely dealing with moisture-induced layer delamination. For a broader analysis of common print defects, check our troubleshooting guide.
Furthermore, moisture absorption is not just a surface issue; it actually alters the physical properties of the raw plastic filament. For example, wet PLA becomes incredibly brittle on the spool. If you try to bend a dry strand of PLA, it will deform plastically before snapping. If it is saturated with water, the strand will snap clean like a dry twig under the slightest bend. This makes it difficult for the extruder gears to feed the filament without crushing it or snapping it mid-print. In other materials, such as PETG and TPU, water acts as a plasticizer, lowering the viscosity of the melt. This results in severe oozing and uncontrollable stringing, as the liquid-like plastic drips out of the nozzle even when retraction settings are dialed in. If you want to understand how different thermoplastics interact under thermal loads and stress, feel free to read our comprehensive materials guide.
Recommended Filament Drying Temperatures and Times
Different materials require specific drying parameters: PLA (45-50°C for 4-6h), PETG (60-65°C for 6-8h), TPU (50-55°C for 4-6h). Exceeding a polymer's glass transition temperature ($T_g$) during the drying process will cause the filament strands to soften, fuse together on the spool, and deform, permanently ruining the entire roll.
The key to safely drying filament is staying below its glass transition temperature ($T_g$). The glass transition temperature is the point at which an amorphous polymer transitions from a hard, glassy state to a soft, rubbery state. If you set your dryer to a temperature above $T_g$, the filament on the spool will begin to stick to itself. Once the roll cools down, the fused strands will prevent the spool from unwinding, causing your extruder to jam. Therefore, we must use controlled, low-temperature heat combined with active air circulation to coax the deep-seated moisture out of the plastic without compromising the spool's physical shape.
Here is an in-depth breakdown of the drying requirements for the most common FDM filaments:
- PLA (Polylactic Acid): PLA has a very low glass transition temperature of 55°C to 60°C. To dry PLA safely, keep the dryer set between 45°C and 50°C. A drying cycle of 4 to 6 hours is usually sufficient to restore its properties. Drying PLA is highly recommended for older spools that have been sitting open on shelves for months, as it eliminates the brittleness that causes mid-print snaps.
- PETG (Polyethylene Terephthalate Glycol): PETG is notoriously hygroscopic and can absorb enough moisture in a few days of humid weather to cause severe stringing. Its $T_g$ is around 75°C to 80°C. Dry PETG at 60°C to 65°C for 6 to 8 hours. You will find that drying PETG almost entirely eliminates the fine hair-like strings and blobs that plague structural prints.
- TPU (Thermoplastic Polyurethane): TPU is an elastomer that behaves like a chemical sponge. Even brand-new, vacuum-sealed spools of TPU from the factory can contain moisture from the water baths used during filament manufacturing. TPU has a low thermal threshold before it becomes sticky. Dry it at 50°C to 55°C for 4 to 6 hours. Printing TPU directly from a dry box or immediately after a drying cycle is the only way to get clean, bubble-free flexible prints.
- ABS and ASA (Acrylonitrile Butadiene Styrene / Acrylonitrile Styrene Acrylate): Both ABS and ASA are moderately hygroscopic and have a high glass transition temperature of roughly 100°C to 105°C. They can tolerate higher drying temperatures of 70°C to 75°C. A drying cycle of 6 to 8 hours will remove trapped moisture, which is crucial for preventing layer cracking and bubbling in high-temperature enclosures.
- Nylon (Polyamide): Nylon is the most hygroscopic of all common FDM filaments. It can absorb more than 10% of its weight in water within 24 hours of exposure to room air. Nylon requires a drying temperature of 75°C to 80°C for 8 to 12 hours. For Nylon, you cannot just dry it beforehand; you must print it directly out of an active dry box to prevent it from reabsorbing moisture during a long print run.
"A golden rule in my print farm: never print TPU straight out of the vacuum bag without drying it first. Even 'brand new' spools from reputable manufacturers often contain residual moisture from the water-cooling baths used during the extrusion process. Taking the time to dry every spool saves countless hours of post-print clean-up." — Dinu Suciu, Lead Technician at 3D Print Book
To help you quickly reference these values, I have compiled our farm's standardized drying parameters into the comparative table below:
| Filament Type | Hygroscopicity Level | Drying Temp (°C) | Drying Time (Hours) | Common Moisture Symptoms |
|---|---|---|---|---|
| PLA | Low to Moderate | 45°C – 50°C | 4 – 6 Hours | Extreme brittleness, snapping, fine stringing |
| PETG | High | 60°C – 65°C | 6 – 8 Hours | Severe oozing, rough finish, popping noises |
| TPU | Very High | 50°C – 55°C | 4 – 6 Hours | Inner bubbles, structural weakness, fuzzy walls |
| ABS | Moderate | 70°C – 75°C | 6 – 8 Hours | Layer cracking, vapor voids, poor bed adhesion |
| ASA | Moderate | 70°C – 75°C | 6 – 8 Hours | Surface dimples, brittle layers, internal bubbles |
| Nylon | Extreme | 75°C – 80°C | 8 – 12 Hours | Steam blowing out nozzle, zero layer adhesion, foaming |
Best Filament Dryers and DIY Alternatives
Choose between dedicated filament dryers, food dehydrators, or using a heated print bed with a box. Each option offers a unique balance of cost, ease of use, and temperature control, which directly affects how efficiently moisture is pulled from the polymer matrix.
When it comes to actually heating your spools, you have several methods to choose from. Let us evaluate the three most common tools used in the 3D printing community, along with their pros and cons:
1. Dedicated Filament Dryers
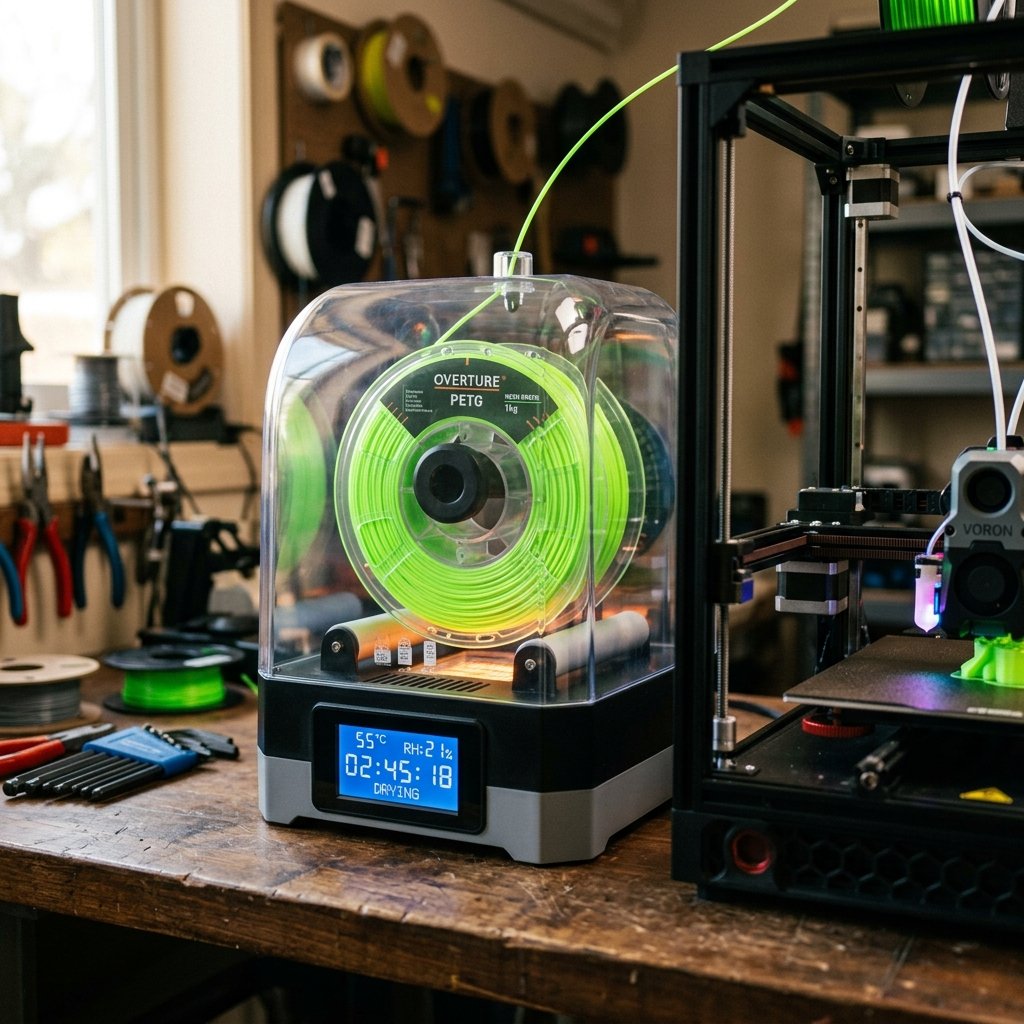
Dedicated filament dryers are commercially designed appliances built specifically to hold one or two spools of 3D printing filament. Popular brands include Sunlu, Eibos, and Creality. These devices feature a small heating element, a fan for air circulation, and built-in rollers that allow the spool to spin freely. Many models also include exit ports, allowing you to feed the filament directly from the dryer into your printer's extruder while it is active.
The primary advantage of a dedicated dryer is convenience and safety. They have precise temperature limits, built-in timers, and are compact enough to sit next to your 3D printer. The main disadvantage is that cheaper models often lack a fan, relying on radiant heat that creates hot spots and uneven drying. If you buy a dedicated dryer, make sure it has active fan circulation to distribute the warm air evenly across the spool.
2. Food Dehydrators
A round food dehydrator is one of the most efficient and cost-effective ways to dry multiple spools of filament at once. Dehydrators are designed to run for hours at low temperatures, and they have excellent active airflow because of their powerful top- or bottom-mounted fans. Because they are designed to dry fruit and jerky, they have highly accurate temperature dials ranging from 35°C to 70°C.
To use a food dehydrator for 3D printing filament, you will need to perform a simple modification: use a pair of wire cutters or plastic snips to remove the grid pattern from the stacking trays, leaving only the outer rings. This creates a hollow chamber where you can stack two or three spools of filament. The active heating and strong airflow make this method incredibly fast and uniform, often outperforming low-end dedicated dryers at a fraction of the cost.
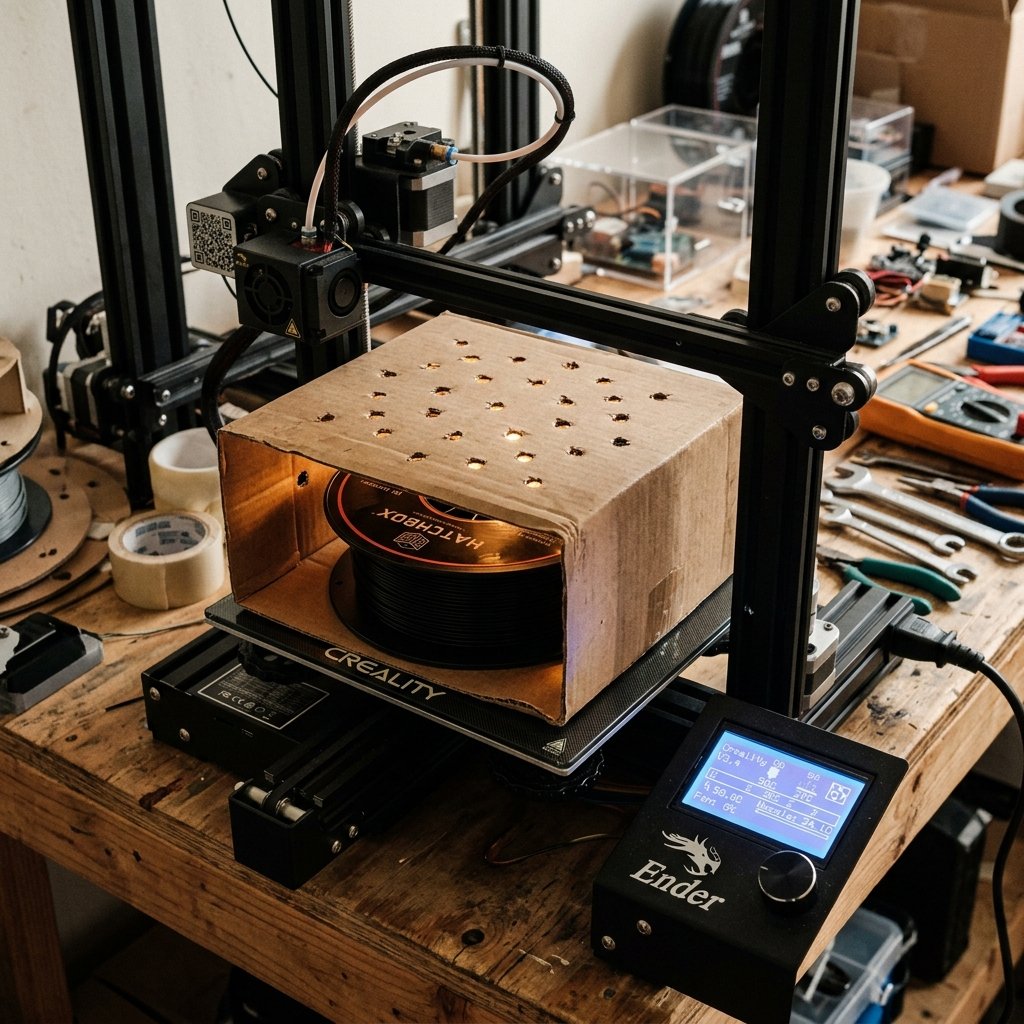
3. The Heated Print Bed and Cardboard Box Method (DIY)
If you need to dry a spool of filament immediately and do not own a dryer or dehydrator, you can use your FDM printer's heated bed as a temporary dryer. Place the wet spool flat on the heated bed. Take a clean cardboard box (like the one the filament arrived in), poke a few small holes in the top to allow moist air to escape, and place it upside down over the spool on the print bed.
Set the bed temperature to the recommended drying temperature of the material (e.g., 50°C for PLA, 65°C for PETG). The heat radiating from the bed will warm up the air inside the box and dry the filament over several hours. While this method is completely free, it has several limitations: it occupies your printer so you cannot print, it lacks active air circulation (making the process slower), and it requires constant monitoring to ensure the bed does not overheat and melt the plastic spool.
How to Store Filament to Prevent Moisture Absorption
Use airtight dry boxes with silica gel packets or vacuum-sealed bags to keep dried filaments dry. Once you have spent hours drying your filament, storing it in a low-humidity environment is essential to keep it in a ready-to-print state and prevent it from absorbing ambient moisture again.
Filament storage is just as important as the drying process itself. If you leave a freshly dried spool of PETG or TPU sitting on your printer's spool holder in a room with 50% relative humidity, it will absorb enough moisture to degrade print quality within 24 to 48 hours. To prevent this constant cycle of drying, you must establish a reliable storage system. The goal is to keep the relative humidity (RH) of your storage container below 15%.
Here are the three most reliable storage solutions for FDM 3D printing filaments:
1. Airtight Dry Boxes with Desiccant
The most popular solution for active print farms is using heavy-duty plastic storage bins equipped with foam gaskets and locking latches. Standard storage tubs are not airtight; you must look for bins specifically labeled as "weatherproof" or "airtight" to ensure a proper seal. Place your spools inside the bin alongside a generous amount of desiccant. We prefer using color-indicating silica gel beads placed in 3D-printed containers. These beads change color (usually from orange to green, or blue to pink) as they absorb moisture, giving you a clear visual indicator of when they need to be recharged in the oven or dryer.
2. Vacuum-Sealed Bags
For long-term storage of filaments you do not print with daily, vacuum-sealing is the gold standard. You can purchase specialized 3D printing vacuum kit bags that come with a small hand pump, or use standard household vacuum-sealing bags. Drop a small packet of silica gel inside the bag with the spool, seal the zip-lock, and pump out the air. This completely eliminates any atmospheric moisture and keeps the filament in perfect condition for years. It also protects the spool from dust, which can clog your nozzle over time.
3. Active Dry Cabinets
For high-end or industrial setups, active electronic dry cabinets (originally designed for storing camera lenses and delicate electronics) are an incredible option. These cabinets use an electronic dehumidifier to maintain a precise relative humidity level (often down to 1% to 5% RH) without requiring desiccant replacement. While they are a significant financial investment, they offer the ultimate convenience for storing high-performance, ultra-hygroscopic materials like Nylon or carbon-fiber composites.
Frequently Asked Questions (FAQ)
Q1: Can I dry 3D printing filament in a kitchen oven?
No, using a household kitchen oven to dry filament is highly discouraged. Kitchen ovens have wide temperature fluctuations, poor air circulation, and inaccurate temperature controls, which can easily exceed the plastic's glass transition temperature, causing the filament to melt, fuse together, or ruin the spool.
Q2: How long does it take for dry filament to absorb moisture again?
Depending on the material and ambient humidity, a dry filament can absorb enough moisture to degrade print quality within 24 to 48 hours. Extremely hygroscopic materials like Nylon or flexible TPU are particularly vulnerable and can absorb significant moisture in just a few hours of exposure to high humidity.
Q3: Is PLA really hygroscopic and does it need drying?
Yes, while PLA is less hygroscopic than PETG, TPU, or Nylon, it still absorbs atmospheric moisture over time. Wet PLA becomes brittle, snaps easily when bent, and causes bubbling, popping noises, and fine stringing during extrusion, making drying necessary for older spools.
Q4: How can I tell if my 3D printing filament is wet?
Common signs of wet filament include cracking or popping sounds coming from the nozzle during printing, excessive stringing or oozing, bubbles or rough textures on the surface of the print, poor layer adhesion, and a brittle filament that snaps easily when bent off the spool.
Q5: Can you over-dry 3D printing filament?
Yes, exposing filament to high temperatures for too long can degrade the polymer chain, break down color additives, or make the material excessively brittle. Always adhere to the recommended drying times and temperatures for your specific material type to avoid thermal degradation.
About the Author: Dinu Suciu
I am Dinu Suciu, the founder and lead operator of 3D Print Book. Having run a dedicated FDM printing workshop for several years, I specialize in material testing, mechanical design adjustments, and scaling up production runs using FDM technology. I only work with FDM processes, which has allowed me to master the nuances of heat bed calibration, custom enclosure design, and high-performance filament extrusion. If you are designing a part and need expert feedback on material selection, mechanical strength, or slicing configurations, please get in touch with me directly through our contact page.