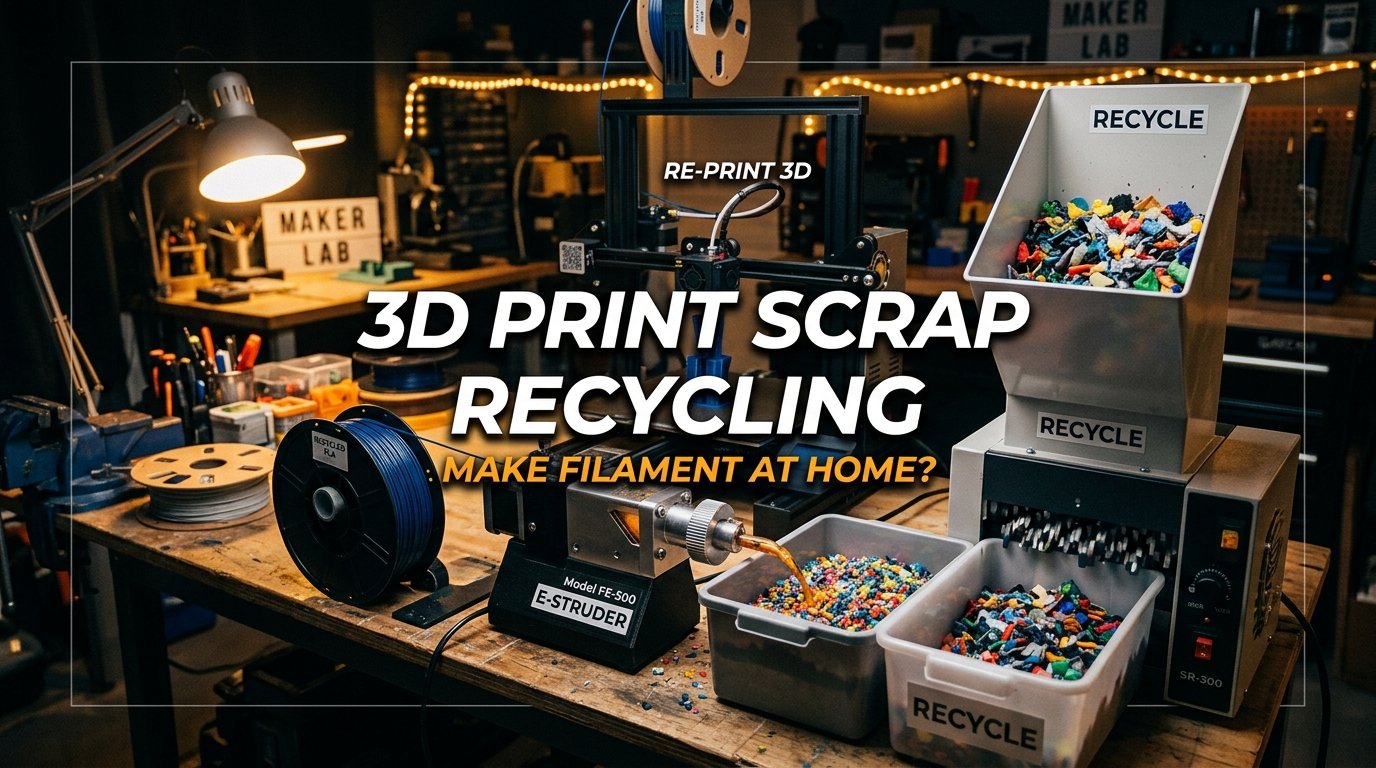
Every active FDM 3D printing workshop eventually accumulates a mountain of plastic waste: calibration cubes, brim edges, dense support lattices, discarded multi-color purge towers, and failed prints. For makers running high-speed CoreXY machines or multi-material systems, plastic scrap can quickly reach 15% to 30% of total filament consumption.
The vision of closing this loop at home is compelling: shredding failed prints into uniform regrind, feeding the flakes into a desktop extruder, and winding fresh, usable spools of 1.75mm filament on your own workbench. However, the physical reality of polymer extrusion is far more demanding than simply melting plastic scrap. Thermoplastics undergo molecular breakdown each time they are melted, diameter tolerances must remain within ±0.03mm to prevent hotend clogs, and contamination between different polymer chemistries can ruin an entire batch.
In this guide, we evaluate the thermodynamic chemistry, mechanical machinery, operational economics, and practical limits of recycling FDM 3D printing waste into reusable filament at home.
Table of Contents
- The Polymer Chemistry of Re-Extrusion: Molecular Chain Scission
- The Mechanical Recycling Pipeline: Sorting, Granulating, and Dehydrating
- Desktop Extruder Anatomy: Screw Geometry, Heat Zones & Die Swell
- Real-Time Diameter Control: Laser Micrometers and Puller Feedback Loops
- Material Performance Comparison: Virgin vs. 100% Recycled vs. Blended Polymers
- Economic Reality Check: Equipment Capital Costs vs. Commercial Recycling Programs
- Step-by-Step Workshop Rules for Successful In-House Extrusion
- Frequently Asked Questions (FAQ)
- References & External Sources
The Polymer Chemistry of Re-Extrusion: Molecular Chain Scission
Every time a thermoplastic is heated above its melting temperature, mechanical shear and thermal energy break its long macromolecular chains into shorter fragments through a process called chain scission. This irreversible molecular degradation lowers the polymer's molecular weight, increases its melt flow rate (MFR), and progressively makes the recycled material more brittle with each extrusion cycle.
When you print virgin PLA at 215°C in your hotend, the polymer experiences its second thermal cycle (the first occurred at the filament manufacturing plant). Re-extruding that scrap into new filament represents cycle three, and printing with the recycled spool represents cycle four. If residual moisture is present inside the plastic flakes during heating, high-temperature hydrolysis accelerates this breakdown tenfold, scissoring ester bonds and causing severe embrittlement.
Three primary chemical mechanisms govern polymer degradation during mechanical recycling:
- Thermal Hydrolysis: Hygroscopic polymers like PLA, PETG, and Nylon absorb ambient water molecules into their chemical structure. When heated above 180°C without prior dehydration, trapped water reacts with molten ester linkages, cleaving polymer backbones and releasing acidic byproducts that degrade tensile strength.
- Thermal Oxidation: Exposure to atmospheric oxygen inside an unvented extrusion barrel at elevated temperatures generates free radicals. These radicals break polymer chains and cross-link fragments, turning the molten plastic yellow or brown and creating microscopic carbonized gels that clog 0.4mm nozzle tips.
- Shear-Induced Degradation: The high mechanical friction generated between the rotating extruder screw flights and the stationary heated barrel shears long molecular chains apart mechanically, lowering intrinsic viscosity and reducing impact toughness.
To preserve structural printability, the standard industrial practice is polymer blending. Combining 70% virgin polymer pellets with 30% clean, sorted regrind replenishes average molecular chain length, maintains predictable melt viscosity, and prevents the extreme brittleness characteristic of 100% multi-pass recycled prints.
The Mechanical Recycling Pipeline: Sorting, Granulating, and Dehydrating
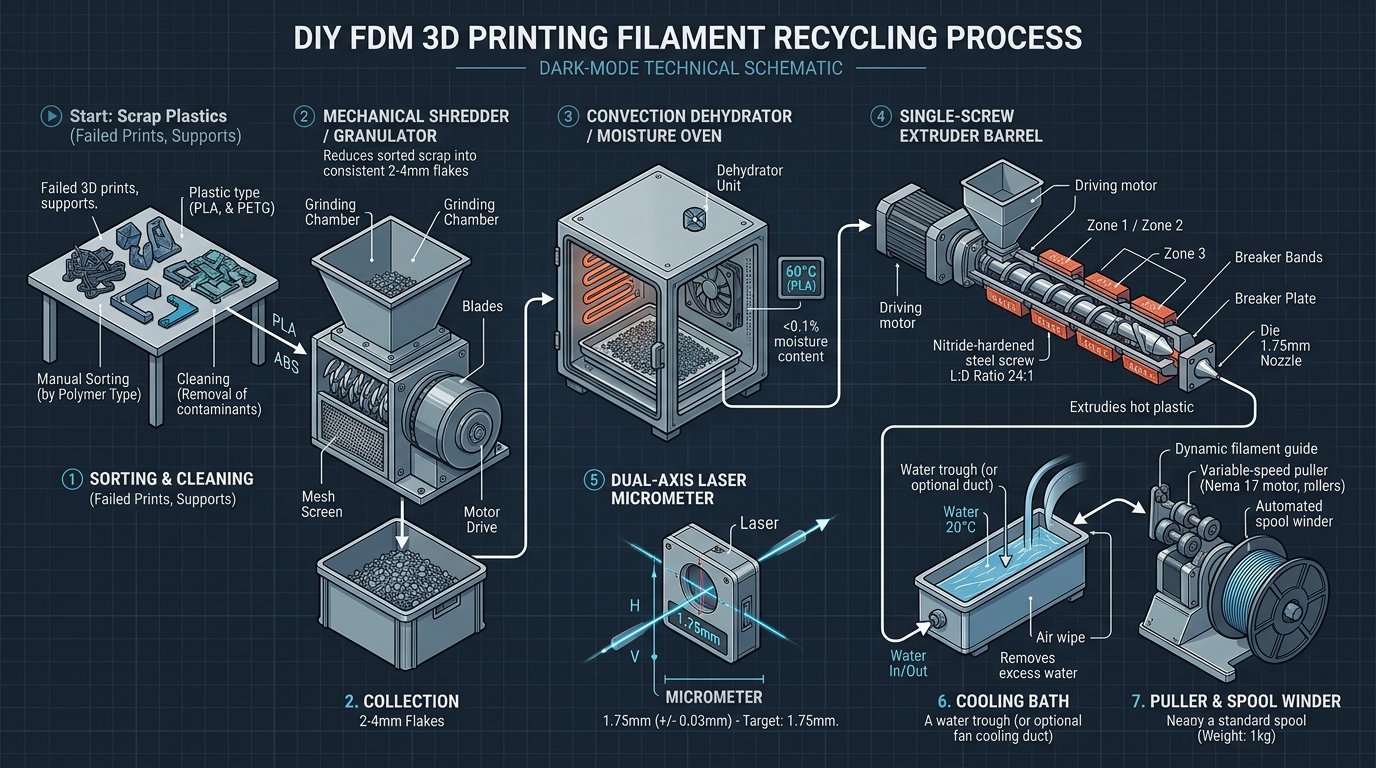
A successful recycling pipeline requires strict single-polymer sorting, uniform granulate particle sizing between 2.0mm and 4.0mm, and exhaustive moisture removal below 0.05% relative humidity before extrusion. Skipping any of these preparation steps leads directly to screw surging, diameter fluctuations, or complete barrel jamming.
The desktop recycling process consists of three distinct preparation stages that occur before the plastic ever touches the heated extruder barrel:
1. Polymer Separation & Decontamination
You cannot co-extrude mixed polymers. PLA, PETG, ABS, and TPU possess fundamentally incompatible melt temperatures, glass transition thresholds, and polymer polarity. For instance, tiny traces of PETG inside a PLA extrusion run will remain semi-solid at PLA processing temperatures (185°C), acting as solid particulate blockages that cause persistent under-extrusion and instant layer delamination in printed parts.
- Maintain dedicated, sealed collection bins for each plastic type at every 3D printer workstation.
- Never mix standard PLA with modified blends (such as PLA-CF, silk PLA, or glow-in-the-dark filaments), as abrasives and specialty elastomeric additives alter extrusion melt indices unpredictably.
- Inspect scrap pieces for embedded brass heat-set inserts, steel nozzle needles, dust, and adhesive residues from textured PEI build plates before granulation.
2. Mechanical Granulation and Particle Sizing
Desktop extruders rely on small-diameter single screws (typically 12mm to 20mm outer diameter) with shallow flight depths. Feeding large chunks of failed prints or crumpled support structures will cause the screw to jam or slip. A mechanical shredder equipped with rotary counter-blades and a 3.0mm classifier mesh screen is necessary to reduce scrap into uniform, free-flowing flakes.
Non-uniform flakes cause bridging in the feed hopper, where irregularly shaped pieces interlock and prevent material from dropping into the screw throat. This interrupts material feed, creating sudden dips in filament diameter down to 1.1mm or producing hollow air voids along the extruded strand.
3. Pre-Extrusion Dehydration Protocols
Reground flakes exhibit a vastly higher surface-area-to-volume ratio than smooth virgin pellets, absorbing airborne moisture within hours. Regrind must be baked in a forced-air convection oven or specialized desiccant hopper dryer prior to extrusion:
- PLA Regrind: Dehydrate at 50°C for 6 to 8 hours (never exceed 55°C to avoid particle clumping below Tg).
- PETG Regrind: Dehydrate at 65°C for 6 to 8 hours.
- ABS Regrind: Dehydrate at 75°C for 4 to 6 hours.
Maker's Workshop Note: Empirical Observations from In-House Extrusion Runs
Tested Hardware: Artme 3D desktop filament extruder with a 16mm nitrided screw (20:1 L/D ratio), dual-zone PID ceramic heating, inline dual-axis optical micrometer, and automatic tension puller-spooler.
Test Setup & Results: In my initial batch using 100% recycled PLA collected from support structures and purge towers from my Bambu Lab P1S and Creality K1, I ran un-sieved regrind directly through the barrel at 190°C. The extruder produced filament with severe diameter variations ranging from 1.62mm to 1.94mm, causing repeated hotend clogs during test prints. In my second run, I sieved the flakes through a 3.2mm brass mesh, baked the regrind at 50°C for 8 hours, and blended 30% regrind with 70% virgin NatureWorks 4043D pellets. Extrusion temperature was dialed to 182°C on Zone 1 and 188°C at the die.
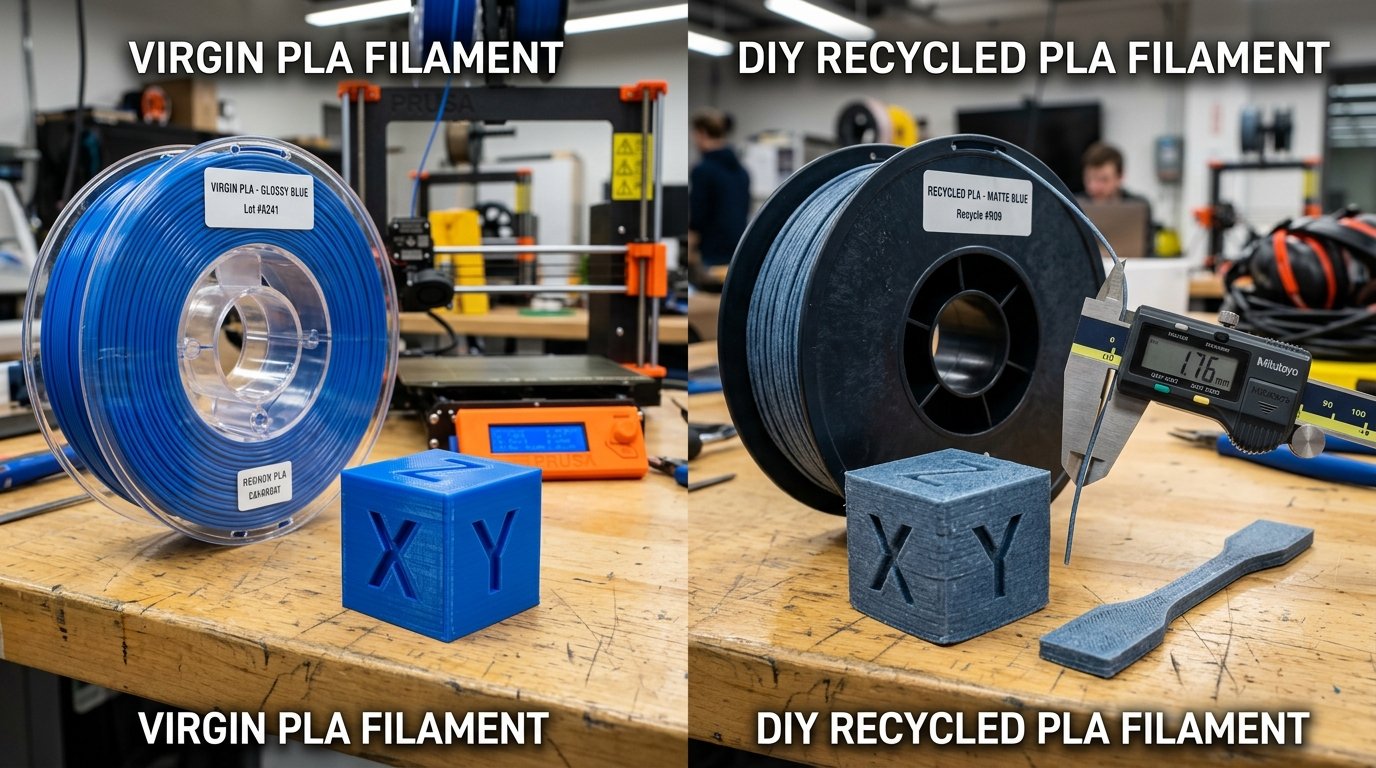
Outcome: The blended batch held a consistent diameter of 1.75mm ±0.03mm across a full 1kg spool. Benchmark test cubes printed on my Creality K1 displayed smooth layer lines and mechanical strength within 92% of factory-fresh Polymaker PLA.
Desktop Extruder Anatomy: Screw Geometry, Heat Zones & Die Swell
A reliable desktop filament extruder requires a dedicated single-screw barrel with a length-to-diameter (L/D) ratio of at least 18:1, multi-stage PID thermal zoning, and a precision-machined 1.75mm extrusion die calibrated for polymer die swell. Standard wood-auger bits or single-temperature heating blocks cannot generate the continuous melt pressure required for round, void-free filament.
The extruder barrel operates as three distinct functional thermodynamic zones:
- Feed Zone (Solids Conveying): Located directly beneath the hopper, this section remains cooled (often via a continuous heatsink fan) to keep polymer flakes solid. Deep screw channels convey the regrind forward without allowing premature softening that would cause hopper throat bridging.
- Compression / Transition Zone: The root diameter of the screw gradually increases, compressing the flakes into a dense, air-free solid bed. Band heaters melt the polymer through thermal conduction and mechanical shear friction, forcing trapped air backward out of the hopper.
- Metering Zone (Homogenization & Pumping): Shallow, high-precision screw flights thoroughly mix the molten plastic, equalizing temperature gradients and pumping the pressurized melt pool through a breaker plate and screen pack into the die at a strictly constant volumetric rate.
When molten polymer exits the circular die orifice under pressure, it expands outward slightly as elastic molecular chains relax. This phenomenon, known as die swell, means that extruding 1.75mm filament often requires a die diameter of 1.60mm to 1.70mm combined with active mechanical pulling tension to draw the strand down to its final calibrated dimension.
Real-Time Diameter Control: Laser Micrometers and Puller Feedback Loops
Maintaining a strict 1.75mm ±0.03mm filament diameter cannot be achieved by screw speed alone; it requires an active closed-loop feedback system linking an optical laser micrometer to a variable-speed pulling capstan. If the puller speed is static, minor variations in melt temperature or regrind bulk density will cause filament diameter to drift unpredictably.
The downstream cooling and measurement line operates via three synchronized mechanical stages:
- Cooling Stage: As the extruded strand leaves the die, it passes through a laminar cooling air duct or a temperature-controlled warm water bath (30°C to 40°C). Cooling the plastic too quickly in ice water induces high internal frozen-in thermal stresses, resulting in oval, curled filament. Cooling too slowly causes the soft strand to sag and deform under its own weight before solidifying.
- Dual-Axis Optical Measurement: A non-contact laser micrometer measures the outer diameter across both the X and Y axes at 500 Hz to detect ovality. The sensor feeds live dimensional data back to the microcontroller driving the puller motor.
- Dynamic Closed-Loop Pulling: If the laser sensor detects the diameter increasing to 1.78mm, the microcontroller instantly accelerates the motorized rubber puller wheels by a fractional percentage, drawing the soft strand thinner. If the diameter drops to 1.72mm, the puller decelerates slightly, allowing the strand to thicken before entering the motorized spool winder.
Material Performance Comparison: Virgin vs. 100% Recycled vs. Blended Polymers
While 100% recycled filament from clean scrap produces acceptable cosmetic parts, its impact resistance and elongation at break drop by 25% to 40% compared to virgin material due to shorter molecular chains and residual thermal degradation. Blending 30% regrind with 70% virgin polymer restores mechanical properties to near-factory benchmarks.
The table below summarizes empirical material testing across virgin polymer, 100% home-recycled scrap, 70/30 blended material, and technical recycled PETG:
| Polymer Formulation | Melt Flow Rate (g/10min @ 210°C) | Tensile Yield Strength (MPa) | Charpy Impact Strength (kJ/m²) | Elongation at Break (%) | Diameter Variance (±mm) | Raw Material Cost ($/kg) |
|---|---|---|---|---|---|---|
| Virgin PLA (NatureWorks 4043D) | 6.0 – 8.0 | 60 – 65 | 16.5 | 6.0% | ±0.02 mm | $18.00 – $24.00 |
| 100% DIY Recycled PLA (Multi-Pass) | 14.0 – 18.5 | 42 – 48 | 9.8 | 2.8% | ±0.05 – 0.08 mm | $2.50 – $4.00 (Energy + Spool) |
| 70% Virgin / 30% Regrind PLA Blend | 8.5 – 10.5 | 56 – 61 | 14.8 | 5.2% | ±0.03 mm | $8.00 – $11.00 |
| 100% DIY Recycled PETG (Clean Scrap) | 18.0 – 24.0 | 44 – 49 | 8.2 | 4.1% | ±0.04 mm | $3.00 – $5.00 (Energy + Spool) |
"Recycling thermoplastic scrap in a small workshop is not merely a question of melting plastic; it is a discipline of thermal history management. The key to industrial-grade recycled filament lies in rigorous dust sieving, moisture exclusion, and blending virgin masterbatch pellets to stabilize molecular chain distribution."
Economic Reality Check: Equipment Capital Costs vs. Commercial Recycling Programs
For an individual hobbyist or small maker workshop, assembling a complete DIY filament extrusion line costs between $1,200 and $3,500 in capital equipment, requiring roughly 75 to 150 kilograms of recycled output before breaking even against commercially purchased filament. For low-volume makers, closed-loop commercial scrap return programs offer a far more practical and cost-effective alternative.
To evaluate whether in-house recycling makes financial sense for your workshop, consider the total cost breakdown:
1. Initial Capital Equipment Investment
- Mechanical Granulator / Shredder: $400 – $1,200 (e.g., modified motor-driven shredder kits with hardened steel cutters and 3mm classifier screens).
- Single-Screw Desktop Extruder: $600 – $1,800 (e.g., Artme 3D, Filabot, or open-source Lyman/Precious Plastic builds).
- Inline Laser Micrometer & Puller-Winder System: $300 – $800 (closed-loop optical monitoring unit, cooling fan duct, tension capstan, and automated slip-clutch spool winder).
- Total Workshop Capital Outlay: $1,300 – $3,800.
2. Operational Time & Energy Costs
Extruding 1kg of filament on a desktop line takes between 1.5 and 3.5 hours, drawing approximately 250W to 450W of continuous electrical power (roughly 0.5 to 1.2 kWh per spool, or $0.15–$0.30 in electricity). However, the manual labor involved in sorting scrap, inspecting for debris, operating the shredder, dehydrating flakes, cleaning the extruder barrel, and supervising the extrusion line represents 45 to 90 minutes of hands-on work per kilogram.
3. Commercial Closed-Loop Alternatives
If your workshop produces 1 to 5kg of scrap per month, investing in a complete hardware line is rarely economical. In Europe and North America, specialized recycling initiatives (such as Recycling Fabrik in Germany or community Precious Plastic workspaces) allow makers to collect clean, sorted PLA and PETG scrap, ship it in prepaid recycling boxes, and receive store credits or discounted spools of commercially certified 100% recycled filament manufactured on industrial multi-stage twin-screw extrusion plants.
Step-by-Step Workshop Rules for Successful In-House Extrusion
To achieve consistent, jam-free recycled filament on desktop equipment, adhere strictly to a standardized workshop processing protocol. Follow these five golden rules for every recycling run:
- Clean as You Go: Keep dedicated, color-coded bins at every printer. Never allow scrap prints to sit on workshop floors where they collect dust, metal shavings, or stray fibers.
- Uniform Flake Classification: Always pass granulated plastic through a 3.0mm to 3.5mm sieve. Discard powdery fines (which melt too early in the hopper throat) and re-shred oversized flakes (which jam screw flights).
- Exhaustive Drying: Bake regrind for at least 6 hours immediately before extrusion. Extruding wet regrind generates microscopic steam bubbles that expand inside the die, creating porous, brittle filament with continuous diameter surging.
- Use the 70/30 Blending Rule: Mix 30% regrind with 70% virgin polymer pellets for any prints requiring mechanical load resistance. Reserve 100% recycled filament for non-critical aesthetic prototypes, draft prints, and architectural scale models.
- Purge the Barrel After Runs: When shutting down the extruder, always purge the barrel with 100g of high-viscosity virgin purge compound or high-MFI HDPE to push out residual regrind. Leaving degraded PLA inside a cooling barrel will bake on and carbonize during the next heating cycle, causing permanent nozzle contamination.
Frequently Asked Questions (FAQ)
Can I mix different colors of PLA scrap when making recycled filament?
Yes. Mixing different colors of the same polymer base (e.g., black, white, and red PLA) is chemically safe and will not cause extrusion jams. However, the resulting filament will blend into an opaque charcoal, olive-brown, or dark grey color. If you want specific vibrant colors, sort your scrap by color family (all reds, all blues, or all naturals) and add concentrated color masterbatch pellets (1% to 2% by weight) during extrusion.
Why does my DIY recycled filament keep clogging my 0.4mm printer nozzle?
Clogging in recycled filament is almost always caused by one of three issues: airborne dust or debris trapped during shredding, carbonized polymer gels from running the extruder barrel too hot, or diameter surges exceeding 1.85mm that jam in the printer's PTFE guide tube. Installing a fine 100-mesh stainless steel filter screen inside the extruder breaker plate eliminates particulate contamination at the source.
Can I recycle support structures printed with multi-material interfaces (e.g., PLA with PETG supports)?
No. When printing PLA with PETG support interfaces, the purge tower and contact layers contain fused fragments of both polymers. Because PLA and PETG do not bond on a molecular level, granulating and re-extruding this mixed scrap produces filament with micro-delaminations that will snap instantly inside the extruder gears or delaminate under minimal mechanical stress.
What is the minimum nozzle size recommended for printing with 100% DIY recycled filament?
While well-filtered recycled filament can run through standard 0.4mm nozzles, using a 0.6mm nozzle provides significantly greater reliability. A 0.6mm orifice is far more tolerant of microscopic diameter variations (±0.05mm) and minor viscosity fluctuations, virtually eliminating mid-print clogging on functional parts.
References & External Sources
- Precious Plastic Open-Source Recycling Workspace & Machinery Blueprints — Global open-source hardware designs, mechanical shredder plans, and community plastic recycling standards.
- NatureWorks Ingeo Technical Guidelines for Mechanical Recycling of Polylactic Acid — Official engineering whitepaper detailing molecular weight retention, drying kinetics, and virgin blending ratios for PLA.
- ISO 15270:2008 Plastics — Guidelines for the Recovery and Recycling of Plastics Waste — International standardization framework for mechanical plastic processing, characterization, and quality validation.
- Prusa Research Sustainability & In-House Filament Extrusion Life Cycle Analysis — Practical data on industrial closed-loop recycling, energy expenditure, and mechanical testing of recycled polymers.
About the Author: Dinu Suciu
Dinu Suciu is a dedicated 3D printing engineer and maker who specializes in functional FDM prototyping, additive manufacturing workflow optimization, and high-performance engineering polymers. In his workshop, Dinu operates and stress-tests modern CoreXY and bed-slinger machines, sharing hands-on technical calibration guides, material analyses, and practical engineering solutions.
Have questions about your 3D printing project or need custom engineering prototypes? Get in touch via the Contact Page.