




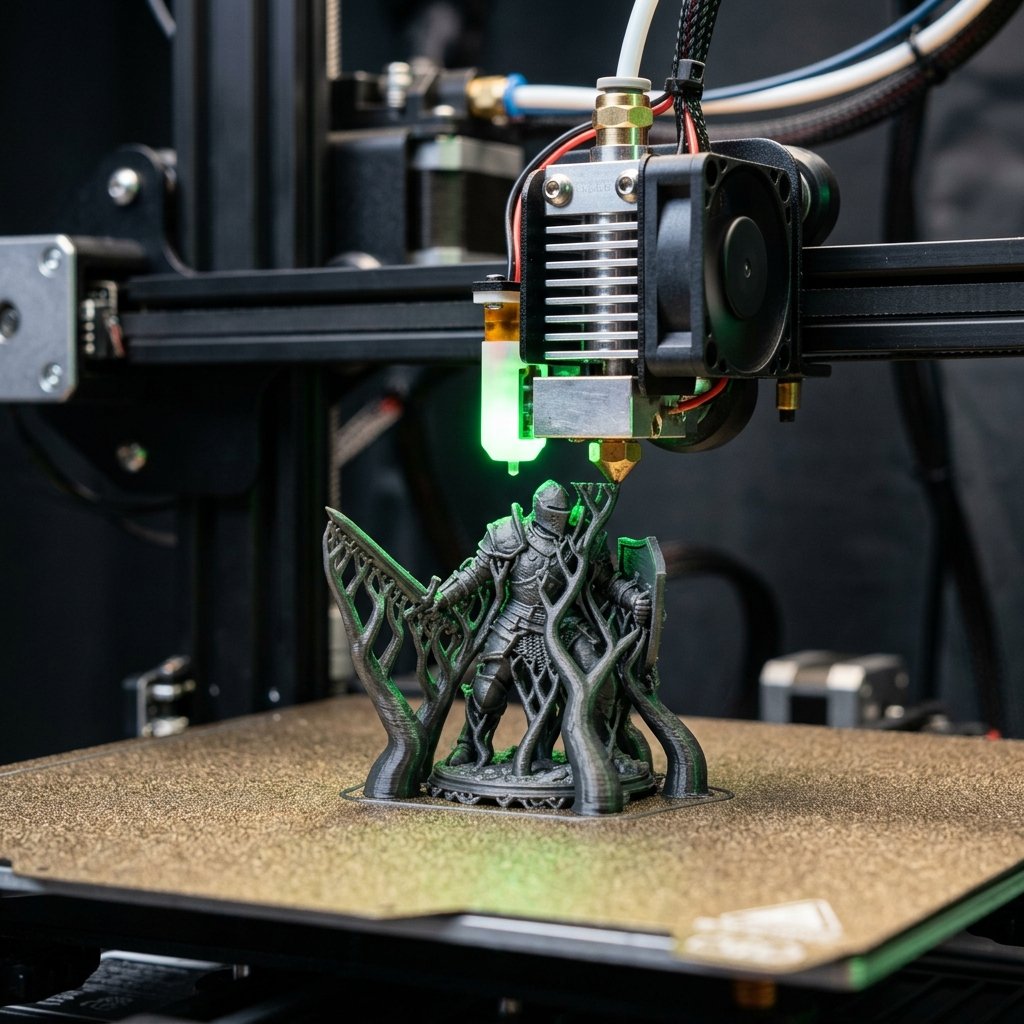
For years, a persistent myth has circulated within the tabletop gaming and maker communities: if you want high-quality miniatures, you must use a resin (SLA) 3D printer. The argument usually points to the visible layer lines, thick nozzle paths, and loss of fine details on FDM (Fused Deposition Modeling) prints. However, as the owner of an FDM-only print studio, I have spent the last decade proving that you do not need messy chemicals, toxic fumes, or intensive post-processing setups to produce exceptional miniatures. By making targeted hardware upgrades, calibrating your filaments, and utilizing advanced slicer hacks, you can push a standard FDM 3D printer for miniatures to deliver crisp, tabletop-ready prints that rival the clarity of molded models.
The secret lies in shifting our perspective on FDM printing. Standard 3D printers are typically configured out-of-the-box for speed and structural strength, relying on a 0.4mm nozzle and layer heights of 0.2mm. While this setup is perfect for mechanical brackets, organizers, and larger decorative pieces, it is physically incapable of resolving the tiny features of a 28mm or 32mm scale miniature—such as facial expressions, chainmail, and thin weapons. To print miniatures successfully, we must trade volumetric speed for absolute precision. In this comprehensive guide, I will walk you through the physics of printing micro-details, the exact hardware configurations you need, the optimized slicer parameters for Orca, Bambu Studio, and Cura, and the advanced tricks required to eliminate stringing and support scarring.
Can you print high-quality miniatures on an FDM printer?
Yes, you can print highly detailed miniatures on an FDM printer by switching to a 0.2mm nozzle, reducing layer height to 0.08mm, and slowing print speed down to 25-30mm/s. These precise adjustments limit the plastic flow, decrease extrusion widths, and reduce the physical impact of dynamic motion artifacts like ghosting and ringing on delicate structures.
To understand why these settings are necessary, we have to look at the physical limitations of FDM. In our extensive comparison of FDM vs SLA 3D printing, we discussed how SLA printers use light projection to cure liquid resin at a pixel level (often 20 to 50 microns in the XY plane). In contrast, FDM printers must physically drag a hot metal nozzle and squeeze out molten thermoplastic. If you attempt to print a miniature's nose or fingers using a standard 0.4mm nozzle, the line width is simply too wide to draw the toolpath. The slicer will either ignore the details entirely (leaving gaps in the model) or over-extrude, resulting in a melted, blobby appearance.
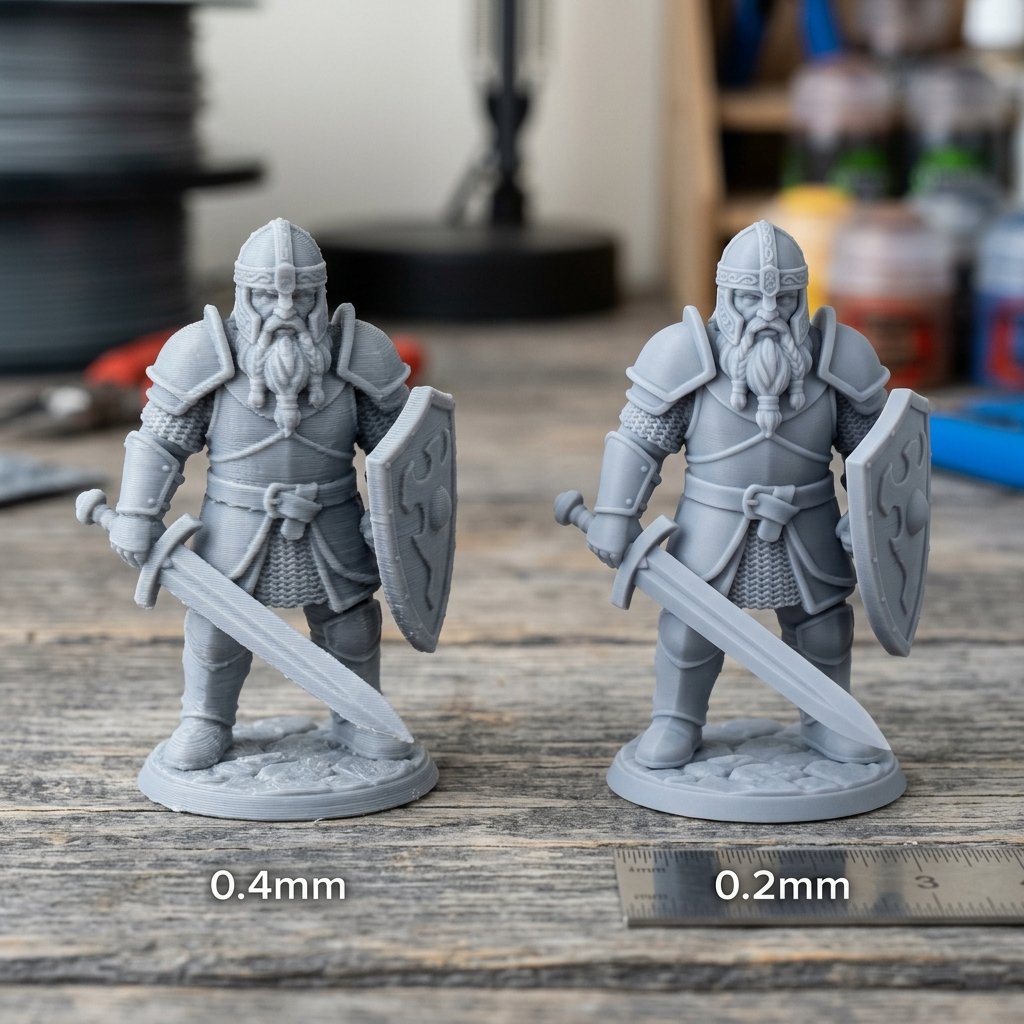
However, by swapping to a 0.2mm nozzle, you immediately halve the minimum feature size you can print on the XY plane. Furthermore, when you match this small nozzle with a reduced layer height (typically 0.08mm or even 0.05mm), the horizontal steps between layers become virtually imperceptible to the naked eye. While a resin printer will always have a slight edge in pure resolution, a finely tuned FDM printer running at these micro-settings produces tabletop miniatures that look fantastic once primed and painted, easily meeting the standards of Dungeons & Dragons, Warhammer, or Pathfinder campaigns.
"The transition from a 0.4mm nozzle to a 0.2mm nozzle is the single most impactful change you can make for miniatures. It forces you to rethink how you calibrate your printer, as tiny errors in extrusion that are invisible at 0.4mm will completely ruin a 0.2mm print."
— Dinu Suciu, Founder of 3D Print Book
The Crucial Hardware Setup: Nozzles, Extruders, and Cooling
Before you adjust a single setting in your slicer, your physical hardware must be prepared for the tight tolerances of micro-printing. Standard components that work flawlessly for larger items will often fail when subjected to the prolonged, low-flow demands of miniature printing.
The first hardware upgrade is the nozzle itself. I highly recommend using high-quality brass nozzles for 0.2mm prints. While hardened steel or ruby-tipped nozzles are excellent for abrasive materials like carbon fiber, they have poorer thermal conductivity than brass. Because a 0.2mm nozzle extrudes a very small volume of plastic, maintaining a highly stable and consistent temperature inside the melt zone is critical. Any thermal fluctuation can lead to immediate under-extrusion or nozzle clogs. Additionally, make sure your filament path is entirely free of dust and debris; a tiny speck of dust that passes easily through a 0.4mm nozzle will immediately block a 0.2mm orifice. Always run your filament through a sponge dust-filter before it enters the extruder.
The second critical factor is part cooling. When printing tiny features—like a miniature's sword or raised hand—the nozzle spends a significant amount of time in a very concentrated area. If the previously deposited layer of plastic is still hot and soft when the nozzle returns to lay down the next layer, the heat from the heater block will melt the model, causing it to droop and deform. To prevent this, your cooling fan must run at 100% capacity, and you should ensure your fan duct directs the airflow precisely beneath the nozzle tip. For printers with single-sided fan ducts, upgrading to a dual-sided or circular duct design is essential for uniform cooling.
Lastly, extruder tension must be calibrated carefully. A 0.2mm nozzle creates significant backpressure inside the hotend because it is pushing molten plastic through an opening that is four times smaller in area than a 0.4mm nozzle. If your extruder tension is too loose, the gears will slip and grind the filament. If it is too tight, it will deform the filament, leading to binding in the PTFE guide tube. You must balance the tension so that the dual-drive gears grip the filament firmly without flattening it.
Slicer settings for FDM miniatures (Orca, Bambu, and Cura profiles)
Optimal slicer profiles for miniatures require a layer height of 0.05mm - 0.08mm, slow printing speeds of 25-35mm/s, and high retraction values (5-7mm for Bowden, 0.8-1.2mm for Direct Drive) to eliminate stringing. These settings ensure that the high backpressure within the hotend does not cause oozing during travel moves.
Configuring your slicer is where the magic happens. Whether you are using Orca Slicer, Bambu Studio, or Cura, the default profile is not designed for miniatures. When you reduce the nozzle size to 0.2mm, you must manually adjust several settings to account for the unique physics of low-flow extrusion. In particular, you must calibrate your extrusion multiplier (flow rate) to ensure you are not over-stuffing the tiny layers. For a step-by-step approach to calibrating these properties, refer to our detailed guide on how to calibrate filaments in Orca Slicer.
The following table outlines the critical differences between standard FDM settings and the tuned profiles required for high-detail miniatures:
| Setting Category | Standard Profile (0.4mm Nozzle) | Miniature Profile (0.2mm Nozzle) | Why This Change Matters |
|---|---|---|---|
| Layer Height | 0.20 mm | 0.06 mm - 0.08 mm | Reduces visible stepping on curves; ensures fine vertical resolution. |
| First Layer Height | 0.20 mm | 0.12 mm - 0.16 mm | Thicker first layer ensures bed adhesion and absorbs minor bed leveling errors. |
| Line Width | 0.42 mm | 0.18 mm - 0.20 mm | Allows the slicer to draw extremely fine structures like fingers and weapons. |
| Wall Speed | 60 - 150 mm/s | 25 - 30 mm/s | Minimizes momentum-based vibrations (ringing) on tiny surface features. |
| Infill Density | 15% - 20% | 30% - 40% (Grid / Gyroid) | Provides structural support for tiny limbs and anchors support structures. |
| Retraction Distance | 0.8 mm (Direct) / 5.0 mm (Bowden) | 1.2 mm (Direct) / 6.5 mm (Bowden) | Combats the high hotend backpressure to prevent stringing and oozing. |
| Minimum Layer Time | 4 - 6 seconds | 12 - 15 seconds | Forces the printer to slow down or pause to allow thin parts to cool and solidify. |
Let's dive deeper into the reasoning behind these key profile settings. The **line width** should match or be slightly smaller than the physical nozzle size (e.g., 0.18mm on a 0.2mm nozzle). This trick—often called under-width extrusion—helps prevent the plastic from bulging outwards, ensuring sharp details. However, it requires a very accurate flow rate calibration. If your flow rate is off by even 2%, you will experience gaps or severe over-extrusion.
The **minimum layer time** is your safety net. If you are printing a single miniature, the printer will reach the head or the weapon tip, and the layer will take less than a second to print. Without a high minimum layer time, the nozzle will continuously circle the same tiny spot, melting the plastic into a blob. Setting this to 12-15 seconds forces the slicer to slow down the print speed to a crawl, or even lift the nozzle away between layers to let the plastic cool. Alternatively, a popular pro-tip is to print two or three miniatures at the same time, spaced slightly apart on the build plate. This naturally increases the time between layer deposits on each model, allowing them to cool without requiring the nozzle to rest.
Recommended support types for tiny details (Tree/Organic supports)
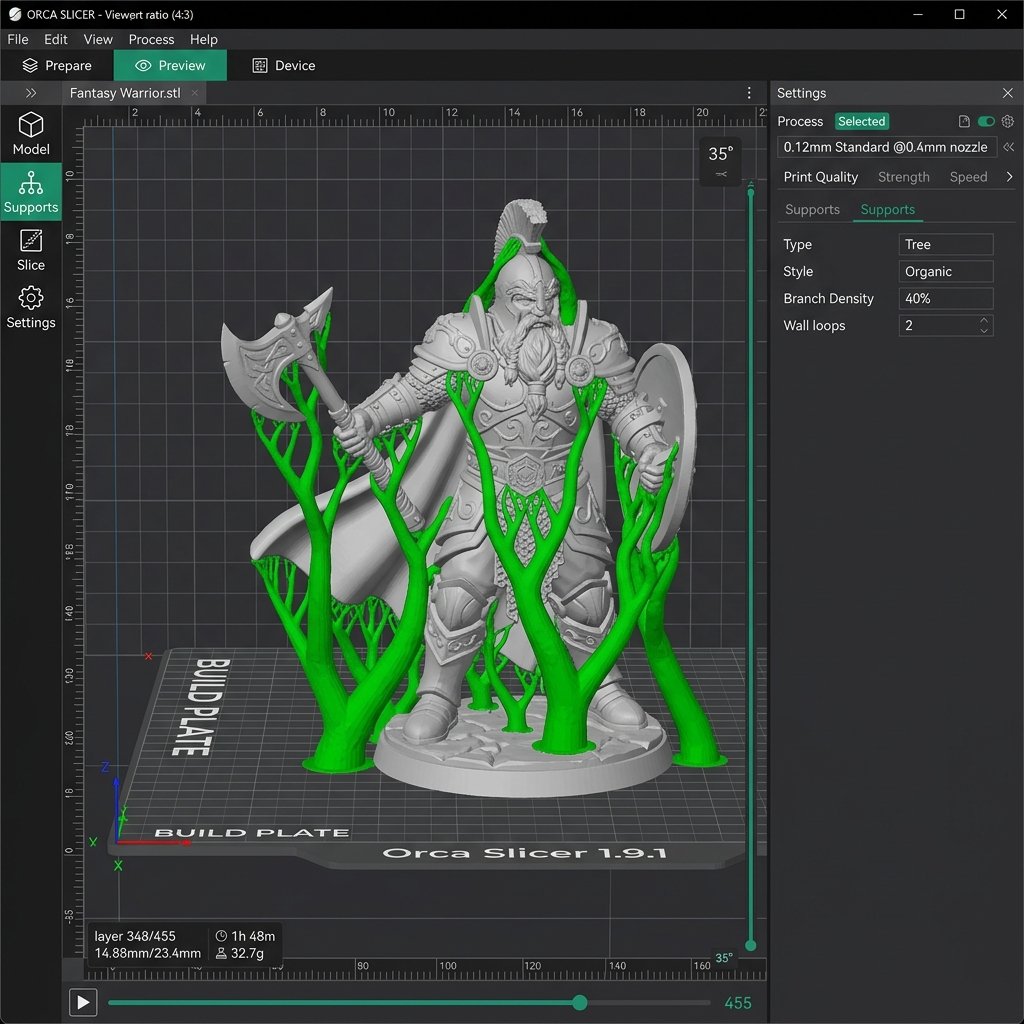
The best supports for 3D printed miniatures are Tree (Orca/Bambu) or Organic (PrusaSlicer) supports, as they touch the model at minimal points, branches curve around delicate details, and they are extremely easy to remove without causing scarring. Traditional grid or snub supports wrap around the model, fusing with tiny details and snapping delicate limbs during removal.
Supports are the bane of FDM miniatures. Because miniatures feature complex, overhanging geometries—like outstretched arms, capes, and weapons—supports are unavoidable. However, removing traditional supports from a 32mm miniature often results in breaking the very details you are trying to print. This is why Tree (or Organic) supports are an absolute game-changer. Rather than building a solid wall of plastic from the build plate straight up to the model, Tree supports grow like branches, reaching around the model to support only the necessary overhangs.
To configure Tree supports for maximum success, adjust these key parameters in your slicer:
- Support Style: Select "Tree Slim" or "Tree Organic". These styles use less filament and have a smaller footprint on the build plate, making them easier to wiggle free.
- Top Z Distance: Set this to exactly double your layer height. If you are printing at 0.08mm layers, use a Z distance of 0.16mm. If you go too close (e.g., 0.08mm), the support will fuse permanently to the miniature. If you go too far (e.g., 0.24mm), the overhang will droop and fail.
- Support Interface Layers: Use 3 to 4 dense interface layers. The interface is the flat roof that sits on top of the support branches right before the model prints. A dense, smooth interface prevents the model's actual layers from dropping into the support structure, ensuring a clean finish.
- Support XY Distance: Set this to 0.35mm - 0.4mm. This ensures that the sides of the support branches do not fuse horizontally to the legs or torso of your miniature.
When the print is complete, do not rush to rip the supports off with your fingers. The heat from your hands can soften the thin plastic of the miniature, leading to bent parts. Instead, let the print cool completely to room temperature. Use a set of sharp flush cutters to carefully snip the support branches at their thinnest points, then gently peel them away. For parts that are stubborn, you can learn more about safely smoothing and finishing FDM prints in our guide on 3D print post-processing techniques.
Advanced Slicer Hacks for Tabletop Minis
Advanced techniques like adaptive layer heights, variable infill density, and adjusting the extrusion width (line width) can drastically improve detail reproduction on vertical curves while maintaining structural strength. These settings allow you to customize the toolpath configuration dynamically across different heights of the model.
Once you have mastered the basic miniature profile, there are several advanced slicer features that can push your print quality even further. The first is **Variable Layer Height** (or Adaptive Layer Height). Miniatures often have vertical sections that are relatively flat (like legs and cloaks) and other sections with intense, curved details (like faces and shoulders). Instead of printing the entire model at a slow 0.05mm layer height—which dramatically increases print time—you can use the variable layer height tool. This tells the slicer to use thicker layers (e.g., 0.12mm) on the legs and automatically transition to ultra-fine layers (0.05mm) for the chest, hands, and head. This optimizes print quality where it matters most while cutting overall print times by up to 30%.
Another crucial hack is **Model Orientation**. Most makers import a miniature and print it standing perfectly upright. However, printing a miniature at a 45-degree angle backwards (leaning on its back or cape) can significantly improve both surface detail and structural strength. Because FDM prints are weakest along the horizontal layer lines, a vertical sword or arm is highly prone to snapping along a layer seam. By angling the model at 45 degrees, you align the layer lines diagonally across the limbs, increasing their resistance to shear force. Furthermore, this orientation moves the support contact points to the back of the model, keeping the highly visible front face, chest, and shield completely free of support blemishes.
Finally, adjust your **Z-Hop (Lift Z)** settings. When printing tiny, fragile details, the nozzle can easily catch on a slightly curled edge of a layer during travel moves, knocking the miniature off the bed or snapping a delicate limb. In Orca or Cura, enable Z-hop and set it to 0.15mm - 0.2mm. Make sure to use a "Normal" or "Spiral" Z-hop type instead of a straight vertical lift. A spiral Z-hop gently lifts the nozzle while moving away, minimizing the vertical suction force that can pull thin details loose.
Troubleshooting Common FDM Miniature Issues
Issues like severe stringing, nozzle clogging, and support fusion can be solved by drying your filament, cleaning the extruder path, and increasing the Z-distance of your support interface. Understanding these common issues will help you maintain high-quality prints and prevent failed runs.
Even with a perfectly calibrated profile, printing with a 0.2mm nozzle is a delicate process that can easily go wrong. Here are the three most common issues encountered when printing FDM miniatures and how to fix them:
1. Severe Stringing and Oozing
Because a 0.2mm nozzle operates under high backpressure, plastic will continue to ooze out of the tip during travel moves, even after a retraction. If you see fine, spiderweb-like strings covering your miniature, the culprit is usually wet filament or incorrect travel settings. PLA is hygroscopic, meaning it absorbs moisture from the air. When wet filament enters the hotend, the moisture turns to steam, expanding and pushing plastic out of the nozzle. Always dry your filament in a dedicated dryer for 4-6 hours before printing miniatures. Additionally, enable "Combing" (set to "Within Infill" or "Not in Skin") and turn on "Wiping" (set to 0.2mm - 0.4mm). Wiping forces the nozzle to run back over the printed path before making a travel move, cleaning the tip of excess plastic.
2. Frequent Nozzle Clogging
A 0.2mm nozzle opening is incredibly small. The most common cause of clogging is micro-particles in cheap filament, dust on the spool, or filament degradation (heat creep). Heat creep occurs when heat from the hotend travels up the throat of the heat break, softening the raw filament before it reaches the melt zone. Because miniature prints run slowly and have low volumetric flow, the filament sits in the hot zone for a long time. To prevent heat creep, ensure your hotend heatsink fan is working perfectly, and avoid printing in overly hot enclosures. If a clog occurs, use the "cold pull" method with nylon filament to clean the internal chamber of the nozzle, or replace the brass nozzle entirely—brass nozzles are inexpensive and easily replaced.
3. Supports Fusing to the Model
If your tree supports are fusing to the miniature's legs or underarms, your cooling is insufficient, or your support Z-distance is too low. First, ensure your part cooling fan is at 100%. Second, check your "Support Interface Density". If the interface is too dense, it will weld to the model. Try reducing the interface density to 30% - 40% and using a grid pattern. Finally, ensure that your slicer is not rounding down your Z-distance. Some slicers will align support Z-distances to the nearest layer height. If you print at 0.08mm and ask for a 0.1mm Z-distance, the slicer might round it down to 0.08 (1 layer), causing fusion. Manually set it to exactly 0.16mm (2 layers) to guarantee a clean break.
Conclusion: Tabletop Glory on a Budget
Tuning your FDM 3D printer for miniatures is a rewarding journey that showcases the true versatility of filament-based machines. By swapping to a 0.2mm nozzle, slowing down your print speeds, and embracing organic tree supports, you can achieve beautiful, highly detailed minis without the hassle, toxicity, and expense of resin printing. The process requires patience, precise calibration, and a willingness to troubleshoot, but the result is a library of custom, tabletop-ready miniatures printed safely right on your desktop.
About the Author: Dinu Suciu
I am Dinu Suciu, the lead technician and founder of 3D Print Book. Operating an FDM-only print studio, I spend my days testing high-performance filaments, calibrating high-speed motion systems, and converting complex digital CAD models into robust physical prototypes. My goal is to make industrial 3D printing accessible and reliable for creators worldwide. If you need assistance with a custom prototyping project or need help choosing the right material properties, feel free to contact me directly via our dedicated contact page.
Frequently Asked Questions (FAQ)
Can I print miniatures with a standard 0.4mm nozzle?
Yes, but you will be limited in the level of detail you can achieve. With a 0.4mm nozzle, you can print decent miniatures at a 0.12mm layer height, provided the model does not have ultra-fine features like slender swords or delicate fingers. However, for true tabletop quality, a 0.2mm nozzle is highly recommended as it reduces the line width and allows the printer to resolve intricate details.
Which filament is best for printing FDM miniatures?
High-quality PLA or PLA+ (PLA Plus) is the absolute best material for printing FDM miniatures. PLA has minimal shrinkage, prints at lower temperatures (reducing heat creep), cools down rapidly, and flows smoothly through tiny nozzles. Avoid using PETG or ABS for miniatures, as PETG is highly prone to stringing on fine details, and ABS requires heated chambers and is more susceptible to warping on small, delicate footprints.
How do I prevent the nozzle from knocking the miniature off the bed?
Miniatures have a very small contact area with the build plate. To prevent the nozzle from knocking them over, first use a "Brim" (5mm to 8mm width) to increase the bed surface area. Second, ensure your bed is perfectly level and clean (wash it with warm water and dish soap to remove hand oils). Finally, enable Z-hop in your slicer settings so the nozzle lifts up and over the model during travel moves.
Does printing miniatures take longer on a 0.2mm nozzle?
Yes, significantly longer. Because a 0.2mm nozzle has a cross-sectional area four times smaller than a 0.4mm nozzle, it extrudes much less plastic per second. When combined with thinner layers (0.08mm vs 0.2mm) and slower speeds (30mm/s vs 60+mm/s), a single 28mm miniature can take anywhere from 3 to 6 hours to print, compared to 45 minutes on a standard setup. However, the dramatic increase in detail and surface finish is well worth the extra time.
How can I hide the layer lines on my finished FDM miniatures?
The best way to hide layer lines on FDM minis is to apply a high-quality sandable filler primer. Spray the miniature with a very thin coat of filler primer, let it dry, and then lightly sand the flat areas if possible. For tiny details, a second light coat of standard primer is usually enough to fill the micro-gaps between the 0.08mm layers, leaving a smooth surface that is ready for acrylic paints.