




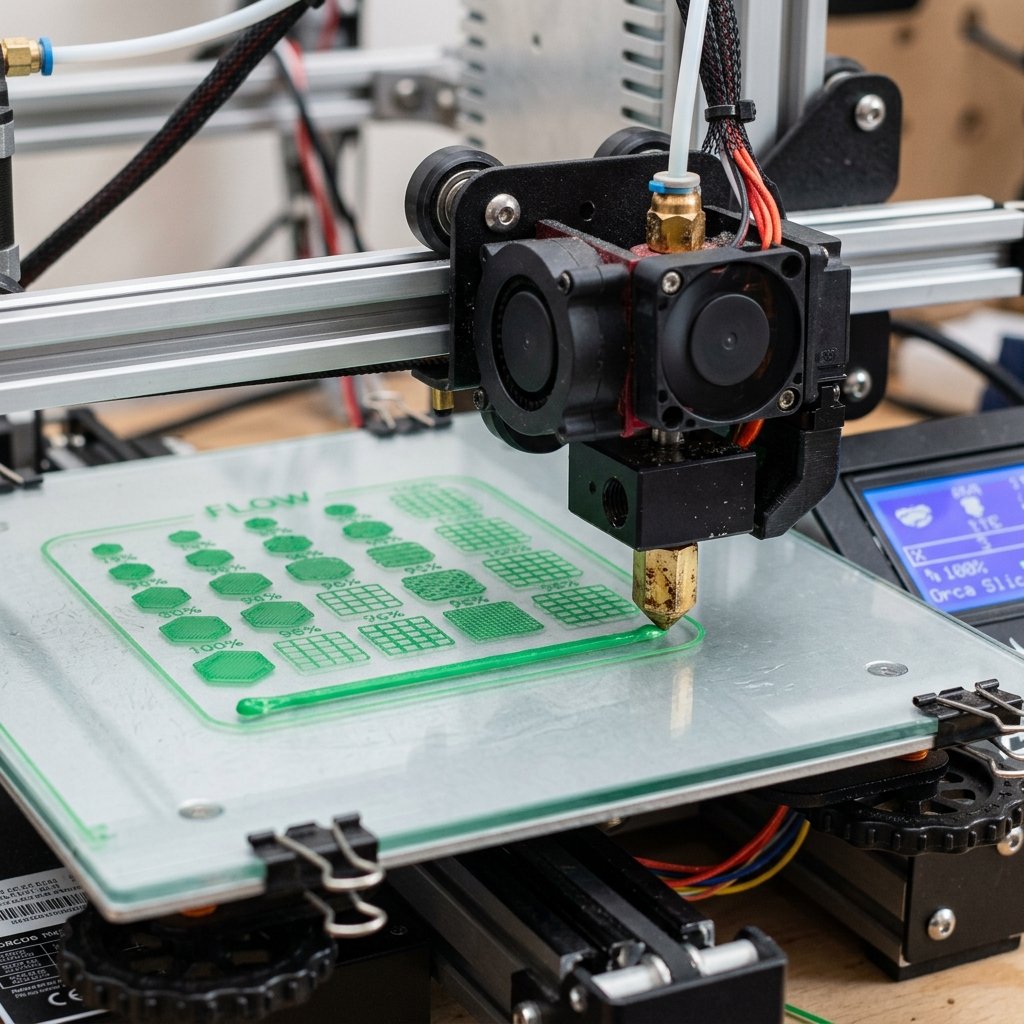
In FDM (Fused Deposition Modeling) 3D printing, consistency is the key to transitioning from hobbyist prints to industrial-grade components. As someone who operates an FDM-only print shop, I frequently see users struggling with issues like corner bulging, stringing, gaps on top surfaces, and poor dimensional accuracy. Often, their first instinct is to blame their hardware or run to online forums search for "fdm printer troubleshooting" tips. However, the root cause is rarely a mechanical defect; instead, it is almost always uncalibrated filament profiles.
Every manufacturer uses a slightly different blend of polymers, colorants, and additives. A generic PLA, PETG, or ABS profile might get a print started, but it will never yield clean results. This is where Orca Slicer shines. Originally forked from Bambu Studio (which itself is based on PrusaSlicer), Orca Slicer has quickly become the gold standard for enthusiasts and professionals alike because of its built-in calibration suite. Instead of forcing you to use external web generators or manually edit G-code, Orca Slicer generates precise, easy-to-read physical test models directly within the editor.
In this comprehensive guide, I will walk you through the exact calibration sequence I use in my workshop to tune every new spool of third-party filament. By the end of this tutorial, you will have a perfect filament profile that guarantees clean walls, sharp corners, and structurally sound layers.
Why Use Orca Slicer for Filament Calibration?
Orca Slicer provides a dedicated calibration suite that replaces guess-and-check tuning with automated, easy-to-read physical test models. This allows users to accurately isolate extrusion variables, reduce print failures, and optimize print quality for any FDM filament.
Traditionally, calibrating a new filament was a tedious chore. You had to download community models, guess flow rates, use calipers to measure single-wall cubes (a method now widely considered inaccurate due to nozzle swell), or manually insert temperature change commands at specific layer heights. Orca Slicer completely redesigns this workflow. It integrates calibration directly into the slicing engine, generating models dynamically based on your current printer profile and selected material.
By systematically tuning temperature, flow rate, and pressure advance, you tackle the core issues of fdm printer troubleshooting. Under-extrusion, over-extrusion, stringing, and corner bulging are resolved step-by-step. The calibration suite is designed to be completed in a specific order, as each setting builds upon the previous one:
- Temperature: Determines the viscosity of the plastic and the strength of the interlayer bonds.
- Flow Rate (Extrusion Multiplier): Calibrates the precise volume of plastic pushed through the nozzle to match the sliced line width.
- Pressure Advance (Flow Dynamics): Controls nozzle pressure changes during acceleration and deceleration to prevent blobs on corners.
Here is a quick reference table showing the typical calibration target ranges and baseline settings for common FDM materials on direct-drive and Bowden extruders:
| Material Type | Typical Temp Range (°C) | Flow Multiplier Baseline | Direct Drive PA (K-Value) | Bowden Extruder PA (K-Value) | Primary Calibration Goal |
|---|---|---|---|---|---|
| PLA / PLA+ | 190°C – 220°C | 0.95 – 1.02 | 0.020 – 0.040 | 0.080 – 0.150 | Minimize stringing, maximize overhang quality |
| PETG | 230°C – 255°C | 0.93 – 0.98 | 0.035 – 0.060 | 0.120 – 0.220 | Reduce nozzle buildup, control fine stringing |
| ABS / ASA | 240°C – 270°C | 0.92 – 0.98 | 0.025 – 0.050 | 0.100 – 0.180 | Ensure interlayer strength, prevent warping |
| TPU (95A) | 210°C – 235°C | 1.00 – 1.05 | 0.040 – 0.080 | 0.150 – 0.300 | Prevent extruder jamming, control stringing |
Step 1: Finding the Sweet Spot with a Temperature Tower
The Temperature Tower test identifies the optimal nozzle temperature for a specific filament by printing a vertical column with blocks sliced at progressively lower temperatures. Observing bridging, overhangs, and surface finish at each block determines the ideal temperature that balances layer strength and visual appearance.
Temperature is the foundation of all print settings. If your nozzle is too cold, the plastic will not melt thoroughly, leading to high extrusion pressure, nozzle clicking, under-extrusion, and weak interlayer bonding. If the nozzle is too hot, the plastic becomes too runny, causing excessive stringing, sagging overhangs, poor bridging, and loss of detail.
To generate a Temperature Tower in Orca Slicer:
- Open Orca Slicer and select your printer and filament baseline profile.
- Click on the Calibration menu in the top menu bar.
- Select Temperature Tower and choose the appropriate material preset (e.g., PLA, PETG, or ABS).
- Orca Slicer will automatically populate a tower model on the build plate. Notice that the slicer automatically injects the custom G-code commands to change the temperature at each vertical block segment.
- Slice and print the model.
Once the print is complete, inspect the tower under good lighting. You want to analyze:
- Stringing: Look at the gaps between the diagonal peaks. The blocks with minimal or no stringing indicate a temperature where the filament is not oozing out under gravity.
- Overhangs and Bridging: Examine the underside of the horizontal bridges. Look for sagged loops or drooping lines. Lower temperatures usually produce cleaner overhangs because the plastic cools and solidifies faster.
- Surface Quality: Check for glossiness, color vibrancy, and surface defects like zits or blobs.
Expert Tip on Mechanical Strength from Dinu Suciu:
"Many people choose their printing temperature based purely on aesthetics—whichever block looks the glossiest or has the least stringing. In my workshop, I do the opposite: I take the printed tower and physically bend it until it snaps. Often, the prettiest, coolest-looking segments snap very easily due to poor interlayer fusion. I always choose the highest temperature that still yields acceptable visual results. This guarantees that my functional parts won't split along the layer lines when placed under load."
Once you determine the best-performing block (for example, 220°C for a tough PLA), open your filament settings in Orca Slicer, navigate to the Temperature section, and update the Nozzle temperature for both the first layer and subsequent layers.
Step 2: Running Flow Rate Pass 1 and Pass 2 Tests
Flow rate calibration in Orca Slicer measures and adjusts the multiplier of filament extruded to ensure exact bead width and prevent under- or over-extrusion. This is done through a two-pass system: Pass 1 identifies a rough range by printing blocks from -20% to +10% flow, while Pass 2 refines the choice in a narrow -9% to +1% range to achieve a perfectly flat, smooth surface.
Flow rate (also called the Extrusion Multiplier in PrusaSlicer) tells the printer exactly how much plastic to push out for a given line width. If this value is even 3% off, it can ruin your prints. Over-extrusion causes excess plastic to squeeze out, forming rough top surfaces, scarred walls, and tight dimensional clearances. Under-extrusion leaves microscopic gaps between lines, creating weak, brittle structures and letting light shine through top layers.
Orca Slicer uses a brilliant two-step visual method to calibrate this value.
Pass 1: The Broad Sweep
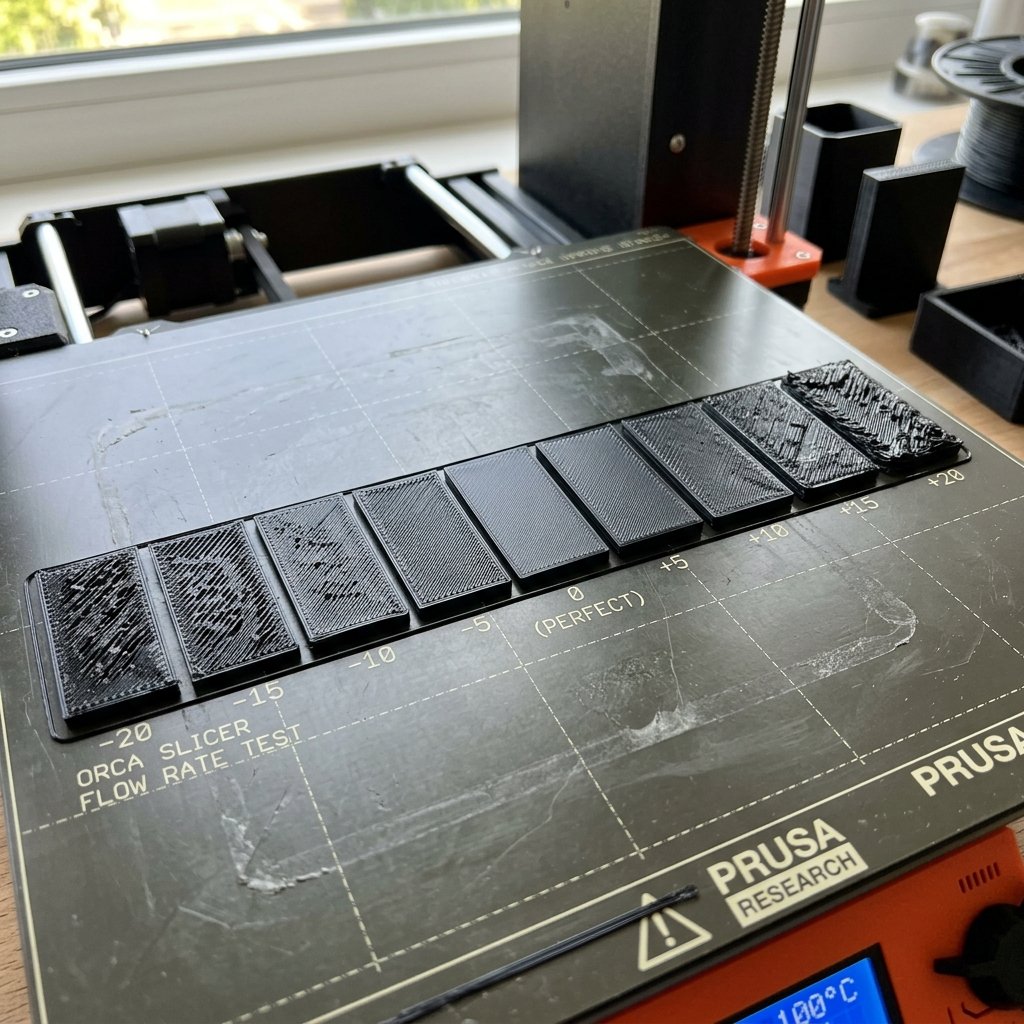
Go to the Calibration menu and select Flow Rate -> Pass 1. Orca Slicer will load nine flat tiles labeled from -20 to +10. Each tile is sliced with a different flow rate modifier. Print the tiles, let the build plate cool, peel them off, and inspect them. Rub your fingers across the top surface of each tile. You are looking for the tile that feels completely smooth and flat.
- Tiles with lower values (like -20 or -15) will feel rough because of under-extrusion, which leaves tiny gaps and trenches between the toolpath lines.
- Tiles with higher values (like +5 or +10) will feel rough because of over-extrusion, which causes the excess plastic to plow upwards and form sharp ridges.
Identify the tile that is closest to being perfectly smooth. Let's say the +5 tile looks and feels the best. Now, calculate your intermediate flow rate using the formula:
For example, if your initial flow rate in the profile was 0.98 and the best tile was +5:
New Flow Rate = 0.98 * (100 + 5) / 100 = 0.98 * 1.05 = 1.029
Open your filament settings, update the Flow ratio to this intermediate value (e.g., 1.03), save the profile, and clear the build plate.
Pass 2: The Fine Adjustment
Go back to the Calibration menu and select Flow Rate -> Pass 2. Orca Slicer will load a new set of ten tiles, but this time, the modifiers are much smaller: ranging from -9 to +1. Print the tiles and inspect the top surfaces in the same way. Since the differences are subtle, hold the tiles at an angle under a light source to check for the flattest reflection.
Select the best tile. If the 0 tile is perfect, your intermediate flow rate is correct. If the -3 tile is best, adjust the rate once more using the same formula:
Final Flow Rate = Intermediate Flow Rate * (100 + Modifier) / 100
Final Flow Rate = 1.03 * (100 - 3) / 100 = 1.03 * 0.97 = 0.999
Enter this final value in your Orca Slicer filament profile under Flow ratio (e.g., 1.00).
Step 3: Calibrating Flow Dynamics (Pressure Advance) for Sharp Corners
Pressure Advance calibration coordinates nozzle pressure with print speed variations to prevent bulging corners and seam defects during acceleration and deceleration. By printing a specialized test pattern (lines, tower, or PA test), you can visually locate the segment where the extrusion lines are most uniform, identifying the correct K-value (Pressure Advance coefficient).
Have you ever noticed that the corners of your 3D prints bulge outward, or that your seams have a small blob of plastic right where the layer starts or ends? This is caused by residual pressure in the nozzle.
Think of your extruder like a syringe or a garden hose filled with thick liquid. When the extruder motor pushes filament into the hotend, pressure builds up. When the printer slows down to navigate a sharp corner, the motor slows down, but the built-up pressure keeps forcing molten plastic out of the nozzle. This creates a bulge on the corner. Conversely, when the printer speeds back up on a straight line, it takes a moment for pressure to rebuild, leading to temporary under-extrusion.
Pressure Advance (known as Linear Advance in Marlin or K-Value in Bambu/Klipper firmware) resolves this by anticipating speed changes. It retracts the filament slightly before a slowdown to relieve nozzle pressure, and pushes extra filament before an acceleration to pre-pressure the hotend.
Orca Slicer offers three methods to calibrate Pressure Advance: the Line Method (prints horizontal lines at varying speed intervals; fast and uses very little filament), the PA Tower Method (prints a hollow column where the PA value increases continuously with height), and the PA Test Method (prints corner shapes varying the PA value dynamically).
For most modern FDM printers (like Bambu Lab P1S/X1C, Creality K1, or Prusa MK4), the Line Method is the fastest way to get an accurate reading.
Running the Line Method:
- Navigate to Calibration -> Pressure Advance.
- Select the Line method and choose your filament type. Set the start value to 0 and end value to 0.1 (for Direct Drive) or 0 to 1.0 (for Bowden extruders). Set the step size to 0.005.
- Print the pattern. The printer will lay down a series of parallel lines. Each line starts slow, accelerates in the middle, and slows down at the end.
- Once printed, examine the lines under a magnifying glass or good light.
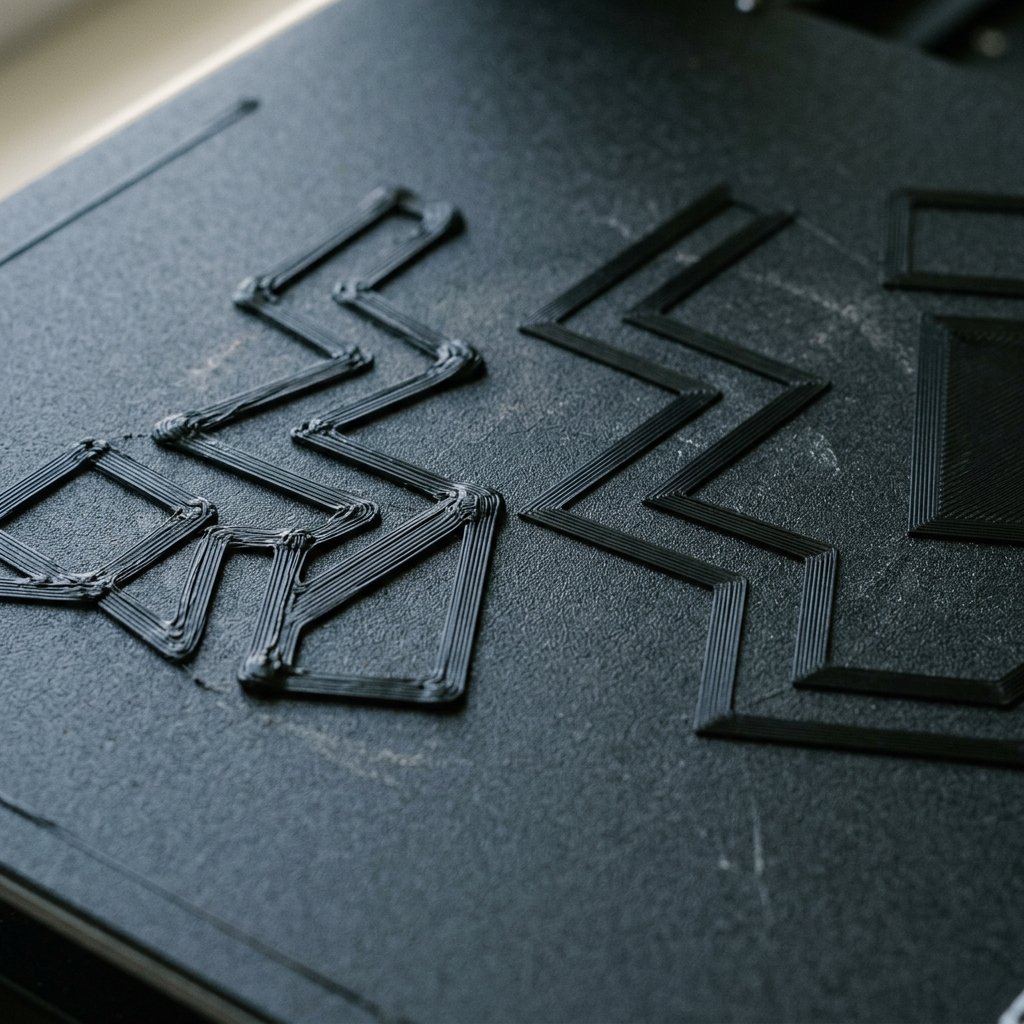
- Lines with too low of a PA value will have bulging ends where the printer slowed down, and thin middle segments where it accelerated.
- Lines with too high of a PA value will have gaps or thin segments at the ends, and bulging centers.
- The ideal line is completely uniform in width from start to finish.
Identify the number printed next to the most uniform line. Open your Orca Slicer filament profile, check the box for Pressure Advance, select your method (e.g., Marlin/Klipper), and input this value in the K-value field.
FDM Printer Troubleshooting: Calibration Failure Modes
If you are running these calibration tests and getting inconsistent results, you are dealing with mechanical or environmental issues. Slicer calibrations assume that your FDM hardware is in healthy working order. Trying to tune settings on a printer with hardware issues will only lead to frustration.
Here are the three most common hardware bottlenecks that mimic slicer miscalibrations:
1. Wet Filament mimicking High Flow/Temperature Issues
If your filament is wet, it will ooze and bubble out of the nozzle. This creates massive stringing that makes a Temperature Tower look terrible at every single temperature level, or it leaves random pitting on top surfaces that looks like under-extrusion. Before attempting any flow rate calibration, make sure your filament is dried. You can refer to our detailed filament drying guide to learn how to identify and dry saturated spools.
2. First-Layer Instability Ruining Flow Tiles
If your bed is not perfectly level, or if your Z-offset is slightly off, the flow calibration tiles will print poorly. Over-extrusion on one side of the plate and under-extrusion on the other is a classic sign of bed tilt, not a bad flow multiplier. Ensure your bed levelling is correct, and read our comprehensive bed adhesion guide to guarantee a perfect first layer.
3. Clogged Nozzle mimicking Under-extrusion
A partial nozzle clog limits the flow of plastic, making it look like your flow rate is too low. If you increase the flow multiplier to compensate for a clog, you will cause extruder gear grinding and eventual print failures. If you see consistent, dry under-extrusion gaps that do not respond to flow rate changes, perform a cold pull or replace the nozzle. Check out our 3D print quality test guide for a list of standard physical tests to diagnose mechanical under-extrusion.
Frequently Asked Questions (FAQ)
Q1: Should I calibrate Orca Slicer settings for every single spool of filament I buy?
You do not need to run calibrations for every single spool if they are from the same brand, material type, and product line. However, if you switch brands, or switch from PLA to PLA Silk or Matte, you should run a quick calibration because the additives alter melting behavior and viscosity.
Q2: Why does Orca Slicer's Flow Rate calibration disagree with the 1-wall caliper method?
The single-wall caliper method is inaccurate due to nozzle swell and caliper measurement errors. Orca Slicer's visual method relies on flat, multi-layered solid surfaces, which accurately reflects how the printer handles solid fills in real-world prints.
Q3: Does nozzle size affect my calibrated Pressure Advance and Flow Rate values?
Yes. Changing your nozzle size changes the volumetric flow dynamics and pressure inside the hotend. While flow rate stays relatively stable, your Pressure Advance (K-value) will change significantly and requires recalibration.
Q4: Why are my calibrated flow rate tiles lifting at the corners during printing?
This is caused by warping due to poor bed adhesion. Make sure your build plate is clean, wash it with warm water and dish soap, and adjust your bed temperature slightly higher to prevent lifting.
Q5: Can I export my Orca Slicer calibrated filament profiles to Bambu Studio or PrusaSlicer?
Yes, you can manually copy the numerical values (Flow Ratio and Pressure Advance K-value) from Orca Slicer into Bambu Studio or PrusaSlicer (as Extrusion Multiplier and Linear Advance K-factor). However, the automated calibration suite itself is unique to Orca Slicer.
About the Author: Dinu Suciu
I am Dinu Suciu, the lead technician and owner of 3D Print Book. Operating an FDM-focused 3D printing workshop, I have spent years optimizing slicer parameters and testing the physical limits of engineering filaments. My passion lies in helping designers, engineers, and makers convert digital CAD designs into robust, functional physical prototypes that perform reliably under real-world stress. If you need assistance troubleshooting a structural component or selecting the right material properties, feel free to contact me directly via our dedicated contact page.