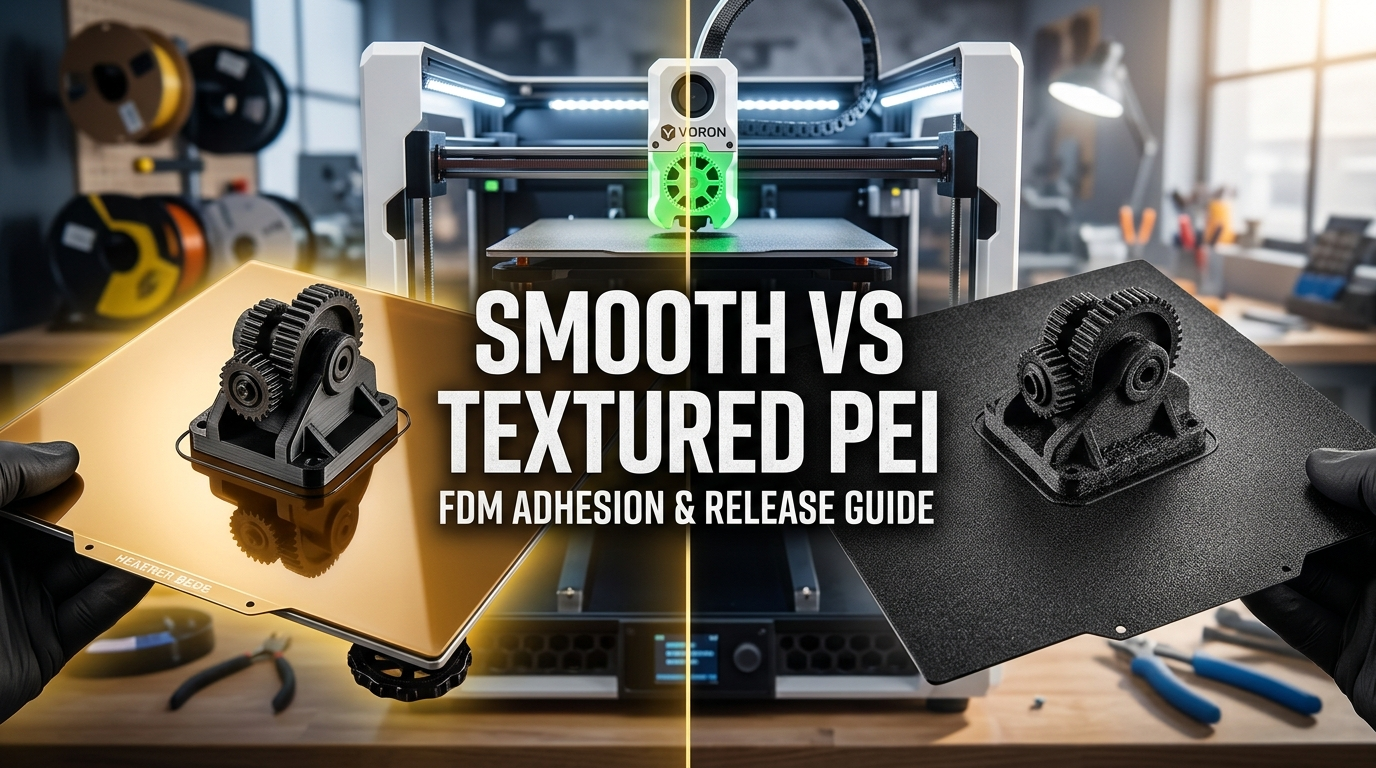
Selecting the right build plate surface is one of the most consequential decisions for reliable first-layer adhesion and effortless part release in FDM 3D printing. While Polyetherimide (PEI) coated flexible spring steel sheets have become the universal standard across modern high-speed machines, the physical interaction between molten thermoplastics and different PEI formulations varies dramatically depending on surface texture and polymer chemistry.
A glossy Smooth PEI sheet delivers mirror-like bottom finishes and aggressive suction-like grip for standard PLA models. However, printing flexible TPU or functional PETG directly onto that same smooth surface without a sacrificial release agent often results in permanent chemical bonding, tearing chunks of expensive amber PEI film straight off the spring steel substrate during part removal. Conversely, powder-coated Textured PEI sheets provide foolproof mechanical release when cooled, but require a slightly more aggressive Z-offset squish to seat molten extrusions into microscopic valleys.
In this technical guide, we break down the physics, material compatibility matrices, thermal release curves, and maintenance routines for Smooth PEI, Textured PEI, Satin/Semi-gloss sheets, and High-Temp engineering plates. Whether you are troubleshooting warped ABS corners, tuning first-layer squish for PETG, or trying to preserve your printer's build sheets over hundreds of printing cycles, this guide provides the practical calibration parameters you need.
Table of Contents
- Adhesion Mechanisms: Smooth vs. Textured PEI
- Why PETG and TPU Tear Smooth PEI Sheets
- Thermal Release Curves and Cooling Mechanics
- Z-Offset Calibration: Smooth vs. Textured Squish
- Comprehensive Build Plate Compatibility Table
- Maintenance Protocols: Soap vs. IPA vs. Acetone
- Satin, High-Temp, and Garolite (G10) Plates
- Frequently Asked Questions (FAQ)
- References & External Sources
Adhesion Mechanisms: Smooth vs. Textured PEI
Smooth PEI relies on microscopic van der Waals molecular forces across high surface contact areas, whereas textured PEI uses mechanical interlocking within powder-coated valleys. The smooth surface creates intimate contact with molten filament, while textured coatings distribute thermal stress across thousands of microscopic peaks and valleys.
To understand why these two surfaces behave differently under identical hotend temperatures, we have to look at the interface between the extruded thermoplastic and the polyetherimide coating:
- Smooth Ultem PEI Film: Smooth build plates use a continuous sheet of extruded Ultem 1000 polyetherimide resin (typically 0.125mm to 0.200mm thick) laminated to a spring steel core with high-temperature 3M acrylic adhesive. Because the film is flat at a microscopic level, molten filament wets the entire surface area. This maximises molecular contact, generating intense van der Waals attraction. The result is a glass-smooth, reflective bottom layer with zero visible texture.
- Powder-Coated Textured PEI: Textured sheets are manufactured by electrostatically applying polyetherimide powder directly onto raw spring steel and baking it in an industrial oven. This process creates a stippled, matte topography consisting of microscopic granules. When molten plastic is extruded under nozzle pressure, it flows into the recesses between granules. As the plastic solidifies, it forms a mechanical interlock that holds the print firmly against lateral shear forces while leaving microscopic air gaps underneath.
- Surface Energy and Polymer Wetting: Polyetherimide exhibits high surface energy at elevated temperatures (50°C to 110°C), encouraging polar polymers like PLA, ABS, and PETG to spread evenly. However, because textured PEI presents roughly 40% less direct molecular contact area than smooth film, it generates lower raw chemical grip. It compensates for this with physical friction and mechanical geometric locking.
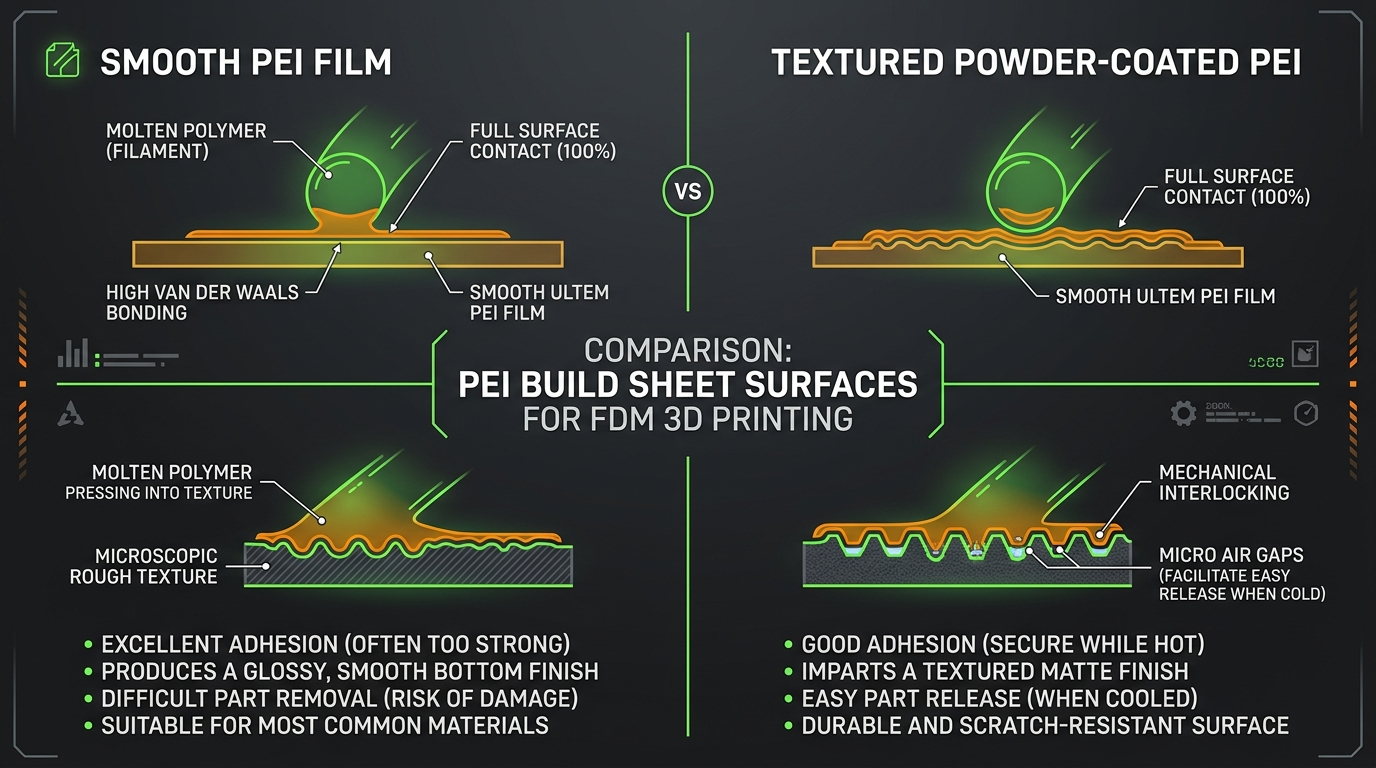
For large PLA prints with wide, flat footprints, Smooth PEI provides unmatched resistance against edge curling. However, for materials that experience high thermal shrinkage or form aggressive chemical bonds with polyetherimide, that same intense molecular contact becomes a double-edged sword during post-print removal.
Why PETG and TPU Tear Smooth PEI Sheets (And How to Prevent Bed Damage)
PETG and TPU form aggressive intermolecular bonds with smooth Ultem PEI that exceed the shear strength of the sheet's lamination adhesive. When cooling, PETG contracts while maintaining chemical affinity with PEI, ripping the polymer film away from the spring steel base unless a sacrificial barrier is applied.
In online maker communities like r/3Dprinting and r/BambuLab, ruined smooth build plates are among the most frequently reported user errors. Here is the material science behind why this destruction occurs:
- Polymer Chain Entanglement at Elevated Temperatures: PETG (Polyethylene Terephthalate Glycol-modified) and Polyetherimide share compatible polar molecular groups. When PETG is extruded at 230°C–250°C onto a 70°C–80°C smooth PEI sheet, the polymer chains at the interface interdiffuse and fuse together. The bond strength between cooled PETG and smooth Ultem film frequently exceeds 25 MPa.
- Adhesive Layer Shear Failure: The 3M 468MP transfer tape bonding the PEI film to the spring steel sheet has a peel adhesion rating of approximately 7 to 10 N/cm. When you attempt to pry a cooled PETG model off bare smooth PEI, the vertical tensile force required to break the PETG-to-PEI bond is significantly higher than the force holding the PEI film to the steel. Consequently, the PEI bubble tears off the metal plate, permanently ruining that side of your build sheet.
- TPU Suction and Elastic Memory: Flexible TPU (Thermoplastic Polyurethane) does not suffer from high thermal shrinkage, but its elastomeric nature creates vacuum suction against smooth surfaces. Attempting to pull flexible parts off bare smooth PEI stretches the film upward, causing localized delamination bubbles.
Maker's Workshop Note: PETG on Smooth vs. Textured PEI
During functional prototyping tests in my workshop, I printed an identical PETG structural hinge on both bare smooth PEI and textured powder-coated PEI. The part on the bare smooth sheet required a razor blade and solvent to remove, leaving a 15mm blister in the PEI film. On the textured powder-coated sheet, the part released with an audible click as soon as the bed dropped below 32°C, leaving the build plate pristine.
If you must print PETG or TPU on a smooth PEI surface to achieve a glossy finish, you must apply a sacrificial release agent before starting the job:
- PVP-Based Glue Stick: Apply a thin, uniform layer of standard water-soluble glue stick (such as Elmer's Disappearing Purple or UHU). The polyvinylpyrrolidone layer acts as a mechanical separator; during removal, the glue shears internally, allowing the part to detach without stressing the PEI film.
- Liquid Bed Adhesives (Magigoo, Layerneer): Formulated specifically for 3D printing, liquid polymer release agents dry into a microscopic film that holds parts firmly while hot and dissolves or shears cleanly when cold.
- Surfactant / Glass Cleaner Mist (Windex): Spraying a light mist of ammonia-free glass cleaner and wiping it down leaves a microscopic surfactant residue that slightly reduces PEI surface energy, preventing aggressive PETG fusion without creating visible glue streaks.
For more detailed troubleshooting on part warping and surface adhesion across various build surfaces, read our complete guide on How to Improve 3D Print Bed Adhesion.
Thermal Release Curves and Cooling Mechanics
Textured PEI spring steel build plates release 3D prints automatically when the temperature drops below the polymer's glass transition threshold. This self-releasing effect is driven by the mismatch in Coefficient of Thermal Expansion (CTE) between the flexible steel sheet and the contracting plastic part.
Spring steel has a linear Coefficient of Thermal Expansion of roughly \(11 \times 10^{-6} \text{ K}^{-1}\), whereas thermoplastics like PLA (\(68 \times 10^{-6} \text{ K}^{-1}\)) and ABS (\(73 \times 10^{-6} \text{ K}^{-1}\)) contract at nearly six to seven times that rate as they cool from printing temperature to ambient room temperature.
"Patience is the best scraper. Attempting to pry a structural print off a hot build plate at 65°C will warp the part and damage the coating. Letting the spring steel sheet cool to room temperature allows thermal contraction physics to do 100% of the release work for you."
Here is how the thermal release process works across temperature stages:
- Printing Phase (55°C–100°C): The heated bed maintains the base layers above or near the polymer's Glass Transition Temperature (\(T_g\)). At this temperature, the plastic remains slightly compliant, conforming to the PEI texture while thermal expansion keeps the mechanical interlock firmly engaged.
- Transition Zone (40°C–50°C): As the bed heater turns off, the plastic passes through its \(T_g\) and transitions into a rigid, glassy state. The thermoplastic begins shrinking rapidly along its lateral X and Y axes, while the underlying steel sheet contracts at a much slower rate.
- Release Zone (<32°C): The shear stress at the interface between the rapidly contracting plastic peaks and the slowly contracting steel exceeds the mechanical grip of the textured coating. Microscopic detachment fronts spread across the bottom surface, often accompanied by crackling sounds. Once room temperature (20°C–25°C) is reached, the print sits freely on the bed and can be lifted off with zero resistance.
Z-Offset Calibration: Smooth vs. Textured Squish
Textured PEI sheets require 0.02mm to 0.05mm more negative Z-offset squish than smooth PEI sheets to compress molten plastic into the coating's surface texture. Setting your Z-offset identically between smooth and textured sheets will lead to under-squished first layers and bed adhesion failures on textured plates.
Because automated bed leveling probes (such as inductive sensors, optical sensors, or nozzle load cells) trigger on the topmost physical peaks of the textured coating, the average effective surface plane sits slightly lower within the microscopic valleys:
- Calibrating for Smooth PEI: On a smooth sheet, the nozzle extrudes onto a perfectly flat reference plane. The target first-layer line should resemble a flattened oval where adjacent extrusion perimeters fuse seamlessly without creating raised ridges between paths. Over-squishing on smooth PEI creates rough top surfaces on layer one and increases the risk of excessive part bonding.
- Calibrating for Textured PEI: On a textured powder-coated sheet, the molten bead must be pressed downward with enough force to fill the micro-crevices between granules. Lower your Z-offset by an additional 0.025mm to 0.040mm relative to your smooth plate baseline. When properly calibrated, looking at the bottom of the removed print under light should reveal a solid, unbroken stippled texture with no visible pinholes or gaps between perimeter passes.
- Printers with Automatic Nozzle Tapping: Modern high-speed machines like the Bambu Lab X1C/P1S, Creality K1C, and Prusa MK4 use nozzle load cells or eddy current sensors to measure physical contact. In slicers like Bambu Studio or OrcaSlicer, always select the exact build plate profile (e.g., "Textured PEI Plate" vs. "Smooth PEI / High Temp Plate") so the firmware automatically applies the correct internal Z-offset compensation offset.
For an in-depth walkthrough on calibrating inductive probes, dial indicators, and automatic mesh leveling, consult our guide to 3D Printer Bed Leveling & Calibration.
Comprehensive Build Plate Compatibility Table
The following technical reference matrix details material compatibility, recommended bed temperatures, release characteristics, and mandatory surface preparation steps across major FDM build plate types:
| Filament Polymer | Smooth PEI Film | Textured Powder-Coated PEI | Satin / Semi-Gloss Sheet | Recommended Bed Temp | Release Agent Requirement |
|---|---|---|---|---|---|
| PLA / PLA+ | Excellent (Mirror finish, high grip) | Excellent (Matte finish, reliable release) | Excellent (Slight satin finish) | 55°C – 65°C | None required (clean surface) |
| PETG / PETG-CF | Dangerous (Risk of tearing PEI film) | Excellent (Default choice, auto-release) | Excellent (Direct print without glue) | 70°C – 85°C | Glue stick / Windex mandatory on Smooth |
| ABS / ASA | Good (Requires brim on large parts) | Excellent (Strong thermal grip hot) | Excellent (Optimal balance for warping) | 95°C – 110°C | None required on Textured (Enclosure recommended) |
| TPU (95A / 85A) | Dangerous (Excessive bond / stretching) | Good to Excellent (Easy peel cold) | Good (Moderate adhesion) | 35°C – 50°C | Glue stick mandatory on Smooth PEI |
| Polycarbonate (PC) | Moderate (High thermal warp forces) | Good (Needs high bed temp) | Good (With specialized glue) | 105°C – 120°C | Magigoo PC recommended |
| PA-CF / Nylon-CF | Moderate (Requires bed adhesive) | Good (Use high bed temp & brim) | Excellent (Great dimensional grip) | 80°C – 100°C | PVP glue or PA adhesive recommended |
To compare the mechanical and thermal properties of these polymers before selecting your build plate setup, review our technical breakdown on FDM 3D Printing Materials Comparison: PLA vs. PETG vs. ABS vs. ASA.
Maintenance Protocols: Soap vs. IPA vs. Acetone
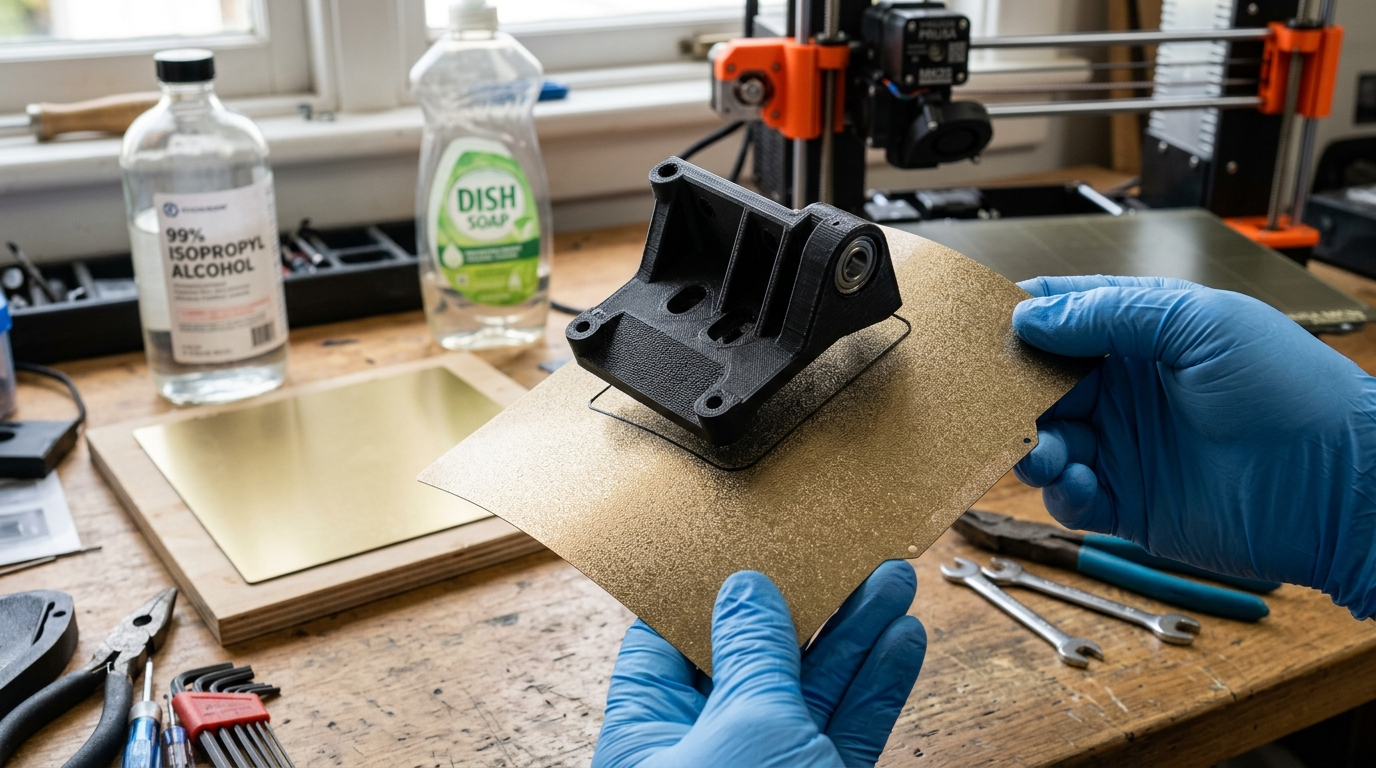
Routine cleaning with 99% Isopropyl Alcohol (IPA) removes surface dust, but washing with warm water and dish soap is required to dissolve human skin oils. Over time, invisible sebum lipids accumulate on the PEI surface from handling, creating localized adhesion dead zones where prints lift and warp.
Follow this strict maintenance protocol to keep your spring steel build sheets performing like new:
- Daily Inter-Print Cleaning (99% Isopropyl Alcohol): Before every print job, wipe the cooled build plate down with a lint-free microfiber cloth saturated with 99% IPA (avoid 70% rubbing alcohol, which contains moisturizers and excess water). IPA dissolves light residue and removes ambient workshop dust. Never apply IPA to a hot bed (above 50°C), as the alcohol will evaporate instantly before lifting surface contaminants.
- Bi-Weekly Deep Wash (Warm Water & Degreasing Dish Soap): When parts begin losing adhesion despite IPA wipe-downs, remove the spring steel sheet from the printer and take it to a sink. Wash thoroughly using warm water and a few drops of unscented dish soap (such as Dawn or Fairy). Scrub gently with a non-scratch sponge to emulsify and wash away finger oils. Rinse completely with clean water and dry with clean paper towels without touching the printable area with bare fingers.
- The Acetone Rule (Smooth PEI vs. Textured Warning): Acetone can be used sparingly (once every 2–3 months) on Smooth Ultem PEI sheets to rejuvenate oxidized polyetherimide and dissolve micro-plastic deposits. NEVER use acetone on powder-coated Textured PEI sheets. Acetone penetrates micro-cracks in the powder coating, dissolves the binder chemistry, and causes the textured granules to flake off the steel sheet permanently.
- Mechanical Rejuvenation for Smooth PEI: If a smooth PEI sheet loses adhesion after prolonged use, lightly rub the surface in circular motions with ultra-fine 0000 steel wool or 1500-grit wet sandpaper lubricated with soapy water. This restores micro-roughness and exposes fresh PEI polymer chains without creating deep scratches.
Satin, High-Temp, and Garolite (G10) Plates
Satin sheets, High-Temp Smooth plates, and Garolite (G10/FR4) offer specialized surface alternatives for engineering polymers. They bridge the gap between high-gloss aesthetics and effortless material compatibility.
- Satin / Semi-Gloss Sheets: Developed notably by Prusa Research and adopted widely across the industry, Satin powder-coated sheets feature an ultra-fine texture that sits midway between smooth and heavy-textured PEI. They provide enough microscopic roughness to allow direct printing of both PLA and PETG without using glue sticks, while delivering a refined, low-glare satin finish on bottom surfaces.
- High-Temp Smooth Sheets: These plates use a specialized polyimide or composite smooth film designed to withstand continuous bed temperatures above 115°C without adhesive degradation. They are ideal for high-speed printing of ABS, ASA, and Polycarbonate parts where a smooth finish is required for gasket sealing or optical clarity.
- Garolite (G10 / FR4) Build Plates: Made from high-pressure fiberglass laminate bonded with epoxy resin, Garolite plates are the premier surface for printing unreinforced and carbon-fiber reinforced Nylons (PA6, PA12). Molten Nylon grips hot Garolite at 70°C–80°C and releases effortlessly when cooled, eliminating the need for PVA glue washes.
Frequently Asked Questions (FAQ)
1. Can I print PETG directly on a Smooth PEI sheet without glue?
No. Printing PETG directly onto bare smooth PEI carries a high risk of permanent chemical fusion. When the print cools, the bond between the PETG and the smooth Ultem film is stronger than the adhesive holding the film to the steel sheet, resulting in torn PEI bubbles. Always apply a thin layer of glue stick or use a textured PEI sheet instead.
2. Why does my Textured PEI sheet fail to hold PLA prints?
PLA adhesion failure on textured PEI is almost always caused by one of two factors: skin oil contamination (sebum) or an incorrect Z-offset. Wash the plate thoroughly with warm water and degreasing dish soap (not just alcohol wipes), and lower your Z-offset by an additional 0.03mm so the molten PLA squishes into the surface texture.
3. Is 70% Isopropyl Alcohol suitable for cleaning PEI build plates?
No. 70% IPA contains 30% water and often includes residual additives or fragrances that leave a thin film on the build plate. Always use 99% pure Isopropyl Alcohol with a clean microfiber cloth to ensure fast evaporation without leaving residue.
4. How long does a powder-coated Textured PEI build plate last?
With proper maintenance (cooling before part removal, avoiding metal scraper gouges, and never using acetone), a high-quality powder-coated textured PEI plate can last for thousands of print hours. Unlike smooth film, there is no laminated sticker layer that can bubble or delaminate over time.
5. Does Textured PEI leave visible patterns on bottom surfaces?
Yes. Powder-coated textured PEI imparts a uniform, matte stippled texture to the entire bottom surface of your 3D print. This is often desirable for aesthetic and functional parts because it masks individual extrusion layer lines, hides minor first-layer imperfections, and reduces surface glare.
References & External Sources
- Prusa Knowledge Base: Flexible Steel Sheets Guide – Official manufacturer guide detailing material compatibility and maintenance for smooth, textured, and satin spring steel plates.
- Bambu Lab Wiki: Textured PEI Plate Maintenance & Adhesion – Technical documentation on cleaning procedures, dish soap degreasing, and Z-offset calibration for high-speed CoreXY beds.
- OrcaSlicer Official Calibration Handbook – Comprehensive open-source documentation on first-layer flow rates, Z-offset tuning, and build surface profile selection.
- Voron Design Documentation: Bed Preparation & Thermal Heat Soaking – Engineering guidelines on managing thermal expansion and spring steel bed adhesion for enclosed high-temperature builds.
About the Author: Dinu Suciu
Dinu Suciu is an FDM 3D printing practitioner, prototyping engineer, and founder of 3D Print Book. Operating high-speed enclosed CoreXY FDM printers, Dinu focuses on practical material testing, bed adhesion mechanics, and routine machine maintenance. Have questions about build plates, filament adhesion, or custom prototyping? Reach out through our Contact Page.