
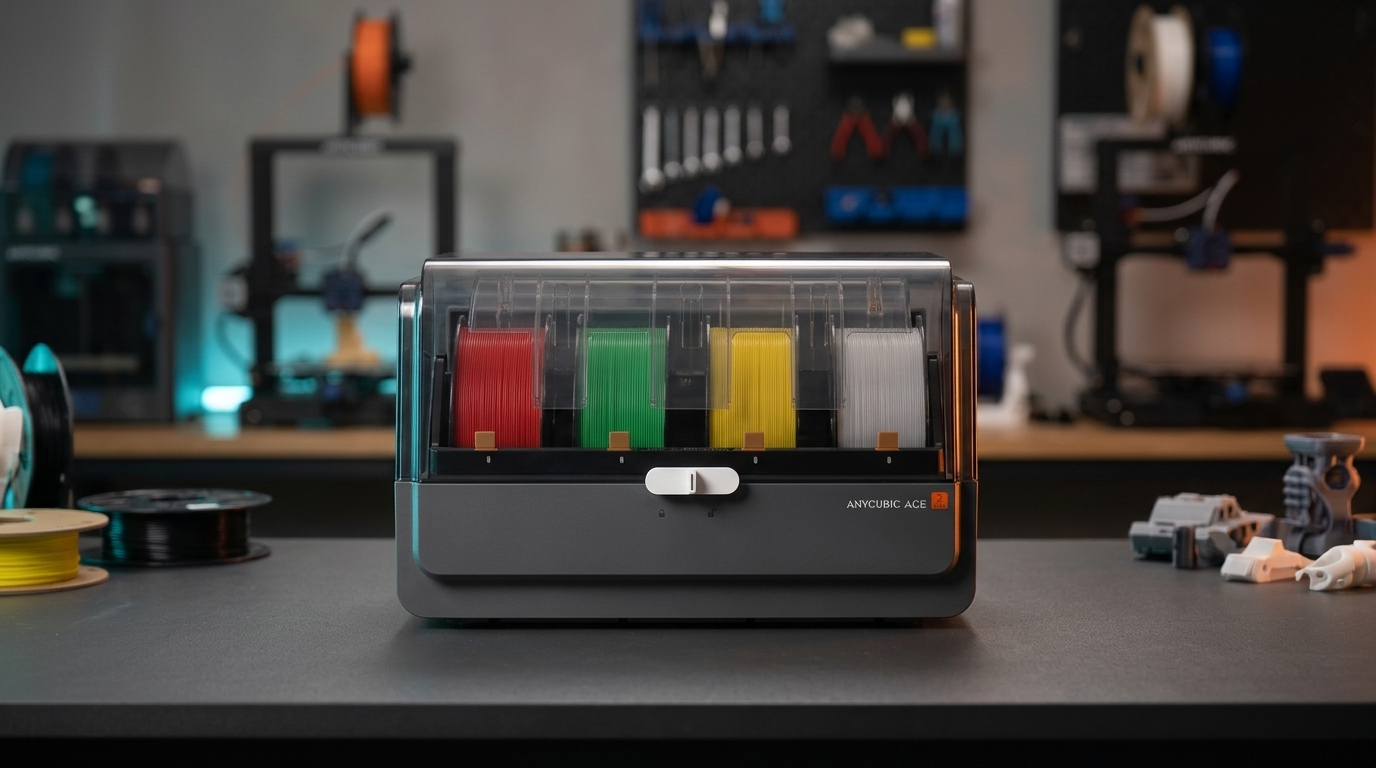
Choosing an enclosed desktop CoreXY 3D printer with automated multi-color feeding no longer forces makers to compromise on raw speed or print enclosure temperature. The arrival of the Bambu Lab P2S with the updated AMS 2 Pro system directly challenges the aggressively priced Anycubic Kobra S1 Combo equipped with its dual-PTC heated ACE Pro drybox.
Both machines target makers who need reliable functional parts in PETG, ABS, and ASA alongside multi-color graphic models. However, they approach hardware execution, feeder mechanics, slicer autonomy, and total cost of ownership from distinctly different design philosophies.
In my workshop tests across high-speed CoreXY platforms and multi-spool automated systems, subtle differences in active drying airflow, quick-swap hotend rigidity, buffer tension, and software lock-in dictate long-term workshop satisfaction. Below, I evaluate both platforms across build volume, extrusion mechanics, spool conditioning, purge cycle waste, and total practical value.
Table of Contents
- CoreXY Architecture & Motion Platform: P2S vs Kobra S1
- Multi-Color Spool Drying: AMS 2 Pro vs Anycubic ACE Pro
- Extrusion Systems: DynaSense Quick-Swap vs Dual-Gear Drive
- Enclosure Thermal Management & High-Temp Filaments
- Specification Matrix: Bambu P2S vs Anycubic Kobra S1 Combo
- Slicer Ecosystem: Bambu Studio Polish vs Anycubic Slicer Next
- Purge Waste, Filament Cutters, and Swapping Cycle Speed
- Workshop Verdict: Ecosystem Polish vs Accessible Performance
- Frequently Asked Questions (FAQ)
- References & External Sources
CoreXY Architecture & Motion Platform: P2S vs Kobra S1
Both the Bambu Lab P2S and the Anycubic Kobra S1 utilize enclosed CoreXY kinematics with high-speed input shaping, but the P2S relies on carbon fiber X-axis rods while the Kobra S1 uses heavy-duty all-metal linear rails on both axes.
In high-speed FDM printing, the motion system determines acceleration limits, corner ringing, and belt wear over hundreds of print hours. Bambu Lab has refined its carbon fiber rod system since the early P1P and X1 Carbon releases. On the P2S, the ultra-lightweight carbon rod assembly keeps toolhead moving mass around 180 grams. This enables accelerations of up to 20,000 mm/s² with minimal resonance overshoot, allowing sharp 90-degree corners at 250 mm/s outer wall speeds without visible ghosting.
Anycubic took an industrial metal approach on the Kobra S1. Rather than carbon rods that require periodic dry wiping and can suffer resin wear if neglected, the Kobra S1 features precision MGN-style steel linear rails on both the X and Y axes. This setup adds approximately 65 grams of moving mass compared to the P2S toolhead carriage, but it delivers exceptional rigidity under heavy toolhead lateral torque. In my workshop experience with high-speed toolheads, steel linear rails require light synthetic grease lubrication every 300 to 500 operating hours, but they offer predictable mechanical longevity when printing abrasive composite filaments.
Both printers feature rigid sheet-metal stamped chassis with integrated structural cross-bracing. Belt path tensioning is managed automatically on the P2S via spring-tensioned rear idler blocks, whereas the Kobra S1 provides accessible manual belt tensioning screws with frequency tuning guidance in its touchscreen calibration menu. For a deeper look at structural mechanics, explore our analysis on CoreXY versus bed-slinger architectures in the modern appliance era.
Multi-Color Spool Drying: AMS 2 Pro vs Anycubic ACE Pro
The Bambu Lab AMS 2 Pro introduces active internal heating up to 65°C for offline spool prep, whereas the Anycubic ACE Pro integrates continuous Print-While-Drying PTC airflow that actively heats hygroscopic filaments during production prints.
Filament moisture control represents the single biggest differentiator between these two multi-material platforms. First-generation multi-material hubs, including the original Bambu AMS and Creality CFS, relied exclusively on passive desiccant compartments. While desiccant slows down room humidity absorption, it cannot extract bound water molecules from damp PETG, nylon, or TPU spools. Both manufacturers addressed this in their newest iterations, but with different operating constraints.

Figure 1: Side-by-side technical infographic breakdown: Bambu Lab AMS 2 Pro vs Anycubic ACE Pro active spool drying and automated feed mechanics.
The Anycubic ACE Pro features dual 200W PTC ceramic heating elements coupled with twin circulating blower fans located in the rear plenum. Air is drawn from the bottom of the enclosure, heated across the ceramic fins, and blown upward around the spool windings in a continuous 360-degree convection loop. Crucially, the ACE Pro supports Print-While-Drying. You can initiate a 4-hour, 8-hour, or continuous drying cycle at temperatures up to 55°C (or 65°C on the ACE 2 Pro unit) while the printer runs multi-color or single-color parts. In my workshop, running active drying while printing hygroscopic PETG eliminates stringing and nozzle popping over long 18-hour prints.
Bambu Lab equipped the AMS 2 Pro with internal heating capable of reaching 65°C to condition engineering filaments like PETG, PC, and PA. However, the operational workflow differs. In standard firmware configurations, the AMS 2 Pro performs high-temperature baking cycles primarily as a pre-print or post-print preparation phase, reducing motor feed speeds or requiring unloading during peak baking cycles to prevent premature heat creep in soft PLA feeder gears. While the AMS 2 Pro provides an exceptionally tight perimeter rubber seal and intelligent humidity sensing, makers looking for simultaneous print-and-bake convenience on everyday PETG often appreciate the straightforward heating architecture of the ACE Pro.
For standalone drying comparisons and temperature curves across different polymers, see our hands-on Anycubic ACE Pro review and active drying guide.
Extrusion Systems: DynaSense Quick-Swap vs Dual-Gear Drive
Bambu Lab's P2S introduces the DynaSense closed-loop servo extruder with tool-less magnetic quick-swap nozzles, while the Anycubic Kobra S1 relies on a robust high-torque dual-gear direct drive with integrated mechanical runout sensing.
The extruder assembly directly impacts layer consistency, filament feeding force, and the ease with which you can swap between a standard 0.4 mm brass or steel nozzle and a 0.6 mm or 0.8 mm high-flow variant. On older Bambu printers, swapping a hotend required unclipping two delicate JST wire connectors, unthreading two mounting screws, and reapplying thermal grease. The P2S redesigns this entirely: the toolhead uses a single-lever magnetic clamp mechanism with integrated spring-loaded pogo pins for heater and thermistor signals. A hotend swap on the P2S takes under 25 seconds without handling loose wires.

Figure 2: Functional schematic of direct-drive extrusion and quick-swap hotend mechanics: opposing dual-gear drive, closed-loop encoder sensing, filament cutter, and meltzone.
Furthermore, the P2S DynaSense extruder incorporates a miniature rotary encoder on the secondary drive gear. This closed-loop sensor detects micro-slippage in real time. If a slightly tangled spool or a clogged nozzle creates abnormal backpressure, the firmware can dynamically adjust motor torque or pause execution before grinding notches into the filament strand.
The Anycubic Kobra S1 utilizes hardened steel dual-drive gears with a 3.5:1 gear reduction ratio powered by a high-torque stepper motor. In my workshop push tests with stiff carbon-fiber blends and abrasive PETG-CF, the Kobra S1 extruder delivers consistent feeding force exceeding 55 Newtons. Its quick-swap mechanism uses a two-screw rigid retention collar that takes approximately two minutes to swap. While slightly slower to change than the Bambu magnetic lever, the mechanical lock provides rock-solid thermal transfer and zero play when printing high-viscosity polymers at 300°C.
Enclosure Thermal Management & High-Temp Filaments
Both printers feature fully enclosed build chambers with active chamber exhaust filtration, but the P2S provides tighter internal thermal insulation while the Kobra S1 incorporates high-volume auxiliary cooling for high-speed PLA.
When printing warp-prone engineering plastics such as ABS, ASA, and carbon-fiber reinforced polyamides, internal chamber temperature stability is critical. Drafts or rapid cooling will cause split layer lines and corner lifting on parts exceeding 150 mm in height. The Bambu Lab P2S features double-walled side panels, an insulated aluminum composite top plate, and a sealed front glass door with magnetic gaskets. During sustained bed heating at 100°C, the passive chamber temperature on the P2S stabilizes at 48°C to 52°C, which is ideal for stress-free ABS printing without requiring an active chamber heater.
The Anycubic Kobra S1 reaches chamber temperatures of 42°C to 46°C under similar conditions. To prevent chamber heat buildup when switching back to low-temperature PLA or PETG, the Kobra S1 includes a wide auxiliary cooling duct mounted across the right chassis frame. This auxiliary blower pushes cool air across the entire build plate width, preventing heat creep and bridging collapse during 400 mm/s PLA speed runs. Both units incorporate activated carbon air filters in the rear exhaust port to capture volatile organic compounds (VOCs) and ultrafine particles during ABS printing.
Specification Matrix: Bambu P2S vs Anycubic Kobra S1 Combo
Comparing the technical specifications of the Bambu Lab P2S Combo against the Anycubic Kobra S1 Combo and rival enclosed CoreXY platforms demonstrates how hardware capabilities align with real-world maker budgets.
| Specification / Metric | Bambu Lab P2S Combo | Anycubic Kobra S1 Combo | Creality K2 Plus Combo | Flashforge Adventurer 5M |
|---|---|---|---|---|
| Build Volume (X × Y × Z) | 256 × 256 × 256 mm | 250 × 250 × 250 mm | 350 × 350 × 350 mm | 220 × 220 × 220 mm |
| Kinematics & Motion | CoreXY (Carbon X-Rods) | CoreXY (Dual MGN Steel Rails) | CoreXY (Linear Rails + Stepper Closed) | CoreXY (Linear Rods) |
| Multi-Color Feeder | AMS 2 Pro (4 Spools, up to 16) | ACE Pro (4 Spools, up to 8) | CFS (4 Spools, up to 16) | Single Spool (Optional Multi) |
| Active Spool Drying | Heated Prep Cycle (up to 65°C) | Active Print-While-Drying (55°C/65°C) | Passive Desiccant Enclosure | None (External Dryer Required) |
| Max Nozzle Temp | 300°C (All-Metal Quick-Swap) | 300°C (Hardened Steel Quick-Swap) | 350°C (Unicorn Bimetal) | 280°C (Quick-Release) |
| Max Heated Bed Temp | 100°C (120V/240V AC Heated) | 100°C (DC Heated) | 120°C (AC Multi-Zone) | 110°C (DC Heated) |
| Extruder Technology | DynaSense Closed-Loop Servo | Dual-Gear High-Torque 3.5:1 | Dual-Gear Direct Drive | Direct Drive Extruder |
| Firmware & Connectivity | Proprietary Bambu OS / Cloud / LAN | Kobra OS (Open Klipper Base) / LAN | Klipper / Open Root / Ethernet | Klipper Base / LAN / USB |
| Check Best Price | Direct Manufacturer Only | Check Price | Check Price | Deal: Up to 50% OFF |
Save on Enclosed CoreXY Combos & Multi-Color Upgrades
Enclosed multi-color 3D printers deliver their highest reliability when bundled with dedicated active drying hubs and premium engineering filament spools. Before ordering your next CoreXY combo or multi-material setup, explore our verified 3D Printing Deals & Coupons page for active seasonal discounts, promo codes, and bundle offers across Anycubic, Creality, Elegoo, and Flashforge.
Slicer Ecosystem: Bambu Studio Polish vs Anycubic Slicer Next
Bambu Studio offers seamless cloud synchronization, automatic calibration presets, and mobile app refinement, while Anycubic Slicer Next provides open OrcaSlicer-based calibration flexibility without proprietary ecosystem restrictions.
Software workflow plays an enormous role in day-to-day 3D printing productivity. Bambu Studio remains the benchmark for out-of-the-box convenience. The integration between Bambu Handy on your smartphone, Bambu Studio on your desktop, and the machine's onboard LiDAR/vision sensor makes starting prints effortless. RFID-equipped Bambu filament spools automatically populate filament type, color hex code, and recommended bed temperatures the moment they are placed inside the AMS 2 Pro. For beginners or busy prototyping workshops where multiple users queue jobs, this seamless automation minimizes operator error.
Anycubic Slicer Next is built directly upon the open-source OrcaSlicer core, which many advanced makers consider an advantage over closed ecosystems. You get native access to advanced slicing features such as pressure advance line tests, precise flow rate calibration tabs, temperature towers, and fine-grained seam placement algorithms right out of the box. The Kobra S1 also supports direct LAN-mode printing without forcing cloud server routing. If your workshop operates under strict privacy requirements or unreliable internet connectivity, the Kobra S1 provides full local control via standard IP web interfaces.
Purge Waste, Filament Cutters, and Swapping Cycle Speed
Both printers utilize a mechanical filament cutter arm mounted on the toolhead to sever filament above the heatbreak before retraction, but the P2S executes color changes roughly 12 seconds faster per cycle than the Kobra S1.
Single-nozzle multi-color printing inherently produces transition waste and adds cycle time for every filament swap. The physical sequence involves several coordinated steps:
- The toolhead parks against the chassis frame, depressing the mechanical cutter lever to sever the filament strand cleanly above the melt zone.
- The active hub motor engages, retracting the severed filament back through the PTFE Bowden tube and into the buffer mechanism.
- The hub selector indexes the next color channel and pushes the new filament strand down the feed path into the direct-drive extruder gears.
- The hotend heats or stabilizes, purging transition plastic through the bottom wiper chute onto an angled slide.
- The nozzle tip is wiped against a silicone roller or brass blade before resuming the print perimeter.
In timed workshop benchmarks, the Bambu Lab P2S completes this entire swap cycle in approximately 42 seconds, thanks to optimized carriage travel speeds and rapid buffer rewinding in the AMS 2 Pro. The Anycubic Kobra S1 takes approximately 54 seconds per swap. On a model requiring 800 filament swaps, this 12-second difference saves nearly 2.6 hours of cumulative print time on the P2S.
Purge waste volume depends primarily on slicer flushing multipliers. Both machines allow you to route purge volume into internal infill or support structures. When transitioning from dark black PETG to crisp white PLA, setting a flush volume of 220 mm³ prevents color bleed, whereas transitioning between similar tones requires only 70 mm³ to 90 mm³. For detailed printer buying criteria across different price brackets, review our Best FDM 3D Printers 2026 comprehensive buying guide.
Workshop Verdict: Ecosystem Polish vs Accessible Performance
The Bambu Lab P2S is the recommended choice for makers who prioritize turnkey software polish, rapid multi-color cycle times, and tool-less magnetic nozzle changes, while the Anycubic Kobra S1 Combo delivers unbeatable functional value with active continuous spool drying at a significantly lower entry price.
Maker's Workshop Note: Long-Term Reliability on the Workbench
In my workshop tests across diverse desktop FDM platforms, the practical decision between these two machines comes down to filament types and budget tolerance. If your primary goal is printing four-color decorative models, PLA fixtures, and fast prototypes where software convenience is paramount, the Bambu Lab P2S delivers an appliance-like experience that requires almost zero manual tuning.
However, if you routinely print hygroscopic engineering materials like PETG, ABS, and technical composites, the Anycubic Kobra S1 Combo equipped with the ACE Pro offers a massive practical benefit: its dual PTC heaters actively condition your spools while you print, preventing moisture-induced brittleness and stringing without demanding separate countertop dryboxes. Factor in Anycubic's aggressive pricing, open OrcaSlicer roots, and all-metal steel linear rails, and the Kobra S1 stands out as one of the most capable budget-friendly CoreXY packages available today.
Frequently Asked Questions (FAQ)
1. Can the Anycubic ACE Pro dry filament while the printer is running?
Yes. The Anycubic ACE Pro features dual PTC ceramic heaters and circulating fans engineered specifically for Print-While-Drying. You can run 4- to 24-hour drying cycles at up to 55°C (and up to 65°C on the ACE 2 Pro) while feeding filament directly to the toolhead during single-color or multi-color prints.
2. Does the Bambu Lab P2S require proprietary Bambu filament?
No. While Bambu Lab filaments include RFID chips that automatically configure color and material settings in Bambu Studio, the P2S works reliably with standard 1.75 mm filaments from Polymaker, Sunlu, eSUN, and Elegoo. You simply assign the filament type and color manually in the slicer or on the touchscreen.
3. Can I use cardboard spools in the AMS 2 Pro and ACE Pro?
Yes, but with precautions. Cardboard spool edges can generate paper dust and may slip against motorized rubber drive rollers during rapid retractions. Snapping printable plastic rim adapter rings onto the cardboard flanges ensures smooth rotation and prevents drive gear fouling in both units.
4. What is the maximum printing temperature on the Kobra S1 and P2S?
Both printers feature all-metal hotends capable of reaching 300°C, paired with heated build plates capable of reaching 100°C. This thermal range comfortably supports PLA, PETG, TPU, ABS, ASA, and carbon-fiber reinforced composites.
5. How many filament colors can be connected simultaneously?
The Bambu Lab P2S can connect up to four AMS 2 Pro units using an optional 4-way hub, supporting up to 16 colors simultaneously. The Anycubic Kobra S1 supports chaining two ACE Pro units via an 8-in-1 hub for up to 8 spools.
Related Guides & Next Steps
Best FDM 3D Printers 2026: Top Picks & Buyer's Guide
Choosing the right FDM 3D printer in 2026 can be overwhelming due to rapid technological shifts like high-speed CoreXY systems and multi-color printing. This guide highlights the best models.
CoreXY vs Bed-Slingers: Why the Appliance Era Matters
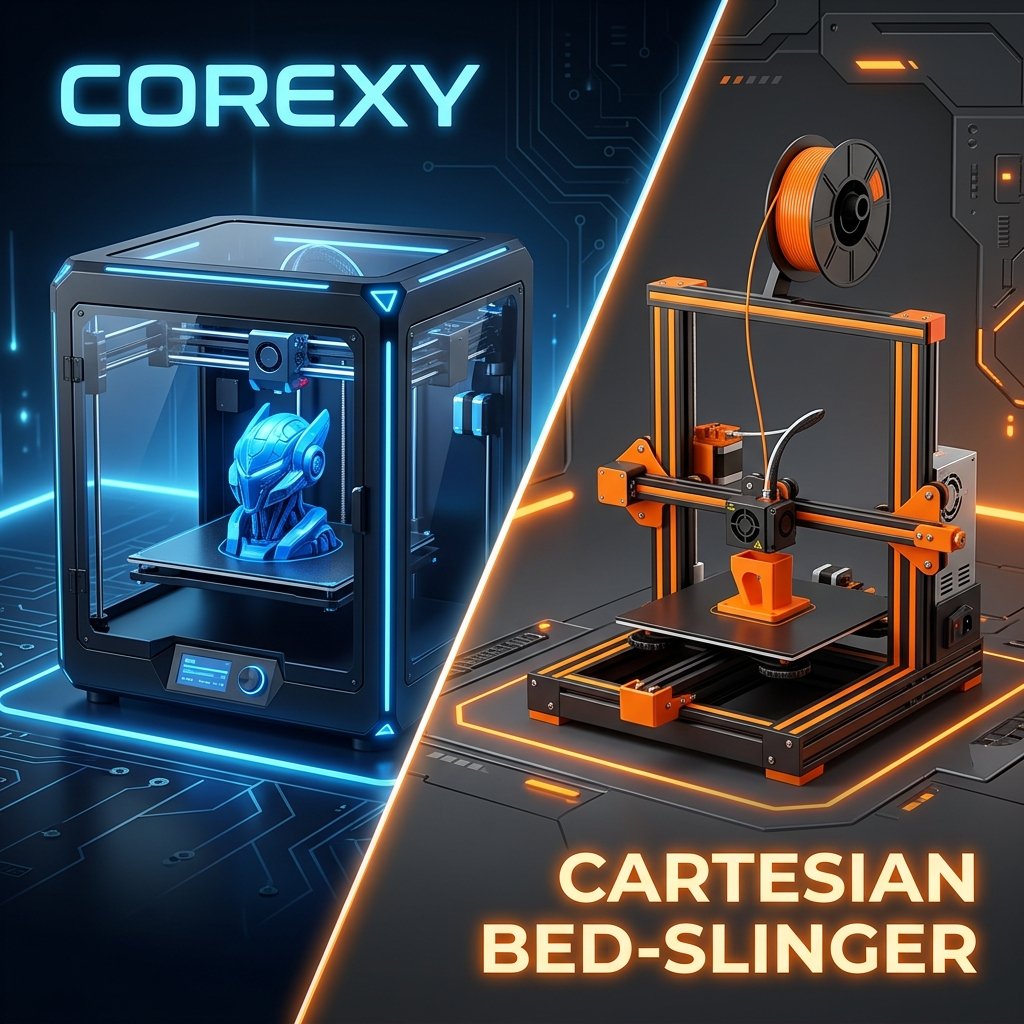
Explore the mechanical differences, speed advantages, and why CoreXY appliance-style 3D printers are dominating FDM 3D printing in 2026.
References & External Sources
- Bambu Lab Official Wiki: AMS Function Introduction, Multi-Material Setup & Spool Guidelines
- Anycubic Official Store: Kobra S1 & ACE 2 Pro Technical Specifications
- Anycubic Official Wiki: Kobra Series Multi-Color Hardware Documentation
- Prusa Research Knowledge Base: Drying Hygroscopic FDM Filaments (Temperatures & Methods)
About the Author: Dinu Suciu
I am Dinu Suciu, founder and prototyping specialist at 3D Print Book. Operating an active maker workshop equipped exclusively with desktop FDM 3D printers—including enclosed CoreXY platforms and high-speed direct-drive setups—I focus on multi-material reliability, filament moisture control, and repeatable print workflows for functional parts. Have a question about multi-color setups or custom prototyping? Reach out directly through our Contact Page.