Achieving a perfect first layer is the single most important factor for 3D printing success. If your print bed is not leveled, models will warp, fail to adhere, or even damage your printer. In this comprehensive guide, we cover manual tramming, automatic bed leveling sensors, setting Z-offset, and how to calibrate your bed for flawless results.
What is 3D Printer Bed Leveling and Why is it Critical?
Bed leveling (or tramming) is the process of adjusting a 3D printer's build plate so that it is at an equal distance from the nozzle across its entire surface. It is critical because an uneven bed prevents proper first-layer adhesion, leading to print warping, detachment, or nozzle clogs.
- Parallelism, Not Gravity: "Leveling" is technically a misnomer; you are actually "tramming" the bed. The goal is to make the build plate completely parallel to the printer's X and Y motion axes.
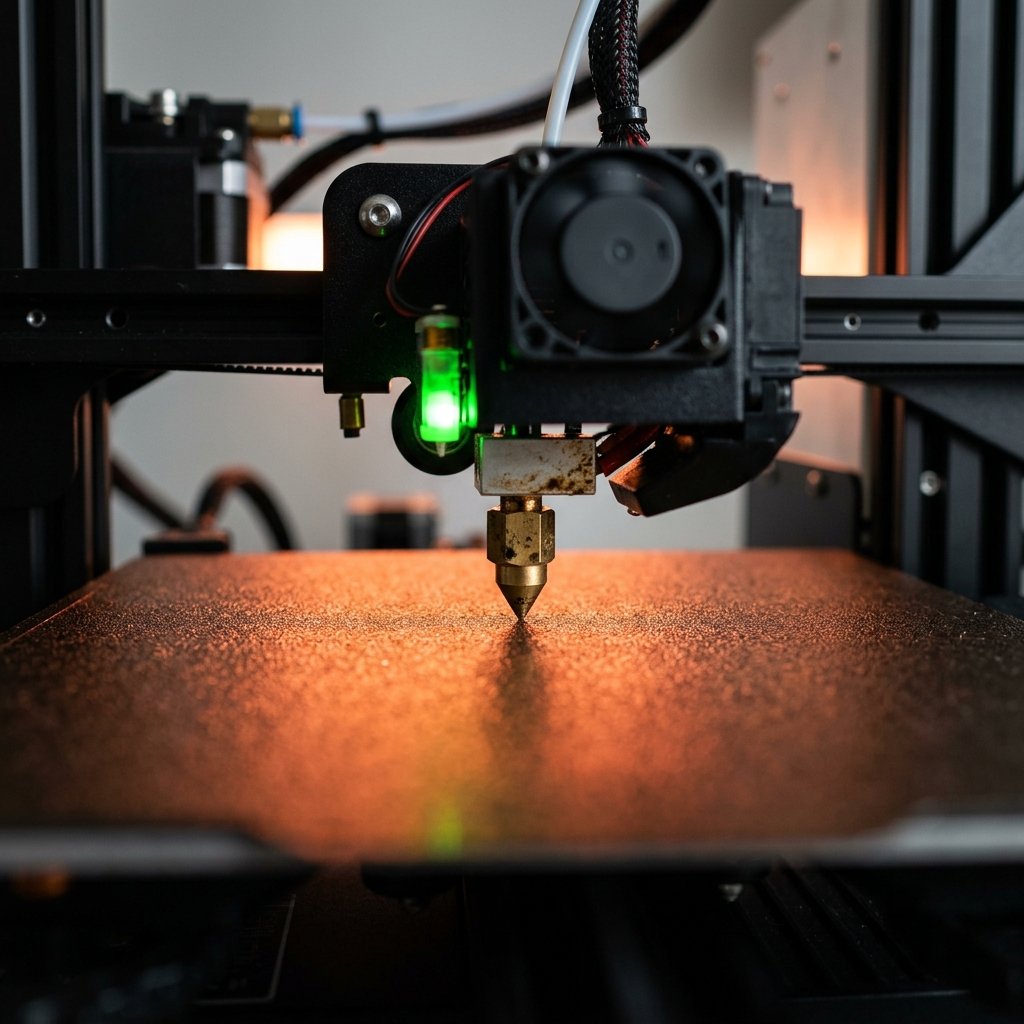
- The Magic of the First Layer: If the nozzle is at the correct distance, it squishes the molten plastic slightly against the bed. This "squish" maximizes surface area contact, forming a strong chemical and mechanical bond.
- Consequences of a Bad Bed: An uneven surface causes corner peeling, nozzle scraping, extruder jams, and in worse cases, spaghetti prints. If you run into extrusion problems, always check our 3D Printing Troubleshooting Guide to rule out mechanical or slicer issues.
Common Signs Your 3D Printer Bed Needs Leveling
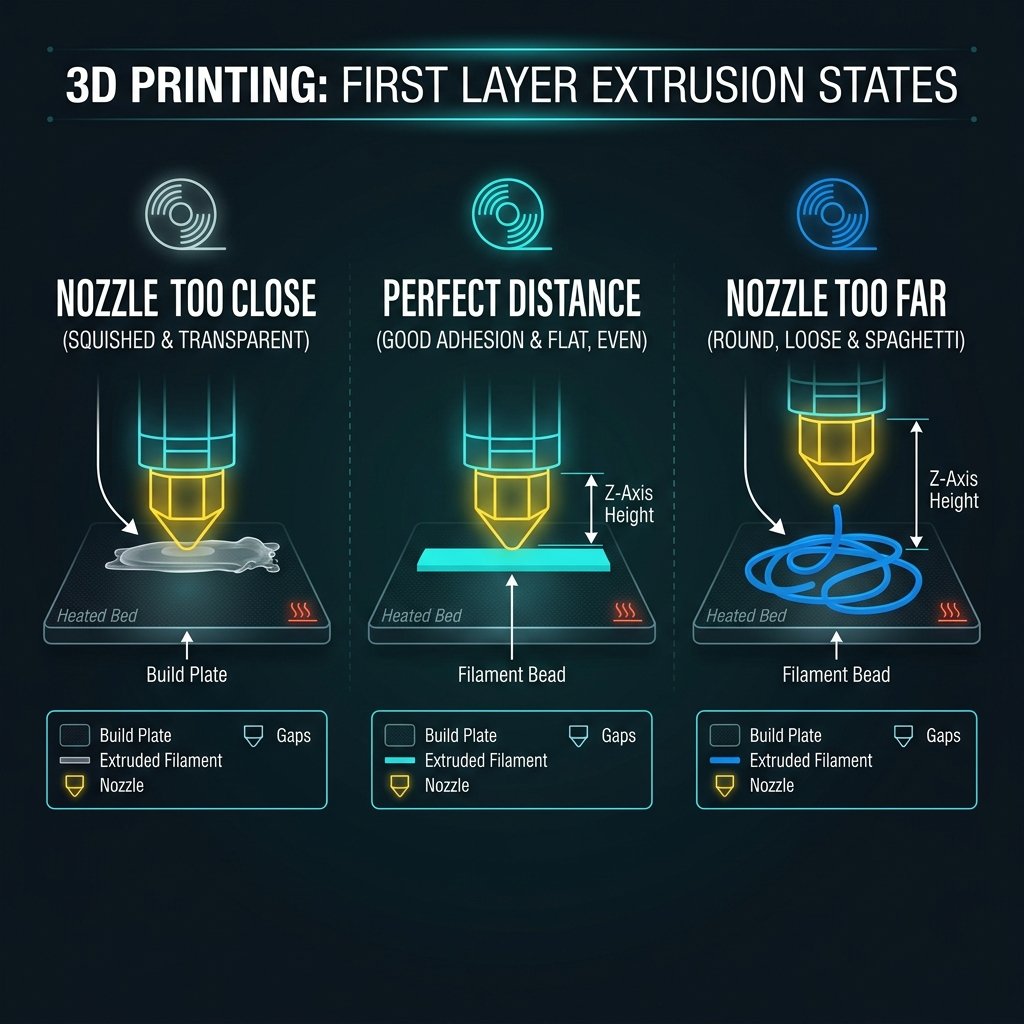
You can identify an unleveled print bed by observing the first layer of your print as it lays down plastic. Key symptoms include plastic not sticking to the bed, filament scraping the bed, or uneven line thicknesses.
- Nozzle Too Close to the Bed: The filament is squished so thin that it appears translucent or rough. In severe cases, the bed blocks the nozzle tip, causing the extruder motor to click (slip) and leading to under-extrusion.
- Nozzle Too Far from the Bed: The extruded plastic behaves like round strings. It doesn't squish, fails to stick, and gets dragged around by the nozzle, forming loops.
- Uneven First Layer: The lines are too thin on one side of the build plate and loose or missing on the other. This indicates that one or more adjustment knobs are out of sync.
Step-by-Step Guide to Manual Bed Leveling (The Paper Test)
Manual bed leveling is performed by adjusting the leveling knobs under the print bed while using a standard piece of paper as a feeler gauge to set the nozzle clearance. This ensures a consistent gap of approximately 0.1mm between the nozzle and the build surface at all corners.
- Step 1: Clean Everything: Ensure the nozzle tip is free of oozing plastic and that the build plate is clean. Finger oils ruin adhesion, so wipe the bed with 99% Isopropyl Alcohol (IPA).
- Step 2: Pre-heat Your Hardware: Do not level a cold bed. Heat the bed and nozzle to your target printing temperatures (e.g., 60°C for the bed, 200°C for the nozzle). Heat causes metal and glass to expand, making hot calibration essential.
- Step 3: Home the Printer: Use the printer's screen interface to home all axes (X, Y, Z).
- Step 4: The Paper Test: Disable the stepper motors (or use screen commands) to move the nozzle directly over the front-left leveling screw. Slip a standard sheet of copy paper (about 0.1mm thick) under the nozzle. Adjust the knob underneath until you feel a slight, uniform drag when pulling the paper back and forth.
- Step 5: Calibrate All Corners: Move to the remaining three corners and repeat the process. Because adjusting one corner alters the pivot point of the others, you must repeat this loop 2–3 times until no further adjustments are needed.
- Step 6: Run a Test Print: Print a leveling test STL (a pattern of squares at the corners and center) to perform micro-adjustments while the first layer prints.
Understanding Automatic Bed Leveling (ABL) and Z-Offset
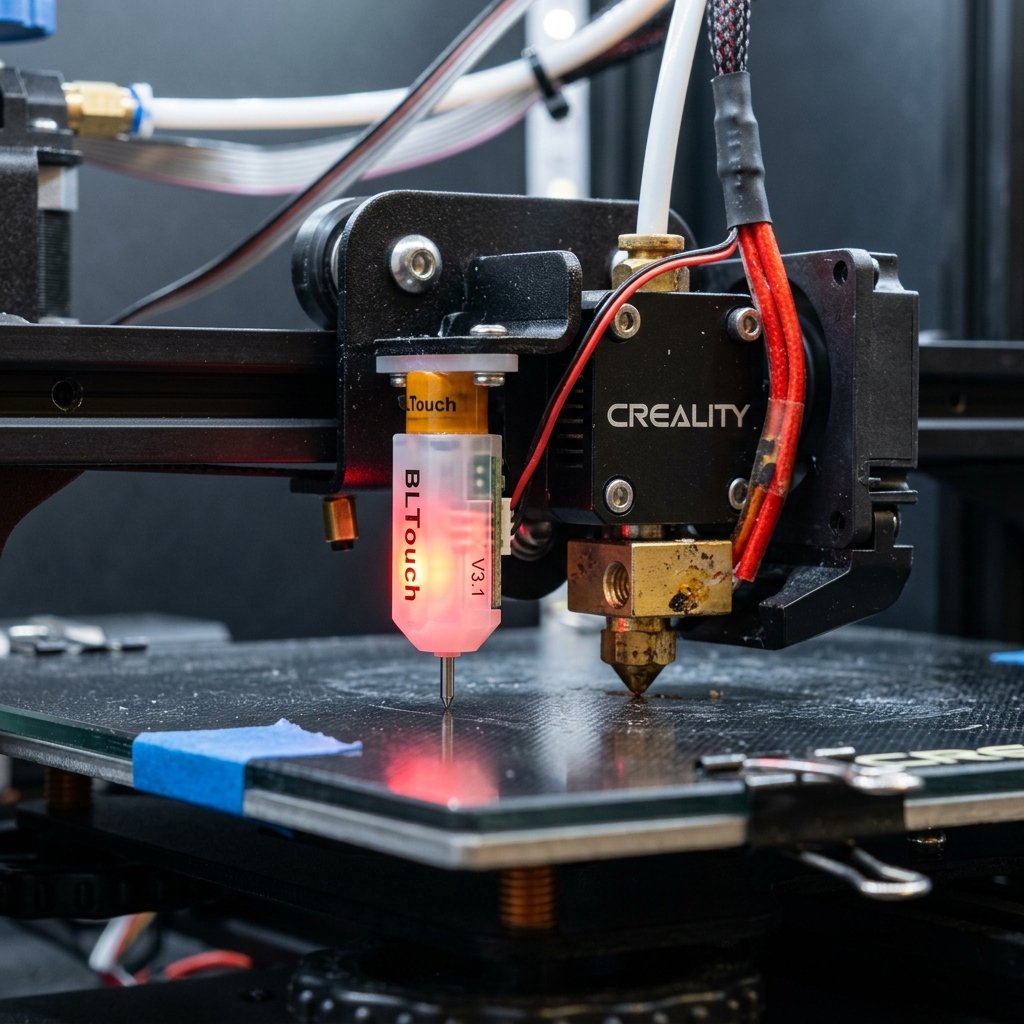
Automatic Bed Leveling uses a physical probe or sensor to measure the bed's topography and dynamically adjust the Z-axis height during printing to compensate for any unevenness. Z-offset is the precise distance between the sensor's trigger point and the actual nozzle tip.
- How ABL Works: Sensors like the BLTouch, CRTouch, or inductive probes map the bed height at multiple points (e.g., a 3x3 or 5x5 grid) before printing, building a digital mesh of the surface.
- Compensating on the Fly: During a print, the printer uses this mesh to raise and lower the Z-axis dynamically by fractions of a millimeter to match the bed's curvature.
- The Importance of Z-Offset: While ABL knows where the sensor triggers, it does not automatically know where the nozzle tip is. You must set the Z-offset manually. A Z-offset that is too high will cause prints to detach, while a negative Z-offset will scratch your bed.
Comparing Bed Leveling Methods and Surfaces
Choosing the right bed leveling method and build surface directly impacts print reliability, setup time, and maintenance frequency. While manual leveling is cost-effective, automatic sensors offer superior precision on warped beds.
| Leveling Method | Sensor Type | Precision | Ease of Setup | Maintenance | Ideal For |
|---|---|---|---|---|---|
| Manual Tramming | None (Paper Test) | Medium | Moderate | High (Frequent) | Flat beds, budget setups |
| BLTouch / CRTouch | Physical Probe | High | Moderate-Hard | Low | Warped beds, glass, PEI sheets |
| Inductive Probes | Magnetic Sensor | High | Easy | Low | Steel PEI sheets only |
| Strain Gauge | Nozzle Contact | Very High | Factory Set | Very Low | Beginners, modern consumer printers |
"Many beginners struggle with bed leveling because they overlook bed temperature. Always heat both your nozzle and bed to your printing temperatures (e.g., 60°C for the bed and 200°C for the nozzle) before leveling. Heat causes metal and glass to expand, and leveling a cold bed will result in an incorrect nozzle gap during actual printing."
The choice of leveling setup also depends on the materials you use. For instance, printing PLA requires a close, solid squish, whereas materials like PETG or ABS require specific bed temperatures and slightly different Z-height profiles to avoid over-adhesion. Read more about filament thermal requirements in our 3D Printing Materials Guide.
If you're deciding between different motion systems and printer builds, check our breakdown on FDM vs SLA 3D Printing to see which calibration system fits your workflow best.
Frequently Asked Questions (FAQ)
How often should I level my 3D printer bed?
For manual setups, check leveling every 5–10 prints, or immediately if you notice adhesion issues. With ABL, you only need to re-level or calibrate Z-offset if you change nozzles, swap build plates, or perform mechanical maintenance.
What is Z-Offset and why does it matter?
Z-offset is the distance between your Z-homing probe's trigger point and the nozzle tip. It must be set precisely so the printer knows exactly where the bed is, preventing the nozzle from scratching the bed or printing in mid-air.
Can I print on a warped bed without an ABL sensor?
Yes, but it is difficult. You can use manual mesh leveling in firmware (if enabled) or place small pieces of aluminum foil under the low spots of your build plate or glass bed to even out the surface.
Why is my nozzle scratching the build plate?
This happens when the nozzle gap or Z-offset is negative (too low) or if your Z-axis endstop switch is set too low. Stop the print immediately to prevent bed damage.
About the Author: Dinu Suciu
Dinu Suciu is the founder of 3D Print Book, a professional 3D printing and modeling service. With years of experience maintaining a fleet of FDM printers, Dinu shares practical tips to help creators achieve consistent, high-quality results.
🛠️ Need Perfect Prints Without the Tuning Hassles?
Calibrating beds, setting Z-offsets, and dealing with print adhesion can take hours. If you need high-tolerance functional parts or custom prototypes printed on professionally calibrated industrial machines, we are here to help. Explore our 3D Printing Services or request a quote directly on our Contact Page!