




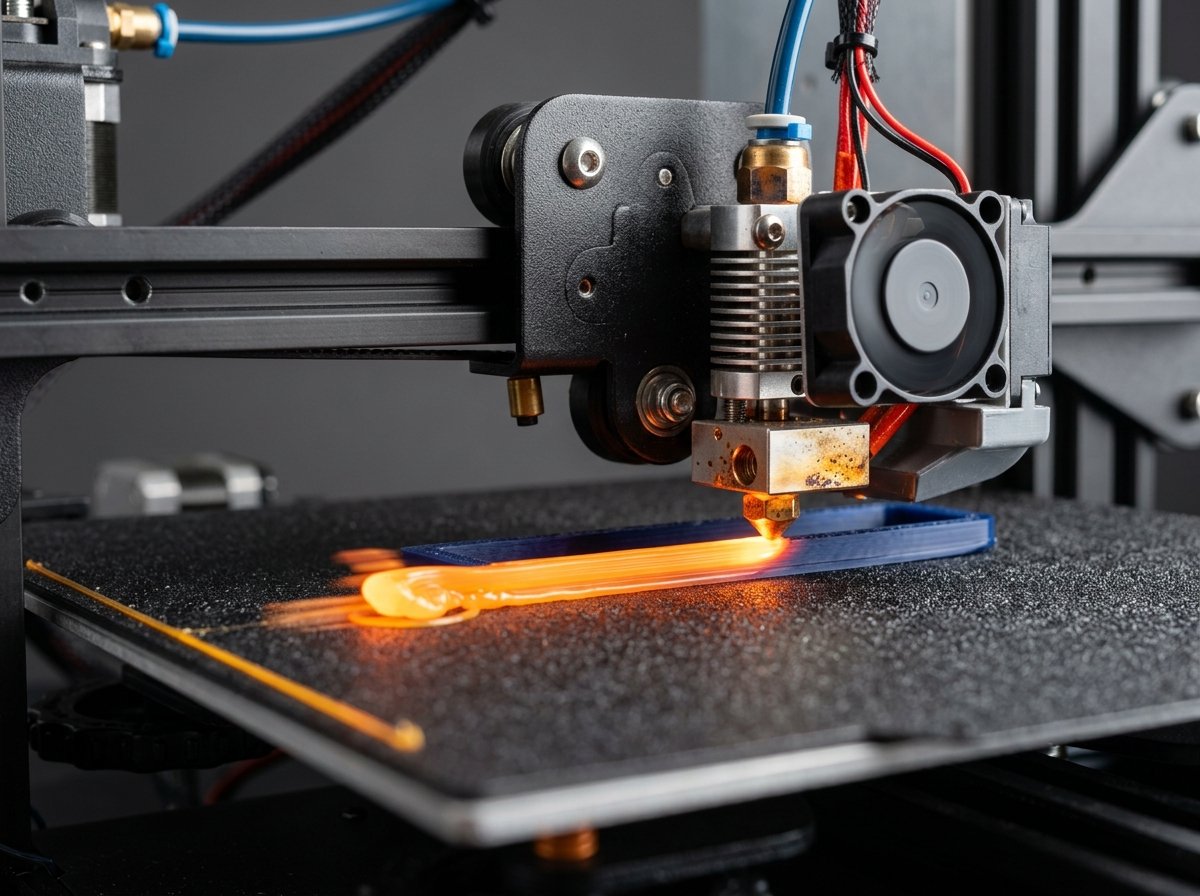
In the modern era of desktop Fused Deposition Modeling (FDM), speed has become one of the primary selling points. Imprimantele moderne CoreXY from manufacturers like Bambu Lab, Creality, and Prusa claim staggering print speeds of up to 500 mm/s or even 600 mm/s. However, many hobbyists and professionals soon discover a frustrating bottleneck: when they crank up the speed settings in their slicer, their prints start to suffer from severe under-extrusion, weak layer bonding, or flat-out fail. The reason for this mismatch is a fundamental, yet often overlooked, parameter known as Max Volumetric Speed (MVS).
As the owner and operator of 3D Print Book, running a dedicated local FDM print farm, I have spent countless hours tuning printer speed profiles. I can tell you that trying to print at 300 mm/s with a standard filament and hotend setup is a recipe for disaster. Speed settings in your slicer are only theoretical maximums; they are hard-capped by the physical ability of your printer's hotend to melt filament. If your heater block cannot melt filament fast enough to keep up with the movement of your print head, under-extrusion is inevitable. In this comprehensive guide, we will break down the science of Max Volumetric Speed, show you how to calculate and calibrate it, and explore how high-flow components can unlock the true speed potential of your FDM printer.
1. What is Max Volumetric Speed (MVS) in 3D printing?
Max Volumetric Speed (MVS) is the maximum volume of plastic (measured in cubic millimeters per second, or mm³/s) that your hotend can reliably melt and extrude. Exceeding this limit causes under-extrusion and weak layers because the extruder motor cannot push solid filament into the melt zone faster than the heater can liquefy it.
To grasp the importance of MVS, we must stop thinking of speed purely in linear terms (millimeters per second, mm/s) and start thinking in volumetric terms (cubic millimeters per second, mm³/s). When a 3D printer extrudes plastic, it lays down a rectangular bead of filament. The volume of plastic deposited per second depends on three key slicer variables: layer height, extrusion width (line width), and print speed. This relationship is defined by the following mathematical formula:
For example, if you are printing with a standard 0.4mm nozzle, using a layer height of 0.2mm, a line width of 0.42mm, and a print speed of 150 mm/s, your volumetric flow rate is:
This flow rate is well within the capabilities of a standard V6-style hotend. However, if you decide to speed up the print to 300 mm/s while maintaining the same layer height and line width, the required volumetric flow rate jumps to 25.2 mm³/s. A standard hotend simply cannot melt plastic at this rate. When you attempt to force cold filament into the hotend faster than it can melt, several physical failures occur:
- Nozzle Temperature Drop: The incoming cold filament acts as a heat sink, rapidly absorbing heat from the nozzle and heater block. The temperature of the nozzle drops below the set point, causing the plastic to become highly viscous.
- Extruder Gear Slippage or Clicking: As the viscosity of the semi-melted plastic increases, the pressure inside the nozzle assembly sky-rockets. The extruder motor must work harder to push the filament, eventually causing the drive gears to slip, grind the filament, or click as the motor loses steps.
- Under-extrusion and Gaps: Because the plastic is not fully melted, it does not flow smoothly. The extruded lines become thin and inconsistent, leading to visible gaps, poor surface finish, and brittle structural walls. If you are experiencing structural parts that snap easily, you should also refer to our guide on how to improve 3d print layer adhesion.
By defining the MVS limit inside your slicer (e.g., OrcaSlicer, PrusaSlicer, or Bambu Studio), you tell the software the absolute physical limit of your filament and hotend combination. The slicer will then automatically throttle the linear print speed down on the fly during dense sections to ensure the volumetric flow rate never exceeds your safe MVS value. This ensures consistent extrusion and perfect surface quality regardless of how complex your model is.
2. How to Calibrate MVS for Any Filament in Orca Slicer
To calibrate Max Volumetric Speed for any filament in OrcaSlicer, print a specialized Max Volumetric Flow Rate test model that gradually increases flow rate from 5 mm³/s to 25 mm³/s. Inspect the printed object to find the height where the surface becomes matte, rough, or displays gaps, and use that limit to calculate your safe MVS setting.
While filament manufacturers often suggest generic print speeds, every brand, color, and polymer compound has unique thermal properties. For instance, a matte PLA requires more heat to melt than a glossy PLA, and PETG behaves differently from ABS. Therefore, calibrating the specific MVS of your FDM 3D printer filament is essential for dialing in your 3d print quality settings.
OrcaSlicer has become the gold standard for FDM calibration because it built these tests directly into the slicer interface. Here is the step-by-step calibration procedure:
- Open Calibration Menu: In OrcaSlicer, navigate to the top menu, select Calibration, and choose Max Volumetric Flow Rate. Select your active filament type (e.g., PLA or PETG).
- Configure Test Parameters: A dialog box will appear. For standard filaments and hotends, set the Start Volumetric Flow Rate to 5 mm³/s and the End Volumetric Flow Rate to 25 mm³/s (or up to 40 mm³/s for high-flow setups). Set the step increment to 0.5 or 1.0.
- Slice and Print: OrcaSlicer will automatically generate a simple rectangular test block. The slicer modifies the speed of the print head as it moves up the Z-axis, gradually demanding more volumetric flow from the hotend. Slice the model and send it to your printer.
- Inspect the Test Print: Once the print is complete, inspect the surface quality of the block. At the bottom (low flow rate), the print will look glossy, smooth, and consistent. As the nozzle moves upward and the flow rate increases, you will reach a point where the surface finish transitions from glossy to matte. Higher up, you will see rough textures, micro-gaps, or visible under-extrusion lines.
- Measure the Failure Point: Use a digital caliper to measure the height (in millimeters) from the base of the model to the exact point where the print quality begins to degrade (where it becomes matte or shows extrusion defects).
- Calculate the MVS Value: OrcaSlicer provides a formula (or a built-in helper tool) based on the test model's dimensions to convert the measured height back to the exact volumetric flow rate. The formula is:
Safe MVS (mm³/s) = Start Flow Rate + (Measured Height (mm) * (End Flow Rate - Start Flow Rate) / Total Height of Print (mm))As a rule of thumb, subtract 10% from this limit to establish a safe, reliable operating margin for daily printing.
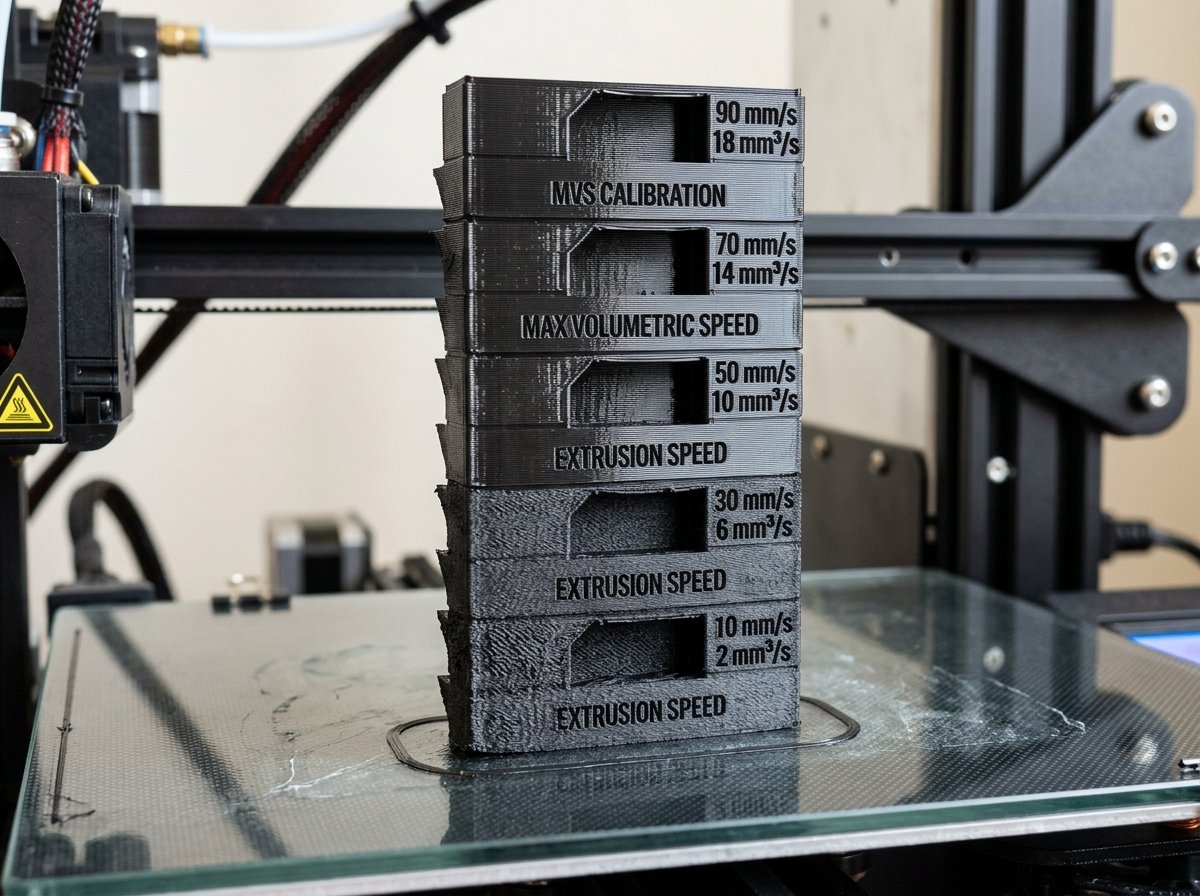
Once you have calculated your safe MVS value, open your filament profile in the slicer, locate the Max Volumetric Speed field (often under the filament overrides or speed limits tab), and enter your value. Save the profile. Now, you can safely set your infill and wall speeds to high values (e.g., 300 mm/s) knowing that the slicer will dynamically limit the speed if the geometry demands more plastic than the hotend can melt.
"Speed is nothing without control. Entering a high linear speed in your slicer without configuring your Max Volumetric Speed is the number one cause of failed high-speed prints. MVS is the safety valve that keeps your extruder from outrunning your heater." — Dinu Suciu, Owner of 3D Print Book
3. High-Flow Filaments vs. Standard Filaments: Are They Worth It?
High-flow filaments are worth the investment for high-speed FDM printers because they contain specialized polymer additives that reduce melt viscosity, allowing the plastic to melt up to 50% faster than standard filaments. This allows you to print at high volumetric flow rates without raising nozzle temperatures to unsafe levels.
As high-speed CoreXY printers have become mainstream, filament manufacturers have responded by introducing "High-Flow" (HF) or "Hyper" filament lines. These filaments are specifically formulated to address the physical limitations of thermal transfer. Let's compare standard filaments with high-flow variants to understand if they are worth the premium:
- Molecular Weight and Viscosity: Standard PLA and PETG consist of long, dense polymer chains. When melted, these chains create a highly viscous liquid that resists flowing through a tiny nozzle orifice. High-flow filaments incorporate chemical additives and lower molecular weight polymers that reduce the viscosity of the molten plastic. This allows the material to flow much faster under less extrusion pressure.
- Thermal Conductivity: High-flow filaments are engineered to absorb heat faster. They conduct thermal energy from the copper heater block into the core of the 1.75mm filament strand more rapidly, shortening the time required to reach a fully liquid state.
- Nozzle Temp Requirements: With standard filament, the only way to print faster is to raise the nozzle temperature (e.g., printing PLA at 240°C instead of 210°C) to force faster melting. However, this has a severe downside: when the printer slows down for detailed corners or overhangs, the plastic cooks inside the hotend, leading to degradation, stringing, and clogs. High-flow filaments allow you to maintain standard, safer printing temperatures while sustaining high volumetric flow.
To maximize your high-speed printing performance, combining high-flow filament with physical hardware upgrades is the ultimate strategy. Upgrading to a high-flow nozzle, such as a Volcano-style hotend or a CHT (Controlled Heat Transfer) nozzle, dramatically increases the physical melt zone length. CHT nozzles, in particular, split the single filament strand into three separate channels, exposing the plastic to more heated metal surface area and melting it from the inside out.
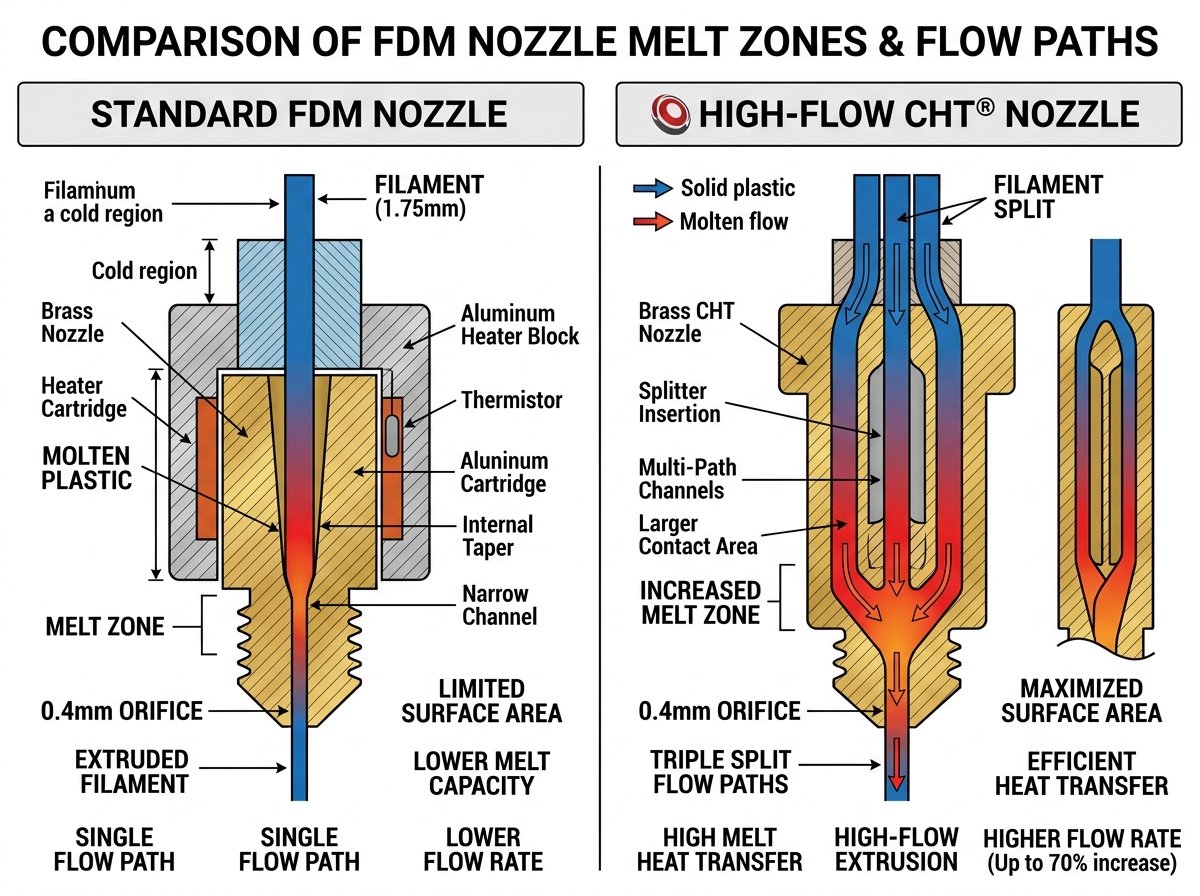
Let us look at a detailed comparative data table outlining typical Max Volumetric Speed ranges and top speed limits for standard vs. high-flow setups across common FDM materials:
| Material Type | Hotend / Nozzle Setup | Typical MVS Limit | Max Volumetric Speed (High-Flow) | Safe Speed (0.2mm Layer / 0.4mm Width) | Recommended Slicer Action |
|---|---|---|---|---|---|
| Standard PLA | Standard V6 / Revo | 11 – 15 mm³/s | N/A | ~130 – 170 mm/s | Set MVS to 12 mm³/s for safe daily prints. |
| High-Flow PLA (HF) | Standard V6 / Revo | N/A | 18 – 24 mm³/s | ~210 – 280 mm/s | Set MVS to 20 mm³/s. Great for rapid prototyping. |
| High-Flow PLA (HF) | Volcano / CHT Nozzle | N/A | 28 – 38 mm³/s | ~330 – 450 mm/s | Set MVS to 32 mm³/s. Matches top CoreXY printer speeds. |
| Standard PETG | Standard V6 / Revo | 8 – 12 mm³/s | N/A | ~90 – 140 mm/s | Keep MVS low to prevent severe stringing and blobs. |
| High-Flow PETG (HF) | Volcano / CHT Nozzle | N/A | 16 – 22 mm³/s | ~190 – 260 mm/s | Set MVS to 18 mm³/s. Ensure filament is dried. |
| ABS / ASA | Standard V6 (Enclosed) | 10 – 14 mm³/s | 18 – 25 mm³/s (HF variant) | ~120 – 160 mm/s (standard) | Maintain high bed temp. Match MVS to enclosure temp. |
| TPU (Flexible) | Direct Drive Extruder | 3 – 6 mm³/s | N/A | ~35 – 70 mm/s | Print slow. High MVS will buckle filament in extruder. |
For makers looking to select the best general printer configuration for their budget and workspace, check out our guide on the best fdm 3d printer 2026 to find the right balance of speed and structural quality. If you want to understand how PLA, PETG, ABS, and ASA compare in detail across structural, thermal, and chemical environments, read our complete materials comparison guide.
4. Slicer Adjustments to Maximize Volumetric Performance
To get the most out of your FDM printer's MVS without upgrading hardware, you can make several targeted slicer tweaks:
- Increase Nozzle Temperature Slightly: Raising your nozzle temp by 10°C to 15°C (within the manufacturer's recommended range) lowers the viscosity of the molten plastic, yielding a 10% to 20% boost in volumetric flow. However, monitor your prints for increased stringing.
- Tune Layer Height and Line Width: If you are limited by a low MVS (e.g., 10 mm³/s), you can optimize your prints by balancing print speed and layer height. Printing thin layers (0.12mm) allows the printer to move faster linearly, while printing thick layers (0.28mm) requires slower linear speeds but finishes prints faster due to fewer total layers.
- Verify Extruder Tension: Ensure your extruder idler arm tension is properly adjusted. If the tension is too loose, the drive gears will slip against the filament at high volumetric flows, causing under-extrusion long before the hotend reaches its thermal melting limit.
5. Frequently Asked Questions (FAQ)
Q1: What happens if I set my Max Volumetric Speed too high in the slicer?
Setting the MVS too high will cause the slicer to calculate linear speeds that exceed the hotend's melting capability. During printing, this leads to progressive under-extrusion, clicking noises from the extruder motor as it slips on the filament, and weak layer-to-layer adhesion, which ultimately ruins the print.
Q2: Does nozzle size affect my Max Volumetric Speed?
No, nozzle size does not directly change the thermal melting limit of your hotend (which is determined by the length of the heater block and heater cartridge wattage). However, a larger nozzle (like 0.6mm) reduces back-pressure, making it easier for the extruder to push plastic, which can slightly improve MVS stability at its upper limits.
Q3: Why does my print look matte in some areas and glossy in others?
This is a classic symptom of varying volumetric flow rates. When the printer prints slow (e.g., outer walls), the plastic is fully melted and cools slowly, resulting in a glossy finish. When printing fast (e.g., infill or inner walls), the plastic is pushed out quickly near its thermal limit, cooling rapidly and creating a matte finish. Setting a consistent speed or MVS limit resolves this visual issue.
Q4: Can I print flexible TPU filament at high volumetric speeds?
No, TPU must be printed at very low volumetric flow rates (typically 3 to 6 mm³/s). Because TPU is flexible, trying to push it into the hotend at high speed creates massive back-pressure, causing the elastic filament to buckle, wrap around the extruder drive gears, and clog the extruder assembly.
Q5: How does Orca Slicer calculate the MVS limit compared to PrusaSlicer?
Both slicers use the same physics and volumetric calculations. The primary difference is that OrcaSlicer provides built-in, automated calibration models (Max Volumetric Flow test) that you can generate with a single click, whereas in PrusaSlicer you must manually configure custom speed modifiers on a test STL.
About the Author: Dinu Suciu
I am Dinu Suciu, the lead technician and founder of 3D Print Book. Operating a commercial FDM 3D printing workshop, I specialize in tuning print speed profiles, mechanical calibration, and optimizing slicer parameters for functional components. My work focuses on bridging the gap between digital CAD geometry and reliable physical FDM prototypes. If you are struggling with under-extrusion, calibrating OrcaSlicer profiles, or choosing the right high-speed filament for your project, please feel free to contact me directly via our dedicated contact page.