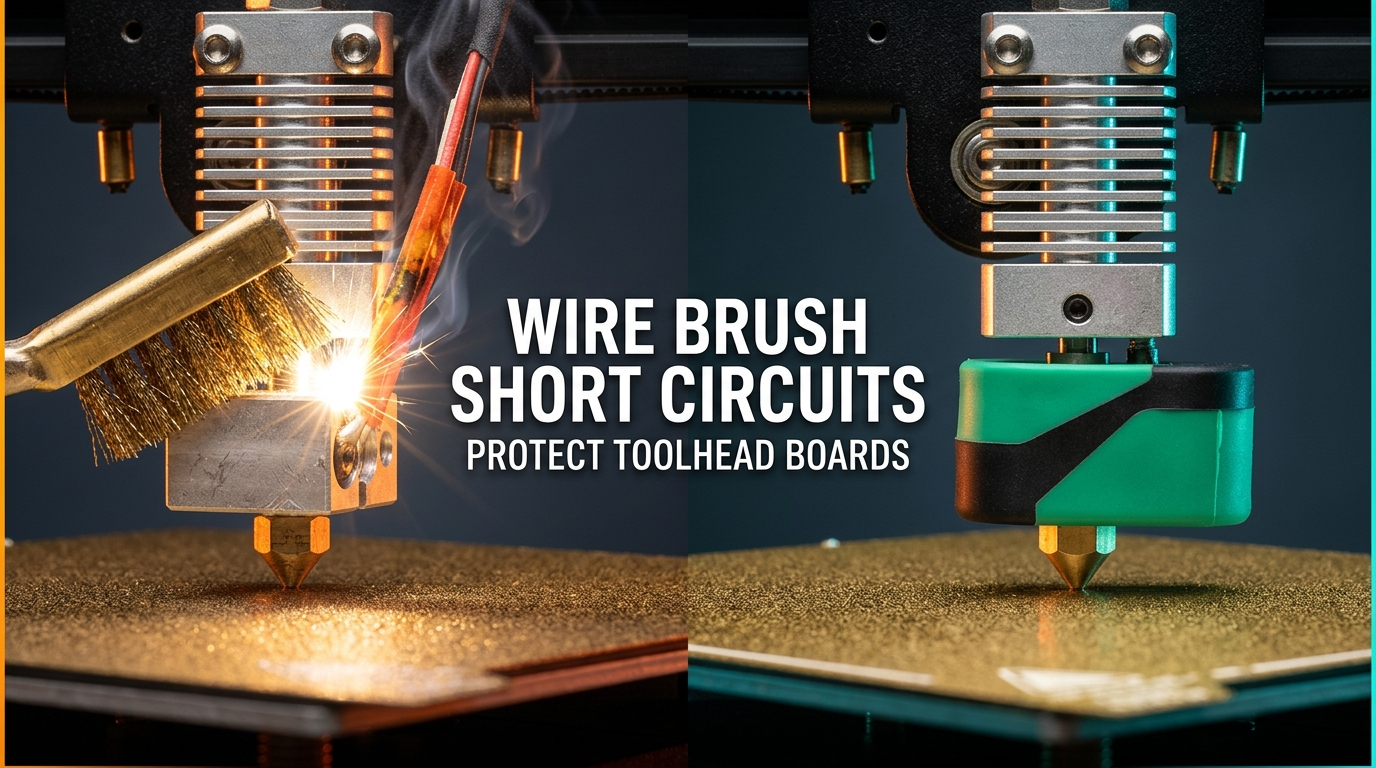

Cleaning cooked PETG or charred PLA off a hot nozzle with a brass wire brush takes five seconds, yet it remains one of the fastest ways to ruin a 3D printer mainboard or CAN-bus toolhead board. One stray bristle bridging a live 24V heater terminal to a bare thermistor lead sends destructive voltage straight into a microcontroller input rated for 3.3 volts.
Most makers assume that because the heater isn't actively climbing in temperature—or because they're using soft brass bristles instead of steel—the toolhead is harmless to scrub while powered. In reality, modern FDM electronics leave full 24V DC potential sitting on the heater cartridge wires whenever the power supply is switched on, even when the hotend is sitting idle at 200°C or cooling down.
In my workshop, I've seen both budget bed-slinger boards and compact toolhead PCBs knocked out by a quick pre-print brush stroke. If you want to avoid permanent MAXTEMP lockouts and keep your FDM 3D printer troubleshooting limited to mechanical tuning rather than board replacements, understanding how this electrical path works—and changing the order in which you clean nozzles—is well worth the effort.
Table of Contents
- Anatomy of a Motherboard Short: How 24V Heater Power Reaches 3.3V ADC Pins
- Why Heaters Carry Live 24V Even When Idle: Low-Side MOSFET Switching Explained
- Diagnosing Blown ADC Ports: Permanent MAXTEMP, MINTEMP, and MCU Reset Loops
- Why Modern CAN-Bus and USB Toolhead Boards Are Extra Vulnerable
- Nozzle Cleaning Tools & Electrical Safety Comparison Matrix
- The Safe Hotend Scrubbing Protocol: Heat First, Cut Power Second, Brush Third
- Non-Conductive Maintenance Alternatives: Silicone Wipers, Brass Rods, and Cold Pulls
- Emergency Workarounds: Remapping a Spare Thermistor Pin in Klipper and Marlin
- Maker's Workshop Note: How One Stray Bristle Killed an EBB36 Toolhead Board
- Frequently Asked Questions (FAQ)
- References & External Sources
Anatomy of a Motherboard Short: How 24V Heater Power Reaches 3.3V ADC Pins
A wire brush short happens when conductive metal bristles simultaneously touch a bare 24V heater wire or terminal and an exposed thermistor lead, routing high supply voltage straight through the temperature-sensing circuit into the microcontroller's 3.3V analog-to-digital converter (ADC) pin.
On almost every desktop FDM printer—whether it uses a classic V6 aluminum block, a Creality K1 ceramic ring, or a Bambu-style integrated hotend—two completely different electrical worlds sit within five millimeters of each other. The heater cartridge carries 12V or 24V DC at 2 to 3 amps, which is enough energy to heat metal past 300°C. Right next to it, a tiny glass-bead or cylindrical thermistor reports temperature back to the processor over a delicate 3.3V voltage-divider circuit.
Those two circuits are usually separated only by thin fiberglass sleeves, PTFE tubing, or a layer of Kapton tape. Over dozens of heat cycles and nozzle swaps, several physical weak spots tend to open up:
- Missing or Torn Silicone Socks: Without a silicone sock shielding the aluminum block, wire brush bristles sweep directly across the rear face where heater and thermistor leads exit the block.
- Crushed Thermistor Insulation: On older MK8 and V6 blocks, the tiny M3 screw holding the thermistor wire often pinches through its clear PTFE jacket, leaving bare metal touching the aluminum block—or one bristle width away from it.
- Uninsulated Heater Crimps and Solder Pads: Ceramic hotend heaters and aftermarket cartridges often have exposed solder joints or bare metal crimp ferrules right above the block.
- Shedding Wire Bristles: Cheap brass-coated steel brushes drop loose 10 mm wires as they wear. One snapped bristle wedged behind a heater block can sit invisibly until a vibration shifts it across both pairs of leads.
The moment a brush bridges the 24V line to either side of the thermistor harness, current skips past the low-current resistor divider and slams straight into the microcontroller silicon. A fuse on the power input won't save you here: the processor pin fails in microseconds, long before a 10A or 15A blade fuse even starts to warm up.
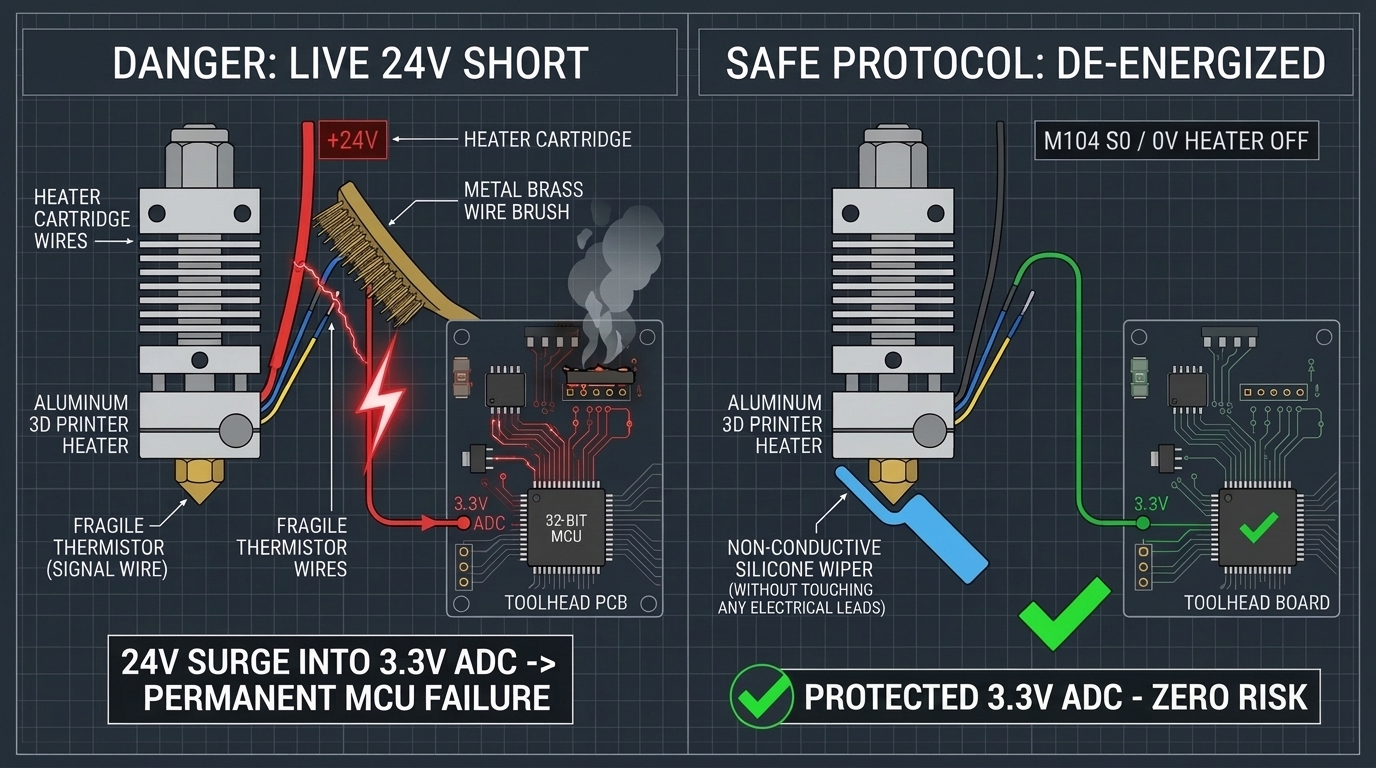
Figure 1: When the printer remains powered, a stray bristle bridging the 24V heater circuit and bare thermistor leads sends lethal over-voltage into the 3.3V MCU pin (left), whereas cutting power and wiping with silicone isolates the electronics (right).
Why Heaters Carry Live 24V Even When Idle: Low-Side MOSFET Switching Explained
Setting your hotend target to 0°C in the slicer or touchscreen (M104 S0) turns the heater MOSFET off, yet it usually leaves a constant 24V DC sitting live on the positive heater wire because 3D printer mainboards switch the ground side rather than the positive rail.
This detail catches experienced makers off guard. People see 0°C / 25°C on the LCD screen, assume the heater cartridge is dead cold electrically, and grab a brass brush to clean off leftover PETG before starting a job. Let's look at why that assumption fails on standard printer electronics:
- Low-Side N-Channel MOSFET Architecture: Almost all 3D printer control boards—including Creality silent boards, BigTreeTech SKR/Octopus boards, Prusa Buddy boards, and Klipper CAN-bus toolhead PCBs—use N-channel MOSFETs because they offer lower internal resistance and run cooler than P-channel parts.
- Always-Hot Positive Pin: In a low-side circuit, one terminal of the 24V heater connector ties straight to the main 24V DC power rail as soon as the printer's rocker switch is flipped on. The MOSFET sits on the negative (ground) leg, opening and closing the return path via PWM.
- Why Sparks Still Fly at 0°C Target: Even when firmware commands zero heating duty cycle, one of those two thick red heater wires is sitting at a live +24V relative to the printer's aluminum frame and thermistor ground. If your wire brush touches that live heater wire and simultaneously touches the aluminum block (which may be grounded through the gantry or touching a pinched thermistor wire), current flows right through the bristles.
- Thermistor Ground Return Risk: One leg of a two-wire thermistor connects to analog ground (AGND), while the other connects through a 4.7 kΩ pull-up resistor to +3.3V and directly to the MCU's ADC pin. Touching 24V to the signal leg overloads the ADC channel directly; touching 24V to AGND can burn thin PCB ground traces and pull up the entire analog reference rail.
Simply pausing a print or turning the nozzle target down in software doesn't remove electrical voltage from the hotend. Only turning off the physical PSU switch—or unplugging the power cord—removes that 24V potential from the heater block area.
Diagnosing Blown ADC Ports: Permanent MAXTEMP, MINTEMP, and MCU Reset Loops
When a wire brush short burns out a microcontroller's ADC pin, the printer typically shows an immediate MAXTEMP error, a permanently stuck high reading (such as 350°C or 999°C) with the thermistor unplugged, or a board that won't boot at all due to an internal 3.3V rail short.
Before you order a new mainboard or tear apart a wiring harness, run a quick systematic check to separate a ruined sensor from a fried processor port. A melted thermistor costs two dollars; a dead STM32 microcontroller requires either pin remapping or board replacement.
Follow this diagnostic sequence with the printer powered off during each cable swap:
- Inspect the Fuse and 3.3V / 5V Status LEDs: Look at the mainboard or toolhead PCB when you turn power back on. If all status LEDs are completely dark, check the automotive blade fuse or SMD fuse near the 24V terminal block. If the board powers up with an illuminated 24V LED while the 3.3V regulator gets burning hot within five seconds, the short likely fused the MCU's internal 3.3V power rail to ground.
- Unplug the Hotend Thermistor Connector: Power off the machine, unplug the 2-pin hotend thermistor plug from the board, and power back on. On a healthy board with no thermistor connected, Marlin should report roughly
-14°C(MINTEMP) and Klipper should read an open-circuit temperature far below freezing (often around-50°Cto-100°C). - Read the Unplugged Value: If the screen or Klipper dashboard still reads 280°C, 358°C, or 999°C with the thermistor completely unplugged, the ADC input pin inside the microcontroller is shorted internally to 3.3V or ground. No replacement thermistor can fix a shorted ADC channel on that pin.
- Swap With the Heated Bed Thermistor (Diagnostic Only): With power off, plug the known-good heated bed thermistor into the hotend port (if both use standard 100k NTC sensors). If the hotend reading remains stuck at an impossible number or fails to respond to finger warmth on the bed, the board input is damaged. Conversely, if the hotend port now reads ambient 22°C accurately, you got lucky—the short only burned open the tiny glass thermistor bead or wire, leaving the board intact.
Also keep an eye out for a subtler failure mode: a partially damaged ADC pin that still reads room temperature accurately at 22°C, yet locks up or drifts wildly by ±15°C once the block passes 180°C. Checking the temperature curve against a known-good bed sensor or thermal camera confirms whether the ADC multiplexer inside the chip took collateral damage.
Why Modern CAN-Bus and USB Toolhead Boards Are Extra Vulnerable
Modern CAN-bus and USB toolhead boards—such as BigTreeTech EBB36/EBB42, Fly SHT36, Mellow SB2040, and proprietary ribbon-connected toolhead PCBs on machines like the Bambu Lab P1S/X1C and Creality K1—place the microcontroller and 3.3V electronics centimeters away from the nozzle with minimal filtering, making them noticeably easier to destroy than older mainboards.
In the days of standard Ender 3 V1 or Prusa MK3S layouts, a long 1.2-meter harness ran from the heater block down to a large controller board tucked inside a lower metal box. That long cable had slight series resistance and inductance, and larger controller boards often included TVS diodes, RC low-pass filters, and bigger pull-up resistors before the microcontroller pins.
Toolhead boards change that mechanical and electrical layout completely:
- Ultra-Short Trace Paths: On an EBB36 or K1 nozzle breakout board, the thermistor connector sits 15 mm from a tiny QFN-packaged STM32G0B1 or RP2040 chip. There's rarely room for heavy protection diodes on the analog lines.
- Dense Connector Pinouts: Compact Molex Picoblade or JST-GH headers place heater pins, fan pins, probe power, and thermistor inputs right beside each other on a crowded PCB right behind the cooling shroud.
- Ribbon and Proprietary Flex Cables: On enclosed CoreXY printers like the Creality K1C or Bambu Lab P1S, the toolhead board talks to the main AP/MC board over a delicate flat flex cable or 4-pin CAN tether. A heavy 24V spike on the toolhead board doesn't always stop at the toolhead—in unlucky cases, it can ripple back through a shared ground or 5V regulator and damage the main controller board too.
- Zero Spare Thermistor Headers: While a big octopus-style mainboard might have 3 or 4 extra thermistor inputs (`TH0`, `TH1`, `TH2`, `TB`) ready for emergency pin remapping, most compact CAN toolhead boards give you only one onboard thermistor header (plus maybe an unpopulated MAX31865 PT1000 pad). Losing that single ADC pin usually turns the whole toolhead board into e-waste unless you run a dedicated wire back to the mainboard.
If your printer runs a compact toolhead PCB, treat the exposed nozzle block like a live power panel whenever the printer's wall switch is on. Keep those ceramic heaters and compact connector boards protected by keeping your silicone sock intact and cutting power before any metal tool touches the hotend.
Workshop Rule: Never let conductive metal bristles touch an FDM hotend while the power supply is switched on. If you need heat to soften baked-on plastic, preheat to 200°C, flip the physical power rocker switch OFF (or pull the plug), scrub cleanly for 10 seconds while the block retains residual heat, and inspect the wiring before powering back up.
Nozzle Cleaning Tools & Electrical Safety Comparison Matrix
Selecting the right nozzle cleaning method depends on whether you're clearing sticky surface ooze before a print or removing carbonized polymer crust after a messy leak. The comparison table below breaks down electrical risk, nozzle finish safety, and practical temperature windows for common workshop tools:
| Cleaning Tool / Method | Electrical Short Risk | Nozzle & Coating Safety | Ideal Working Temp | Workshop Verdict & Best Use |
|---|---|---|---|---|
| Brass / Steel Wire Brush (Power ON) | Critical (high risk of 24V to 3.3V ADC short) | Steel strips brass tips & nickel coatings; brass is safer mechanically | 180°C – 240°C | Avoid completely. Main cause of blown thermistor ports and dead toolhead boards. |
| Brass Wire Brush (PSU Power OFF) | None (zero live voltage on heater block) | Safe on brass, hardened steel, and carbide; still risky near bare wires | 180°C – 220°C (residual heat) | Recommended for heavy baked crust when the silicone sock is removed for deep cleaning. |
| High-Temp Silicone Wiper / Spatula | None (100% electrical insulator) | Zero abrasion; preserves non-stick nickel/PTFE nozzle coatings | 170°C – 260°C | Best daily pre-print tool. Cleans molten PETG and PLA drips safely with power ON. |
| Wooden Toothpick / Bamboo Skewer | None (non-conductive natural wood) | Won't scratch soft brass or copper orifices | 180°C – 230°C | Quick pocket-friendly option for nudging soft blobs off a nozzle tip mid-warmup. |
| Nylon / PLA Cold Pull (Atomic Pull) | None (cleans internal melt zone) | Protects delicate internal bore geometry | 90°C (PLA) / 140°C (Nylon) | Best for internal clogs and partial carbonization without touching outer wires. |
Workshop Sourcing Tip: Silicone Socks, Replacement Hotends & Reliable Filaments
Protecting your toolhead electronics starts with keeping spare silicone heater socks, reliable thermistor cartridges, and non-abrasive cleaning supplies on hand before an accidental snag turns into weekend downtime. Upgrading to durable hardened nozzles and consistent filament blends also cuts down on nozzle buildup and messy stringing blobs in the first place. Before paying full retail for spare toolhead kits, replacement printers, or bulk filament packs, browse our verified 3D Printing Deals & Coupons page for active manufacturer discounts across Elegoo, Creality, Anycubic, and Flashforge.
The Safe Hotend Scrubbing Protocol: Heat First, Cut Power Second, Brush Third
To scrub charred plastic off a nozzle with a brass wire brush safely, heat the block to 200°C–220°C first, turn the physical power switch completely off (and wait two seconds for PSU capacitors to discharge), then brush away from the wires using short strokes before the block cools below 150°C.
The biggest objection makers raise against turning the printer off is simple: "If I turn off the power, won't the plastic harden before I can scrub it?" In practice, an aluminum or copper heater block holds plenty of thermal mass to stay above polymer softening temperatures for 25 to 45 seconds after you flip the switch—plenty of time to clean a nozzle tip cleanly.
Here's the exact step-by-step routine I use in my workshop whenever a hotend needs a real wire-brush cleanup:
- Raise the Z-Axis for Clear Access: Home or jog the Z gantry up at least 100 to 120 mm above the textured PEI plate so your hand and brush don't scrape the build sheet or snag bed clips.
- Preheat Slightly Below Full Print Temp: Heat the hotend to roughly 195°C–205°C for PLA, or 225°C–235°C for PETG and ABS. You want the crust soft and gummy like thick putty, not liquid and dripping down onto the brush handle.
- Keep the Silicone Sock On (If Only Cleaning the Tip): If the plastic residue sits strictly on the exposed brass or hardened steel cone, leave the silicone sock installed. It acts as an insulating shield over the block and rear wiring while you work.
- Flip the Physical Power Switch OFF: Don't rely on sending
M104 S0or tapping "Cooldown" on the screen. Reach around to the main AC rocker switch—or unplug the barrel/XT60 DC supply on smaller machines—and turn the printer completely off. Wait two seconds for status LEDs to go dark so the 24V power supply capacitors bleed down. - Brush Away From the Wiring Harness: Hold a pure brass bristle brush (avoid steel bristles on brass nozzles) and sweep strictly across the nozzle tip and front face of the block, moving away from the back side where the thermistor and heater leads enter. Avoid poking bristles upward toward the heatsink throat or fan shroud.
- Peel Loose Strands With Needle-Nose Tweezers: Use curved tweezers only while power remains off to pull softened rings off the heater block corners.
- Inspect Before Powering Back On: Shine a phone flashlight around the heater block rear and underside. Confirm no loose brass wire bristles are clinging to sticky polymer residue or bridging a terminal, then turn the printer back on and watch the idle temperature reading for 10 seconds to ensure normal room-temperature stability.
Notice how easy that sequence becomes once you make it a habit. You get all the mechanical scrubbing power of brass bristles at 200°C, with zero risk of sending 24V DC into your electronics.
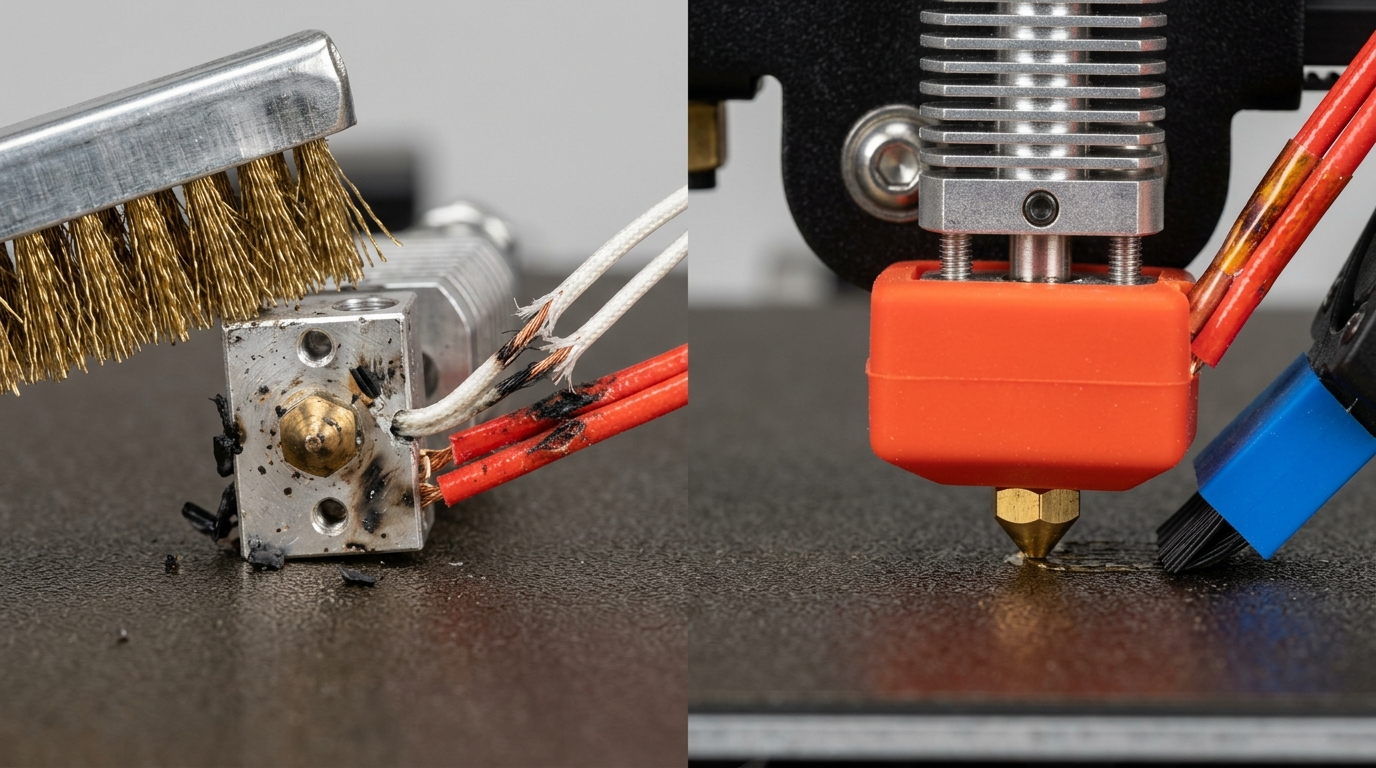
Figure 2: Aggressive metal brushing around bare heater blocks frays delicate thermistor jackets (left), whereas pairing a snug silicone sock with a high-temperature silicone wiper strips off ooze cleanly without touching wires (right).
Non-Conductive Maintenance Alternatives: Silicone Wipers, Brass Rods, and Cold Pulls
Replacing metal wire brushes with high-temperature silicone nozzle wipers, folded paper towels, or non-conductive wooden picks eliminates electrical short-circuit hazards completely for everyday pre-print wiping while the printer stays powered on.
Truthfully, most makers reach for a wire brush when they don't actually need metal bristles at all. A bit of wispy PETG stringing curled around the nozzle cone during warm-up isn't baked-on carbon—it's soft melted plastic that wipes right off with soft, insulating tools. Knowing which tool matches the job saves wear on your nozzles as well as your electronics. If you use specialized alloys or coated tips, check our breakdown of brass, hardened steel, and tungsten carbide nozzles to see which coatings suffer most from abrasive metal brushing.
Consider adding these four non-conductive tools to your bench:
- High-Temp Silicone Wiper Strips & Spatulas: Modern printers like the Bambu Lab A1 and P1S series use a small flexible silicone brush or wiper tab integrated near the purge chute for a reason. Silicone rated to 260°C–300°C won't melt during quick 1-second passes, cannot conduct electricity, and won't scratch PTFE or nickel anti-stick nozzle coatings. You can mount a cheap silicone pad along the back edge of any Klipper or Marlin bed and add a three-line start G-code wipe macro.
- Folded Paper Towels or Cotton Swabs (Quick Tip Wipe): For a fast manual wipe while the nozzle preheats to 180°C, folding a thick dry shop paper towel four times and briskly swiping the tip takes less than half a second. Just keep your fingers clear of the hot block, and never wrap the towel around the wiring harness.
- Hardwood Skewers or Popsicle Sticks: A dry bamboo skewer scrapes soft PLA and PETG blobs cleanly off nozzle flats without marring soft brass orifices or conducting current. When the tip chars after a few cleanings, snap off 5 mm or toss it.
- Cold Pulls for Internal Residue: If residue is trapped inside the orifice or causing partial heat creep clogs, external scrubbing won't fix it anyway. Performing an atomic cold pull with Nylon or natural PLA at 90°C–140°C clears internal burnt specs cleanly with zero risk to external heater leads.
Also keep a close eye on your silicone sock condition. A fresh $2 silicone sock not only stabilizes hotend PID temperatures under part-cooling fan blasts—it physically covers 85% of the aluminum heater block, preventing curled extrusion blobs from climbing up onto your thermistor wires in the first place.
Emergency Workarounds: Remapping a Spare Thermistor Pin in Klipper and Marlin
If a wire brush short has already killed your primary hotend thermistor ADC pin while the rest of the mainboard still boots normally, you can often recover the printer in 10 minutes by physically moving the thermistor plug to an unused spare thermistor header (`TH1` or `TH2`) and reassigning that pin in Klipper or Marlin.
First, inspect the board honestly: if the 3.3V regulator overheats, the USB/UART chip won't enumerate, or the board refuses to flash or connect, stop—the microcontroller itself has internal silicon damage and needs replacement. However, many 32-bit multi-extruder controller boards (such as the SKR Mini E3 V3 on older builds, SKR 1.4, SKR 3, Manta M8P, or Creality 4.2.7/Octopus boards with dual-extruder headers) survive with only one dead ADC channel while secondary channels remain healthy.
In Klipper, recovering via a spare thermistor header (`TH1` or `T1`) takes only a one-line edit in `printer.cfg`:
- Power down the printer completely and check your board's pinout schematic on GitHub to locate an unused thermistor port (often labeled
TH1,T1, orE1_TEMP—for example,PA0orPC5depending on the board). - Move the hotend thermistor 2-pin JST plug to that spare port (make sure it is a real thermistor input with a 4.7 kΩ pull-up resistor, not a raw fan or endstop pin).
- Open
printer.cfgin Mainsail or Fluidd, locate the[extruder]block, and updatesensor_pinto the new pin name:
[extruder]
# sensor_pin: PA4    # Damaged TH0 ADC pin (disabled)
sensor_pin: PA0      # Remapped to healthy spare TH1 port
sensor_type: EPCOS 100K B57560G104F
Save and restart Klipper, then confirm the idle temperature matches room ambient (~21°C–24°C) and responds smoothly when you pinch the nozzle with warm fingers before running any heater test.
In Marlin, the process requires editing pins_YOUR_BOARD.h inside your Marlin source tree, swapping the pin assignment of TEMP_0_PIN to your board's spare TEMP_1_PIN, recompiling firmware, and flashing via SD card. Note that if your printer uses a single-port compact CAN-bus toolhead board without a second thermistor connector, there's usually no spare onboard header to remap unless you solder directly to an unused spare GPIO pin with an external 4.7 kΩ pull-up resistor—at which point swapping in a fresh $15–$20 toolhead board is cleaner and far more reliable.
Maker's Workshop Note: How One Stray Bristle Killed an EBB36 Toolhead Board
Maker's Workshop Note: Real Bench Lessons From Two Short-Circuit Incidents
In my workshop, I learned the low-side MOSFET rule the hard way across two different FDM builds over the past couple of years. Knowing the theory on paper is one thing; watching a tiny spark pop right behind a toolhead shroud while the hotend wasn't even heating drives the lesson home fast.
Incident 1: The Idle-Heater Spark on a Custom CoreXY Toolhead (EBB36 CAN Board):
I was prepping for a batch of functional brackets in black eSUN PETG (245°C nozzle, 80°C bed). During the previous night's print, a small string of PETG had wrapped up behind the silicone sock onto the aluminum heater block. I preheated to 210°C, tapped "Cooldown" in Mainsail so the target dropped to 0°C, and pulled off the silicone sock to scrub the block with a small brass brush. About two seconds into brushing near the back corner of the block, I saw a crisp blue-white pinprick spark near the heater cartridge leads. Klipper immediately threw an MCU 'EBBCan' shutdown: ADC out of range fault.
When I powered off, unplugged the thermistor, and rebooted, the EBB36 board still connected over CAN-bus—its STM32G0B1 chip was alive—but the hotend thermistor channel stayed pinned at 392°C with nothing plugged into the socket. Checking the bare wires under a magnifying lamp showed a single brass bristle had bridged the always-hot 24V heater pin right onto a microscopic nick in the thermistor insulation where the retaining screw sat. Because the EBB36 only has one thermistor plug, that one brush stroke meant pulling the whole toolhead apart and swapping in a spare EBB36 board.
Incident 2: Silicone Sock + Power-Off Protocol on My Creality K1C:
Since that bench failure, I changed how every printer in my shop gets cleaned—from my Creality K1C and Bambu Lab P1S to my open-frame bed-slingers. For routine pre-print wiping on Polymaker PolyLite PLA (215°C) or PETG, I keep a high-temp silicone spatula and folded shop towels next to each machine and never bring wire brushes near a powered printer. On the few occasions when a failed print coats the nozzle cone in baked crust, I raise Z, heat to 205°C, flip the rear PSU rocker switch off, wait two seconds for the status LED to die, and then scrub cleanly with a small brass brush. In over 18 months of daily workshop printing since adopting that sequence, I haven't lost a single thermistor wire or ADC port.
Frequently Asked Questions (FAQ)
1. Can a brass wire brush short out a 3D printer even if the heater is set to 0°C?
Yes. Most 3D printer mainboards use low-side MOSFET switching, meaning +24V DC stays live on one heater wire whenever the main power supply is switched on—even when the heater setpoint is 0°C. Turning off the physical power rocker switch or unplugging the printer is the only reliable way to remove 24V from the block before using a metal brush.
2. Why does my printer still show MAXTEMP after replacing the thermistor?
If a brand-new thermistor—or even unplugging the thermistor completely—still displays a sky-high temperature like 300°C to 999°C or triggers an immediate MAXTEMP shutdown, the 24V short likely damaged the microcontroller's analog-to-digital converter (ADC) pin on the mainboard or toolhead PCB. In that case, replacing the sensor won't clear the error; you must remap firmware to a spare thermistor port or replace the board.
3. Are nylon or brass brushes safer than stainless steel wire brushes?
For electrical safety while powered on, both brass and stainless steel bristles conduct electricity and carry the exact same 24V short-circuit risk. Mechanically (with power switched off), pure brass is much softer than steel and won't gouge soft brass nozzles or chip tungsten carbide tips, whereas standard nylon brushes melt on contact with a 200°C hotend. High-temp silicone wipers or dry wooden picks are non-conductive and safe even when powered.
4. Can I clean a Bambu Lab or Creality K1 nozzle with a wire brush?
You can use a brass brush on the hardened steel or brass nozzle tip only if you power the printer completely off at the rear switch first after preheating, and avoid hitting the delicate ceramic heater ring and thin thermistor leads tucked behind the sock. For everyday wiping on modern high-speed enclosed printers, using the built-in silicone wiper or a hand-held silicone blade is much safer.
5. Could a wire brush short also blow a MOSFET so the nozzle heats uncontrollably?
Yes, though it's less common than a dead ADC pin. If a metal brush shorts the live 24V heater wire directly to the chassis ground or thermistor ground while the heater MOSFET is conducting, the surge can fuse the MOSFET's drain and source internally ("failing closed"). A shorted-closed MOSFET forces the heater to run at 100% power nonstop whenever the printer is on, which makes inspecting idle temperatures right after any spark critical for fire safety.
Related Guides & Next Steps
Run PID Tuning: Stabilize Heated Bed & Nozzle Heat
Learn how FDM PID tuning eliminates hotend and heated bed temperature swings, stops horizontal Z-banding ripples, and saves Kp Ki Kd gains in Marlin and Klipper.

MGN12 Linear Rail Lubrication: Synthetic Grease vs Oil
Learn why light machine oils fail on high-acceleration MGN12 linear rails, how NLGI 1 and 2 synthetic greases protect bearings, and how to flush factory oil.
References & External Sources
- Prusa Research Knowledge Base: Different Nozzle Types & Toolhead Maintenance Guidelines
- Bambu Lab Official Wiki: Basic Maintenance, Hotend Cleaning & Nozzle Wiper Care
- Klipper Official Documentation: Configuration Checks, ADC Sensors & Pin Verification
- Marlin Firmware Documentation: Heater Safety, Thermal Runaway & M303 Calibration
About the Author: Dinu Suciu
I am Dinu Suciu, founder and prototyping specialist at 3D Print Book. Operating an active maker workshop equipped exclusively with desktop FDM 3D printers—including enclosed CoreXY machines and direct-drive bed-slingers—I focus on mechanical tolerances, toolhead electronics protection, and repeatable calibration workflows for functional parts. Have a question about hotend repairs or custom prototyping? Reach out directly through our Contact Page.